
SRT-4 L4-2.4L Turbo VIN S (2004)
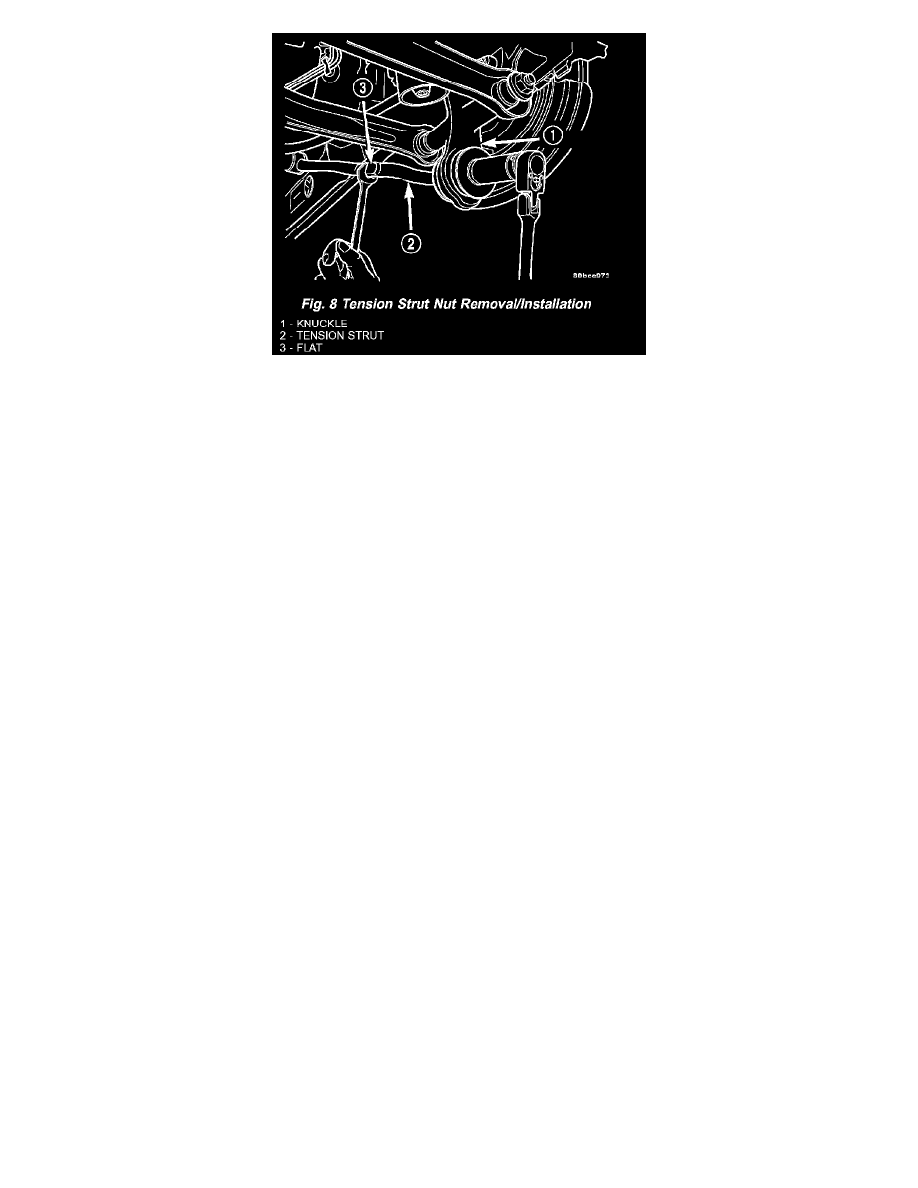
13. Disconnect the tension strut from the knuckle. To do this, first hold the tension strut from turning by using a wrench on the flat on the tension strut
and then remove the nut from the rear of the tension strut (Fig. 8). Next, remove the tension strut retainer, then the rear tension strut bayonet
bushing from the tension strut.
14. Remove the two nuts and bolts attaching the rear knuckle to the strut (Fig. 7). Tap the bolts from the knuckle using a pin punch.
15. Remove the knuckle.
INSTALLATION - KNUCKLE (REAR)
NOTE: Before proceeding with this procedure, Refer to Service Precautions.
1. To install the knuckle on the vehicle, first align the hole in the lower end of the rear knuckle with the forward bayonet bushing on the tension strut.
Be sure the stepped area of the bushing is squarely seated into the hole in the knuckle. Next, Rotate the knuckle until the upper mounting holes in
the knuckle is aligned with the holes in the strut's clevis bracket.
CAUTION: The strut-to-knuckle attaching bolts are serrated and must not be turned during installation. Once installed, hold the bolts stationary
in the steering knuckle while installing and tightening the nuts.
2. Install the two bolts attaching the strut to the rear knuckle from the front side. Install the nuts on the bolts (Fig. 7). Tighten the two nuts to a torque
of 88 Nm (65 ft. lbs.).
3. Align the lateral arms with the hole in the center of the knuckle. Install the bolt attaching the arms to the knuckle. When installing the bolt, start it
from the front side. Install the nut, but do not completely tighten it at this time. The nut will need to be tightened when the vehicle is at curb height.
4. Install the rear bayonet bushing on the tension strut. Be sure the stepped area of the bushing is squarely seated into the hole in the knuckle.
5. Install the rear tension strut retainer, then the nut. To completely install the nut, place a wrench on the flat formed into the tension strut and tighten
the nut (Fig. 8). Tighten the nut to a torque of 95 Nm (70 ft. lbs.).
6. If vehicle is equipped with rear drum brakes, install the brake support plate on the knuckle and attach it using its four mounting bolts (Fig. 5).
Tighten the mounting bolts to a torque of 75 Nm (55 ft. lbs.).
7. If the vehicle is equipped with rear disc brakes, install the disc brake adapter on the knuckle and attach it using its four mounting bolts (Fig. 6).
Tighten the mounting bolts to a torque of 75 Nm (55 ft. lbs.).
8. Install the hub and bearing on the knuckle's spindle, then install a new retaining nut (Fig. 4). Do not reuse the original nut. Tighten the nut to a
torque of 217 Nm (160 ft. lbs.).
9. Install the dust cap on the end of the hub and bearing (Fig. 4).
10. If the vehicle is equipped with rear disc brakes (Fig. 4), install the brake rotor and disc brake caliper on the knuckle. Install the two guide pin bolts
securing the front disc brake caliper to the steering knuckle. Tighten the guide pin bolts to a torque of 22 Nm (192 inch lbs.).
11. If the vehicle is equipped with rear drum brakes, install the screw securing the brake hose bracket to the rear of the strut assembly (Fig. 2). Tighten
the screw to a torque of 31 Nm (275 inch lbs.).
12. If the vehicle is equipped with the Antilock Brake System (ABS), install the screw securing the ABS wheel speed sensor bracket to the rear of the
strut assembly (Fig. 3). Tighten the mounting screw to a torque of 13 Nm (120 inch lbs.).
13. Install the tire and wheel assembly. Tighten the wheel mounting nuts in proper sequence until all nuts are torqued to half specification. Repeat the
tightening sequence, this time, to full specified torque of 135 Nm (100 ft. lbs.).
14. Lower the vehicle to ground level.
15. Tighten the lateral arm-to-knuckle mounting bolt nut to a torque of 95 Nm (70 ft. lbs.).
16. Set the rear toe on the vehicle to specification if necessary.