
Stratus L4-2.0L VIN C (1997)
14.
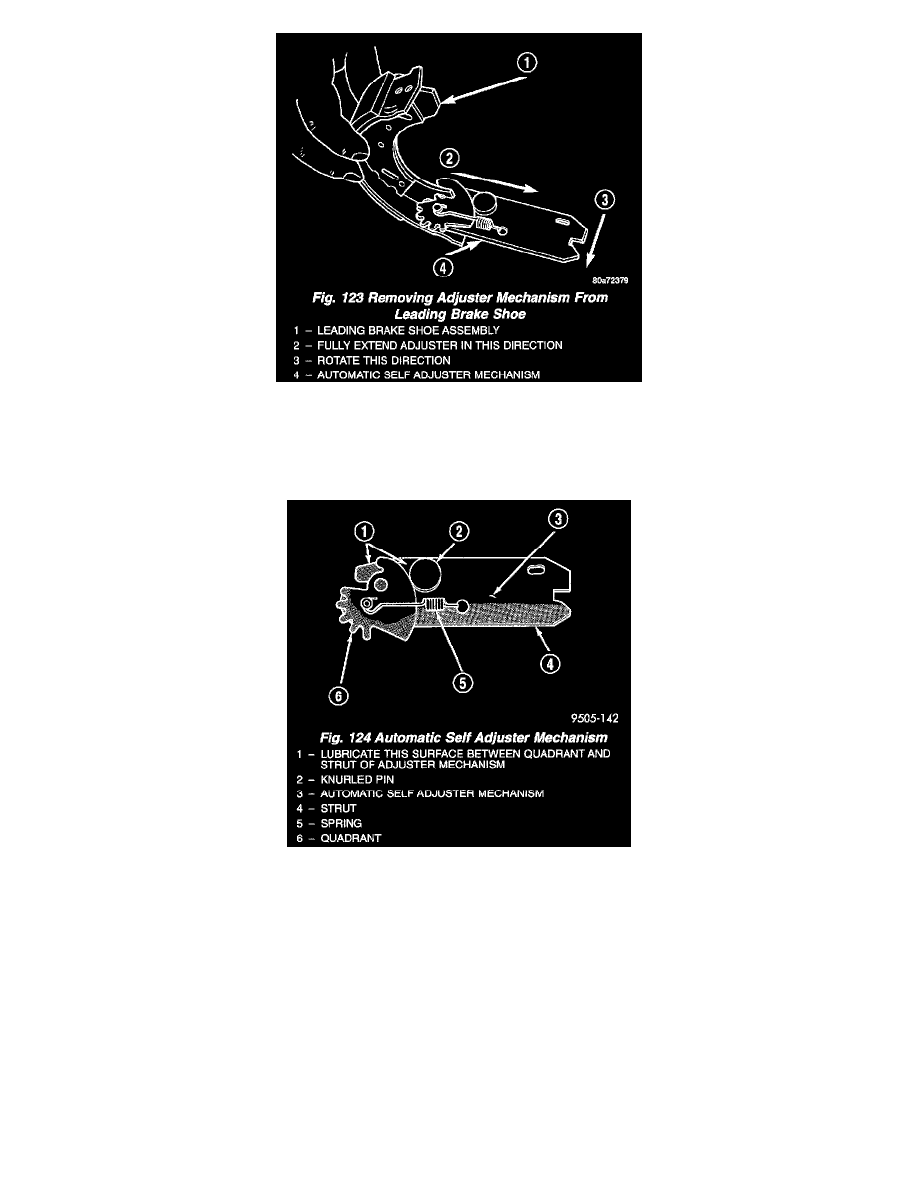
Remove the automatic adjuster mechanism from the original leading brake shoe assembly for installation on the replacement brake shoe, using
the following procedure. Fully extend the adjuster mechanism in the direction shown. Then, with adjuster mechanism fully extended, rotate the
adjuster mechanism in the direction shown to separate adjuster mechanism from leading brake shoe.
CLEANING AND INSPECTION
Clean metal portion of brake shoes. Check to see if shoes are bent. Lining should show contact across entire width and from heel to toe, otherwise
replace. Shoes with lack of contact at toe or heel may be improperly ground. Clean and inspect the brake support plate and the automatic self
adjusting mechanism. Visually examine the adjuster assembly to ensure it is functioning correctly by checking for the following operation.
^
Be sure the quadrant is free to rotate throughout its entire tooth contact range.
^
Ensure that the quadrant is free to slide the full length of its mounting slot in the adjuster mechanism.
^
Inspect the quadrant spring for any signs of excessive wear or damage.
^
Ensure that the knurled pin is securely attached to the adjuster mechanism and that its teeth are not damaged.
^
Overall, examine the adjuster mechanism for excessive wear or damage and replace if necessary.
If the adjuster mechanism is re-useable, apply a light coat of Mopar Multi-Purpose Lubricant or equivalent, between the quadrant and the strut of
the adjuster mechanism.If old springs have overheated or are damaged, replace. Overheating indications are paint discoloration or distorted end
coils.
Installation
CLEANING AND INSPECTION