
Stratus L4-2.4L DOHC (1995)
2.
Remove the single attaching screw (at the rear of the front doors, and front of the rear doors) securing one end of each molding.
3.
Pull upward on the screw end of the molding and separate from vehicle. The front window moldings must be pulled rearward from under the
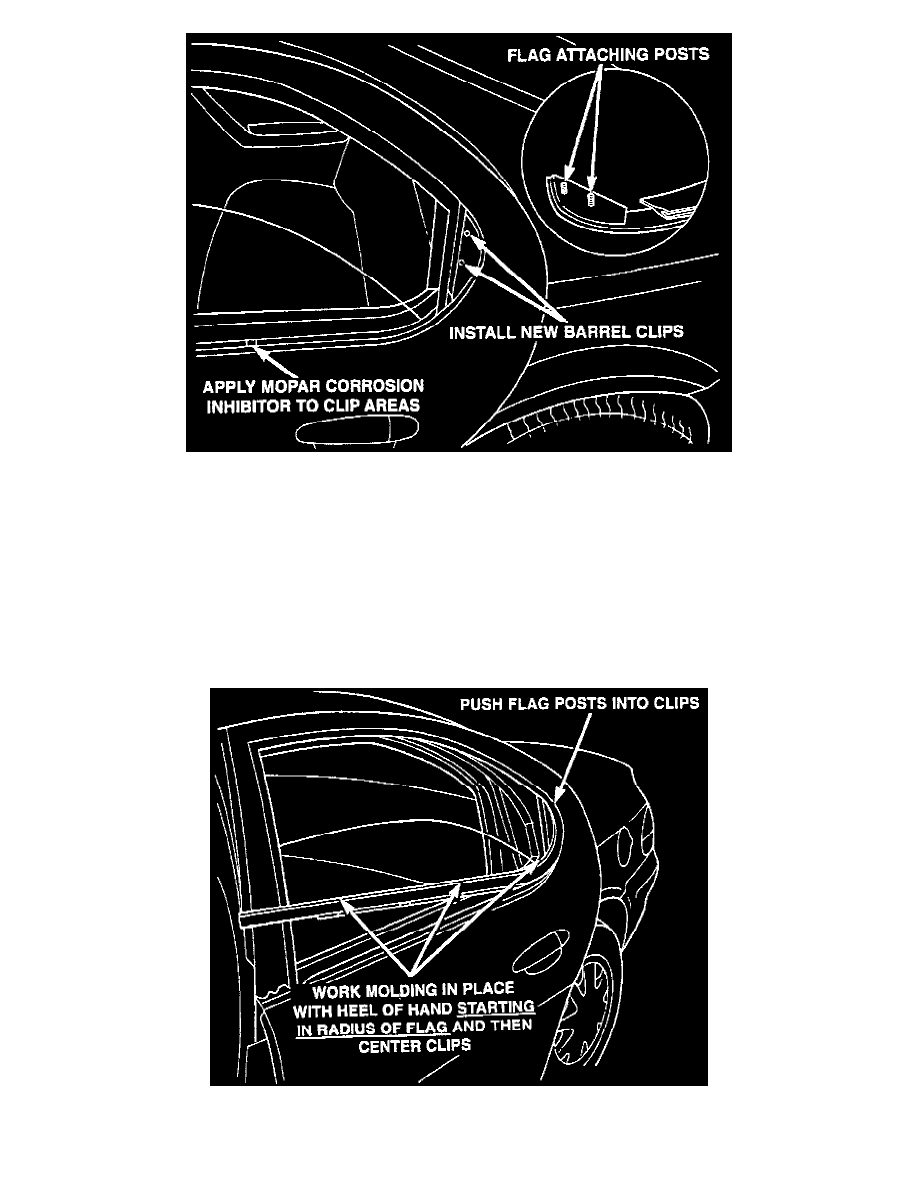
mirror. The rear window moldings must be pried outward at the flag area to disengage the flag retainers.
4.
The center molding attaching clips will scratch paint off the door sheet metal as they are removed. To prevent corrosion, coat the scratches
liberally with Mopar Corrosion Inhibitor, P/N 82300068, just prior to installing the new moldings.
5.
Install the front window moldings by inserting the forward end under the mirror and work into position from front to rear using the heal of your
hand. Install attaching screws.
6.
Remove existing barrel clips from the rear door flag area and install new clips, P/N 6000258.
**NOTE:
USE MASKING TAPE OR OTHER SUITABLE MATERIAL TO PREVENT SCRATCHING "B" PILLAR APPLIQUES AND GLASS RUNS