
Stratus L4-2.4L VIN X (1998)
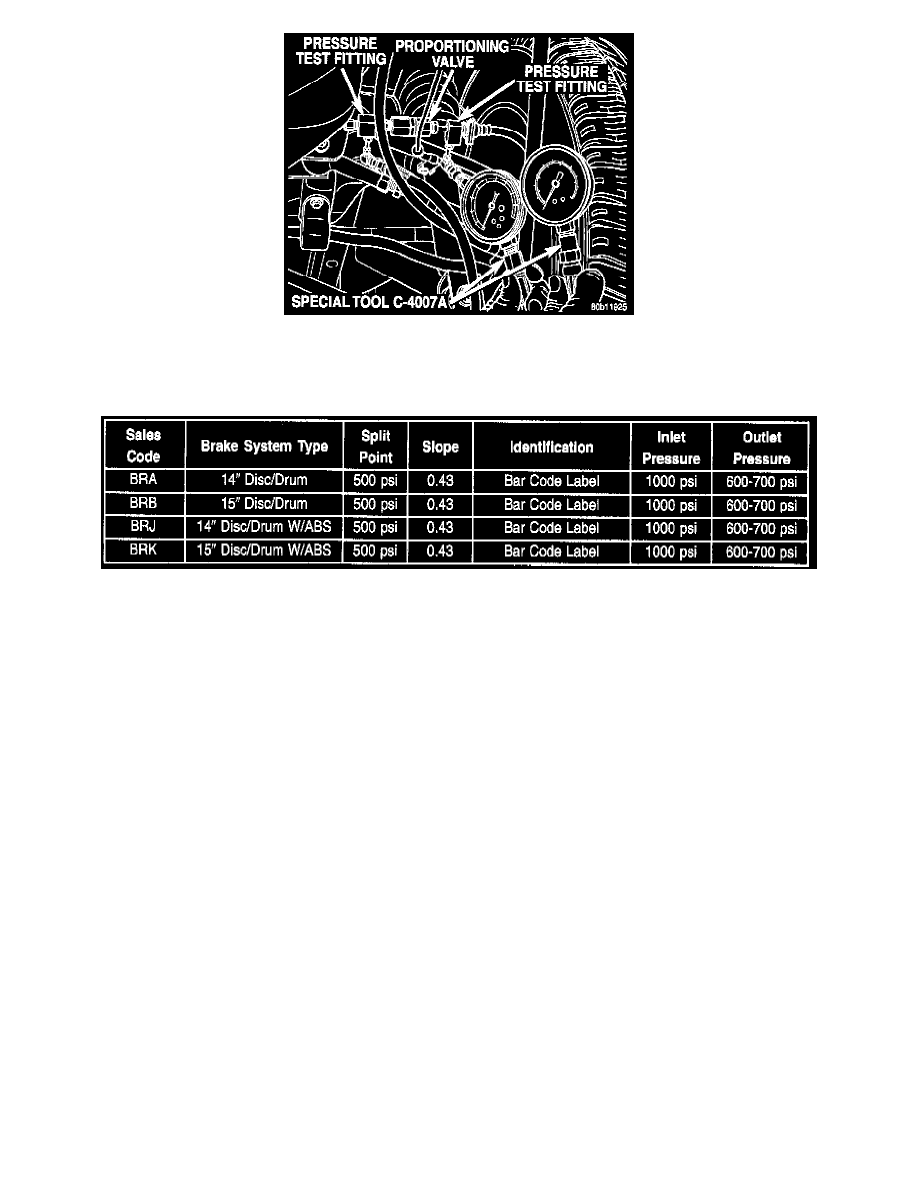
Pressure Gauges Installed On Pressure Test Fittings
6. Install a Pressure Gauge, Special Tool C-4007-A or equivalent into each pressure test fitting. Bleed air out of hose from pressure test fitting to
pressure gauge, at pressure gauge to remove all trapped air.
Proportioning Valve Applications And Pressure Specifications
7. With the aid of a helper, apply pressure to the brake pedal until reading on proportioning valve inlet gauge, is at the pressure shown. Then check
the pressure reading on the proportioning valve outlet gauge. If proportioning valve outlet pressure does not agree with value shown, when inlet
pressure shown on chart is obtained, replace the proportioning valve. If proportioning valve is within pressure specifications do not replace
proportioning valve.
8. Check rear wheel brake shoe linings for contamination or for replacement brake shoes not meeting OEM brake lining material specifications.
These conditions can also be a possible cause for a premature rear wheel skid.
9. Install proportioning valve on end of brake flex hose. Tighten the proportioning valve to a torque of 17 Nm (145 inch lbs.).
10. Install brake tube on proportioning valve. Torque tube nut to 17 Nm (145 inch lbs.) torque.
11. Bleed the affected brake line.
Without Antilock Brakes
If premature rear wheel skid occurs on a hard brake application, it could be an indication that a malfunction has occurred with one of the rear brake
proportioning valves.