
Stratus L4-2.4L VIN X (1998)
Front Steering Knuckle: Service and Repair
Installation
1. If required install a hub/bearing assembly into the steering knuckle before installing steering knuckle on vehicle. Refer to Transmission and
Drivetrain for proper wheel bearing removal and installation procedure.
2. Slide drive shaft back into front hub/bearing assembly. Then install steering knuckle onto the ball joint stud in lower control arm.
3. Install the steering knuckle to lower ball joint stud castle nut.
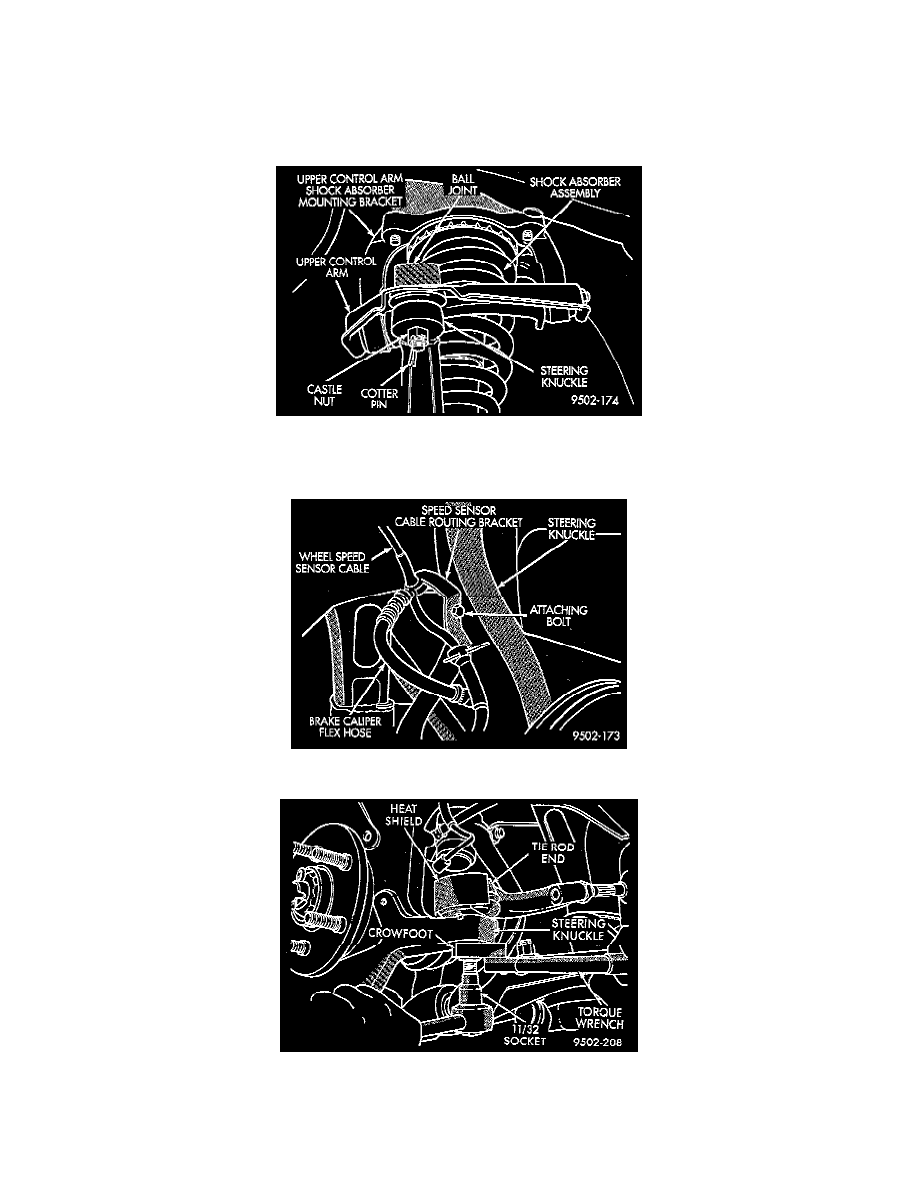
4. Install upper ball joint in steering knuckle. Install the steering knuckle to upper ball joint nut. Tighten the upper ball joint castle nut to a torque of
62 Nm (45 ft. lbs.). Then, using a crowfoot and torque wrench, tighten the lower ball joint nut to a torque of 75 Nm (55 ft. lbs.). Install cotter pins
in upper and lower ball joint studs.
5. If equipped with antilock brakes install the speed sensor cable routing bracket on the steering knuckle and securely tighten the attaching bolt.
CAUTION: When installing tie rod on steering knuckle the heat shield must be installed. If heat shield is not installed, tie rod seal boot can fail
due to excessive heat from brake rotor.