
Stratus L4-2.4L VIN X (1998)
Cross-Member: Service and Repair
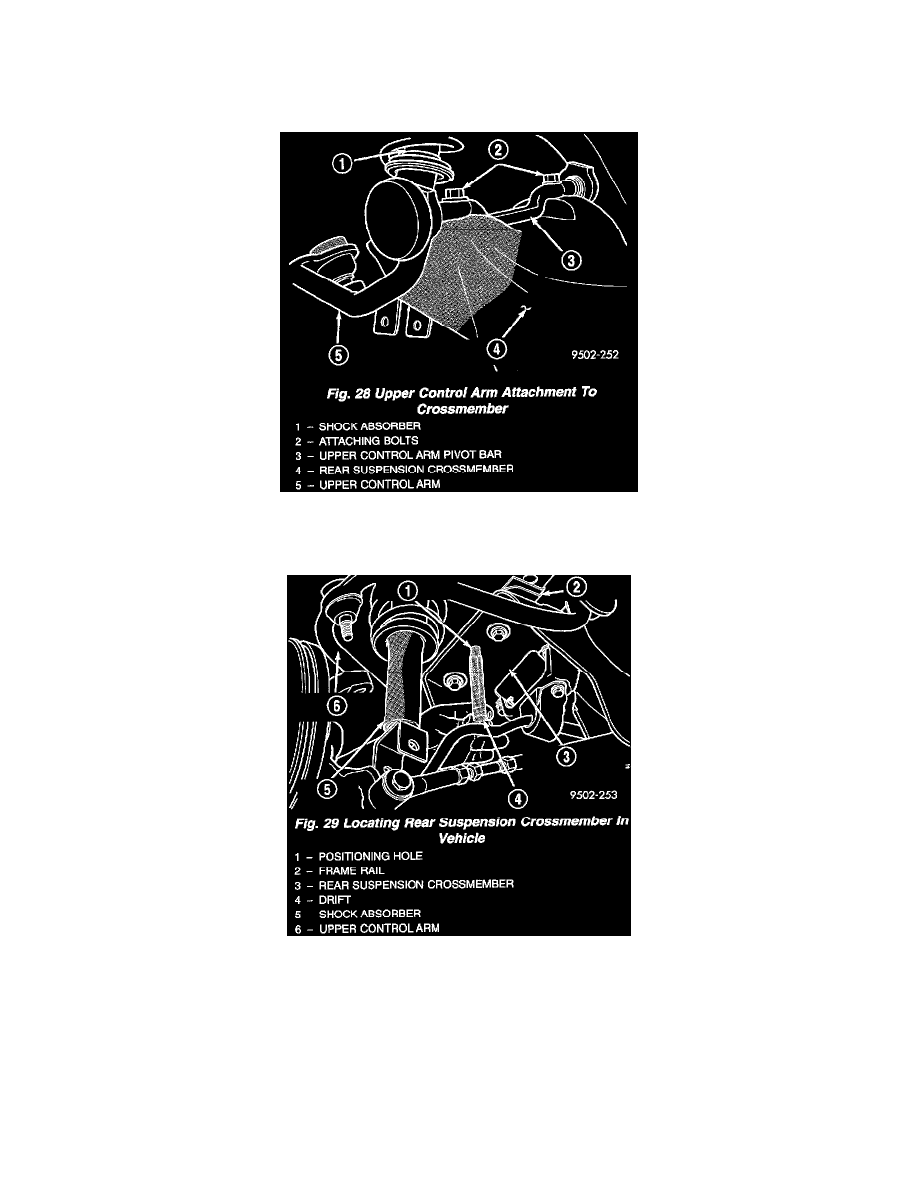
Installation
1. Install the rear suspension crossmember, lateral arms and rear stabilizer bar back into the vehicle as an assembly.
2. With the aid of a helper position rear suspension crossmember back in vehicle and support it using the transmission jack.
3. Align the upper control arm pivot bars with the mounting holes in the rear suspension crossmember. Install and tighten the 4 pivot bar to
crossmember attaching bolts to a torque of 107 Nm (80 ft. lbs.).
4. Using transmission jack, raise rear suspension crossmember up to the rear frame rails and loosely install the 4 attaching bolts.
5. Position a drift of the appropriate size into the positioning hole in each side of rear suspension crossmember and locating holes in the frame rail of
the body. This is required to properly position rear suspension crossmember side-to-side and front to rear in the body of the vehicle. Then tighten
the 4 crossmember to frame rail attaching bolts to 95 Nm (70 ft. lbs.). Remove drifts from rear suspension crossmember.
6. Align lateral links with knuckles and install the lateral arm to knuckle attaching bolts. Tighten the 4 lateral arm to spindle attaching bolts to a torque
of 95 Nm (70 ft. lbs.).
7. Remove transmission jack supporting rear suspension crossmember.