
Stratus L4-2.4L VIN X (1998)
Lateral Stabilizer Rod: Service and Repair
Forward Lateral Link Replacement
REMOVE
1. Raise vehicle on jackstands or centered on a frame contact type hoist.
2. Remove the rear wheel and tire assembly from the side of the vehicle requiring lateral link removal.
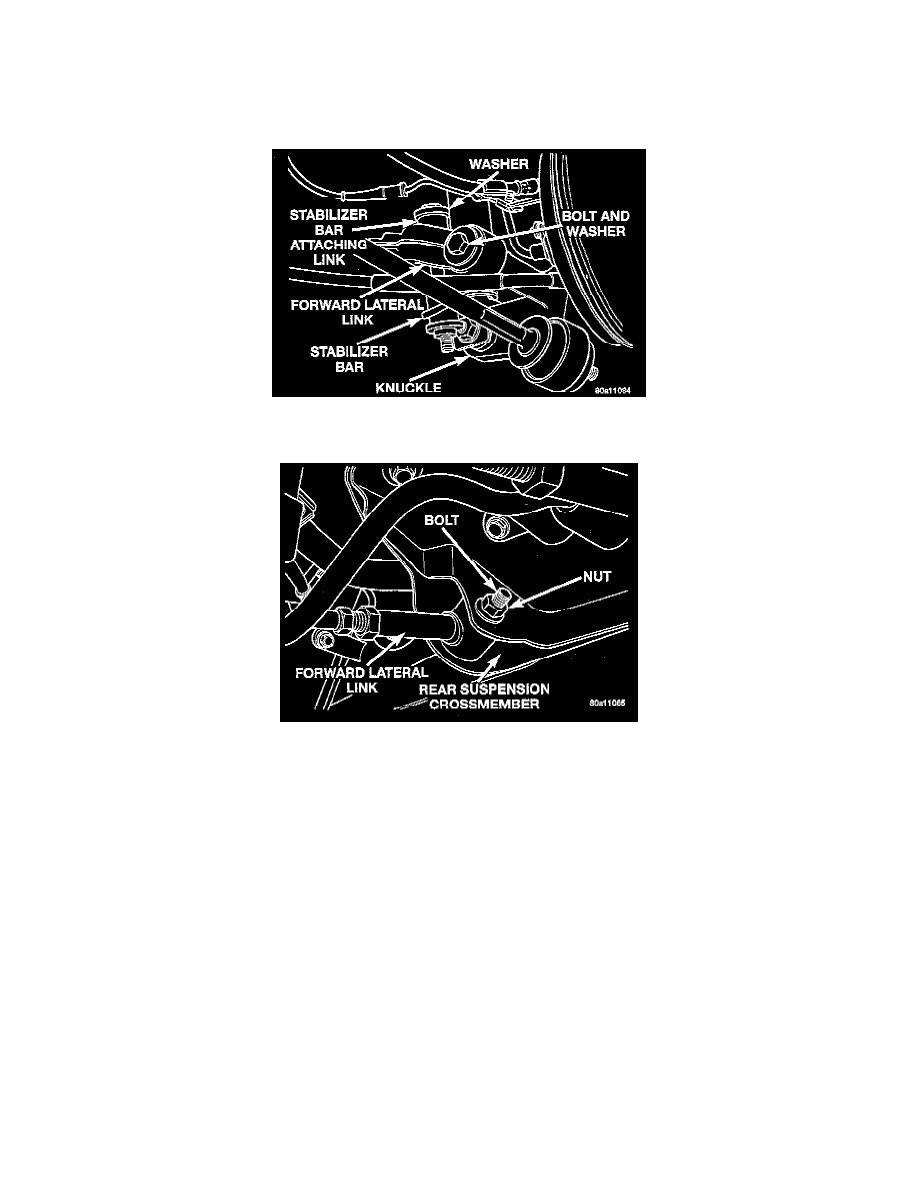
3. Remove the rear stabilizer bar attaching link from the forward lateral link.
4. Remove the nut, bolt and washer attaching the forward lateral link to the knuckle.
5. Remove nut, bolt and washer, attaching the lateral link to the rear suspension crossmember.
6. Remove the forward lateral link from the vehicle.
INSTALL
1. Install the lateral link and the attaching nut and bolt at rear suspension crossmember. The forward lateral link is to be installed with the cup in cast
portion facing down and toward rear knuckle.
2. Install the lateral link and attaching nut and bolt at rear knuckle.
3. Torque both lateral link attaching bolts to 95 Nm (70 ft. lbs.).
4. Install the rear stabilizer bar attaching link, isolator bushings and attaching nut on the forward lateral link. Tighten the stabilizer bar attaching link
to a torque of 32 Nm (24 ft. lbs.).
5. Install wheel and tire assembly on vehicle. Tighten the wheel mounting stud nuts in proper sequence until all nuts are torqued to half specification.
Then repeat the tightening sequence to the full specified torque of 129 Nm (95 ft. lbs.).
6. Lower vehicle to the ground.
7. Check and reset rear wheel Camber and Toe to specifications if required. Refer to Alignment.