
Stratus V6-2.5L VIN H (1997)
Housing Assembly HVAC: Service and Repair
Heater - A/C Housing Removal and Installation
NOTE: The heater core may be removed without removing the unit housing. Refer to: "Heater Core : Service and Repair" See: Heater
Core/Service and Repair
WARNINGS:
-
Avoid breathing a/c refrigerant and lubricant vapor or mist exposure may irritate eyes, nose and throat. Use only approved service
equipment meeting SAE requirements to reclaim R-134a systems. If accidental system discharge occurs, ventilate work area before
resuming service.
-
R-134a service equipment or vehicle a/c system should not be pressure tested or leak tested with compressed air. Some mixtures of air and
R-l34a have been shown to be combustible at elevated pressures. These mixtures are potentially dangerous and may result in fire or
explosion causing injury or property damage.
REMOVAL
1. Disconnect battery negative remote cable. This must be done to prevent accidental air bag deployment.
2. Using an A/C recovery unit, remove all R-134a refrigerant from the A/C system. Refer to: "Heating and Air Conditioning : Service and
Repair" See: Service and Repair
3. Remove air cleaner hose and air distribution duct from the engine.
4. Drain the engine cooling system. Refer to: "Engine, Cooling and Exhaust : Cooling System : Service and Repair" See: Engine, Cooling and
Exhaust/Cooling System/Service and Repair
NOTE: The upper intake manifold has to be removed at this time to access the heater hose connections at the bulkhead.
5. Disconnect heater hoses at the dash panel. Plug the heater core inlet and outlet tubes to prevent antifreeze from spilling on the vehicle interior
during removal. If an appropriate plug cannot be found pull back carpet and use caution when removing unit. Keep the heater tubes elevated to
prevent spillage of coolant.
6. Remove both A/C lines from expansion valve. Use Special Tool Kit 7193 to disconnect quick connectors on A/C lines. After removing lines cap
the expansion valve openings and the A/C hose openings. This will prevent any dirt or moisture from entering the refrigerant system during
servicing.
CAUTION: The lubricant used in this air conditioning system absorbs moisture readily (similar to brake fluid). Do not leave any portion of the
system open for extended periods of time.
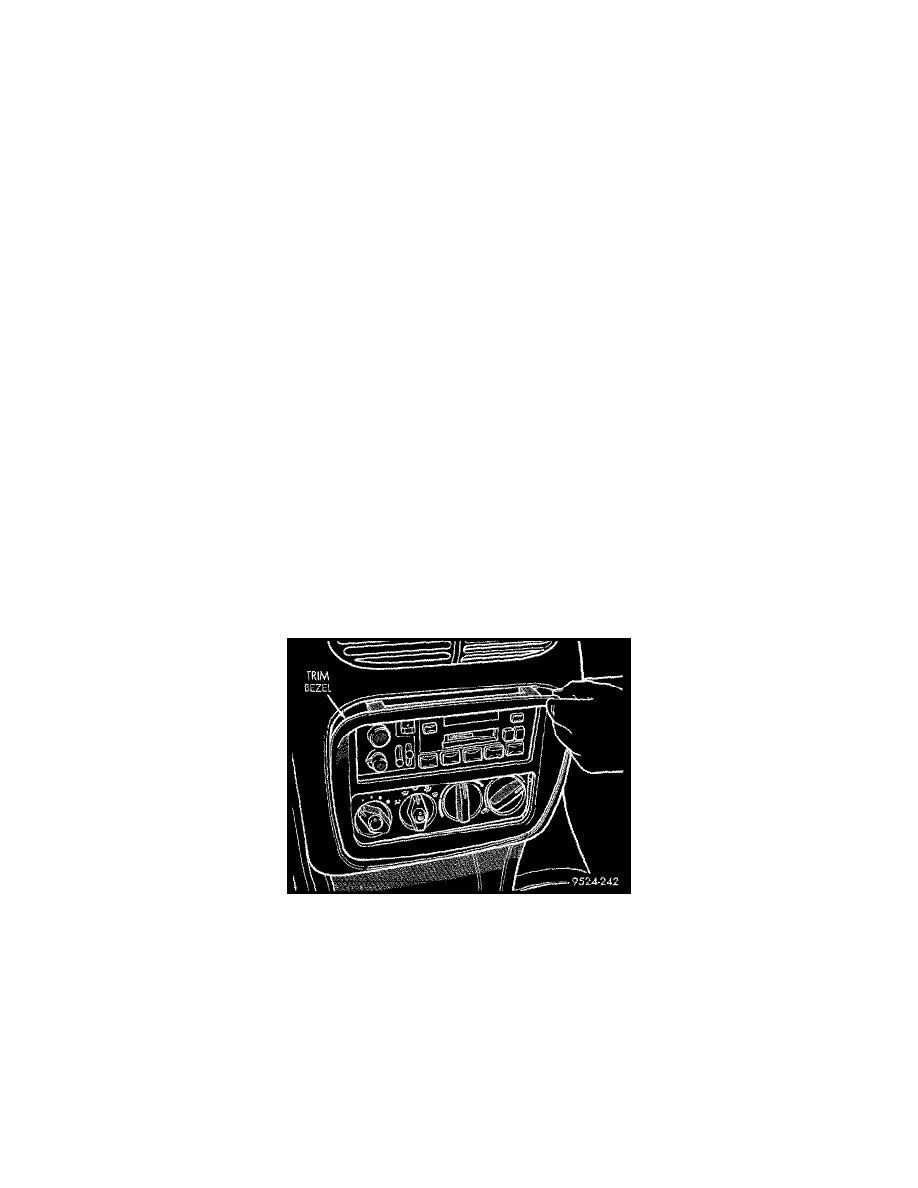
Fig 66 Trim Bezel
7. Remove trim bezel.