
Stratus V6-2.5L VIN H (1997)
Distributor Cap: Service and Repair
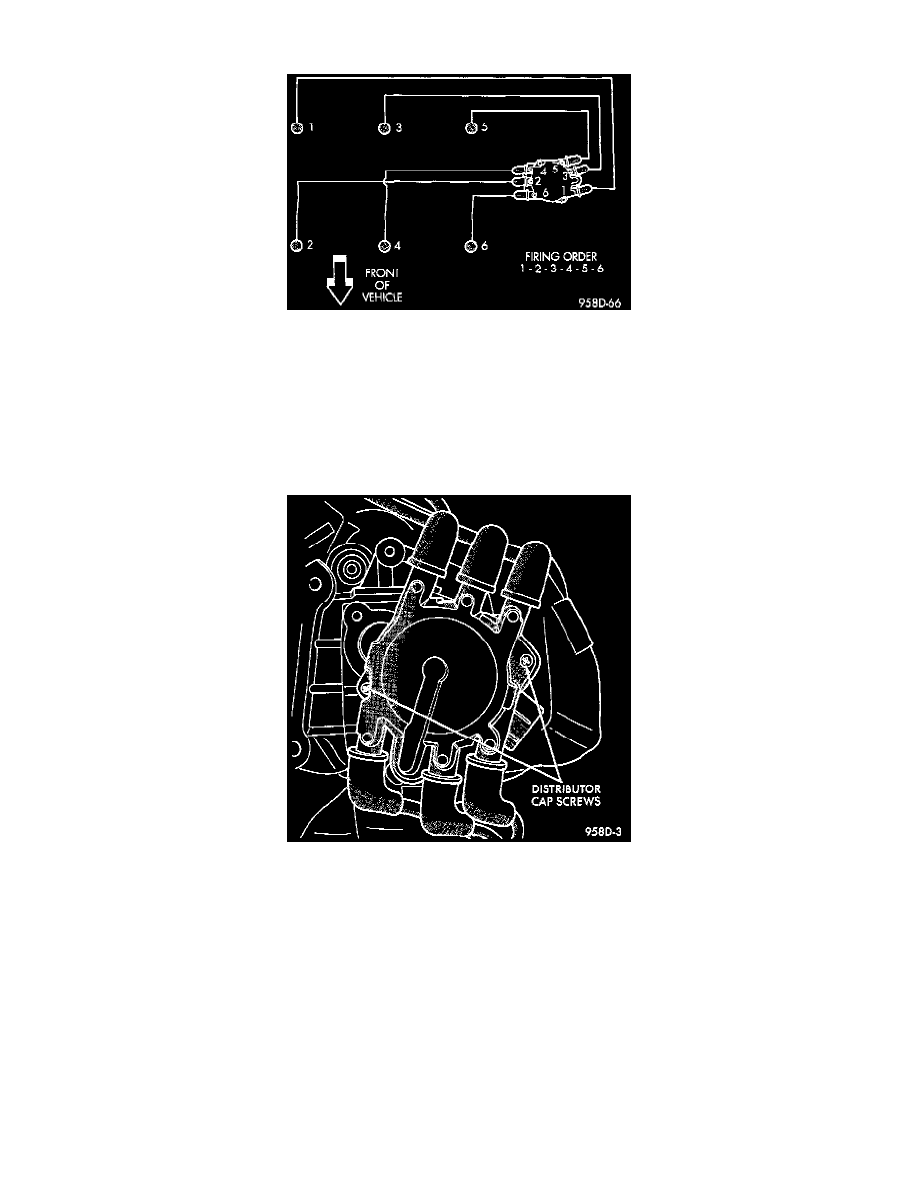
Fig. 1 Spark Plug Cable Routing
When replacing the distributor cap, transfer cables from the original cap to the new cap one at a time. Ensure each cable is installed into the
corresponding tower of the new cap. Fully seat the wires into the towers. If necessary refer to the appropriate engine firing order diagram Fig. 1.
Light scaling of the terminals can be cleaned with a sharp knife. If the terminals are heavily scaled, replace the distributor cap.
A cap that is greasy, dirty or has a powder-like substance on the inside should be cleaned with a solution of warm water and a mild detergent.
Scrub the cap with a soft brush. Thoroughly rinse the cap and dry it with a clean soft cloth.
Fig. 11 Distributor Cap Screws
REMOVAL & INSTALLATION
1. Remove bolt holding air inlet resonator to intake manifold.
2. Loosen clamps holding air cleaner cover to air cleaner housing.
3. Remove PCV make-up air hose from air inlet tube.
4. Loosen hose clamp at throttle body.
5. Remove air inlet tube, resonator and air cleaner cover.
6. Remove EGR tube.
7. Remove spark plug cables from distributor cap.
8. Loosen distributor cap holddown screws and remove cap Fig. 11.
9. Transfer cables from old cap to new cap. The cap is numbered and so are the cables.
10. Install distributor cap.
11. Install distributor holddown washers and nuts. Tighten nuts to 13 Nm (9 ft lb).