
Stratus V6-2.5L VIN H (1997)
Air Bag Control Module: Service and Repair
WARNING: Replace Airbag System components with Chrysler Mopar specified replacement parts. Substitute parts may visually appear
interchangeable, but internal differences may result in inferior occupant protection. The ACM contains an impact sensor that enables the
system to deploy the air-bags. To avoid accidental deployment, never connect ACM electrically to the system while vehicle battery is connected.
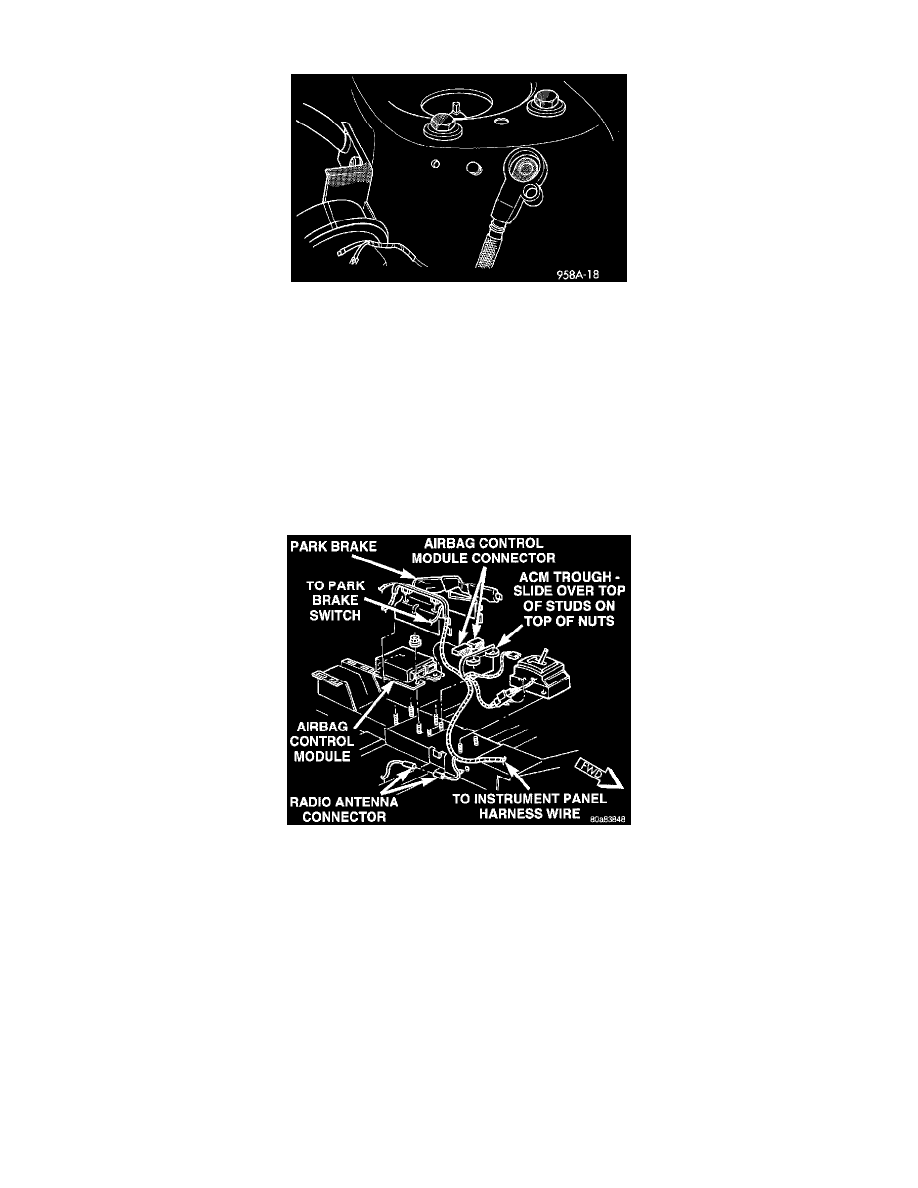
REMOVAL
1. Disconnect and isolate the battery negative remote cable.
2. Raise parking brake lever as high as possible.
3. Loosen set screw on front of shifter knob and remove shift lever knob.
4. Remove plastic plunger rod from shifter lever.
5. Remove lighted PRNDL letter bezel.
6. Remove screws next to floor shifter and in console storage compartment, holding floor console to the brackets on the floor pan.
7. Disconnect wire connector for floor console accessories at floor pan.
8. Separate console from vehicle.
9. Remove the park brake lever assembly.
10. Disconnect wire harness connector from the Airbag Control Module.
11. Remove four module mounting nuts and remove module.
CAUTION: Use supplied nuts only.
INSTALLATION
1. Install ACM, position ACM (arrow pointing forward) on center tunnel area mounting studs. Attach the two rear mounting nuts and tighten to 14 to
19 N.m (125 to 170 in. lbs.) torque.
2. Position console in vehicle.
3. Verify that the rear locator pin on the bottom of the storage bin is engaged to the slot in the body bracket.
4. Connect the wire connector for the floor console accessories at floor pan.
5. Install lighted PRNDL letter bezel.
6. Install plastic plunger rod to shifter lever.
7. Install shift lever knob and tighten set screw on front of shifter knob.
8. Do not connect battery negative remote cable. Refer to Testing and Inspection/Procedures.