
Stratus V6-2.5L VIN H (1997)
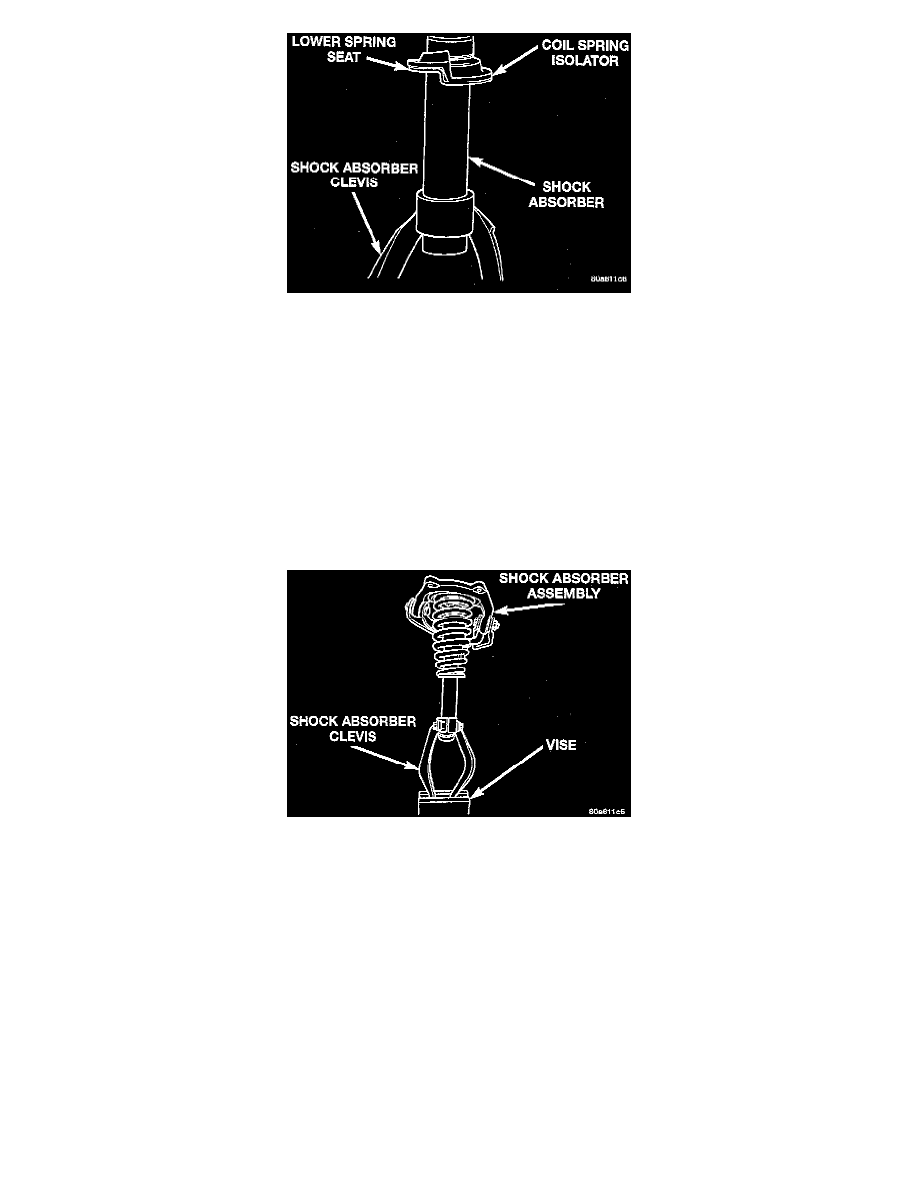
14. Remove the coil spring isolator from the lower spring seat on the shock absorber assembly.
15. Inspect the shock absorber for any condition of rod binding over the full stroke of the shock rod.
16. Inspect the shock mount and upper spring seat/isolator assembly for the following:
-
Mount for cracks and distortion and locating studs for any sign of damage.
-
Severe deterioration of the upper or lower coil spring isolators.
-
Deterioration of the shock absorber rod to shock absorber mounting bracket bushings.
-
Inspect dust shield for rips and/or deterioration.
-
Inspect jounce bumper for cracks and signs of deterioration.
17. Replace any components of the shock absorber assembly found to be worn or defective during the inspection, before re-assembling the shock
absorber.
Assembly
CAUTION: Do not clamp the shock absorber in a vise by the body of the shock absorber. The clevis bracket must be reinstalled on the shock absorber
clamped in the vise using the clevis bracket.
1. Install clevis bracket back on replacement shock absorber and tighten pinch bolt. Then using the clevis bracket, clamp the shock absorber assembly
in a vise, with shock absorber in a vertical position.