
Stratus Sedan L4-2.4L VIN X (2003)
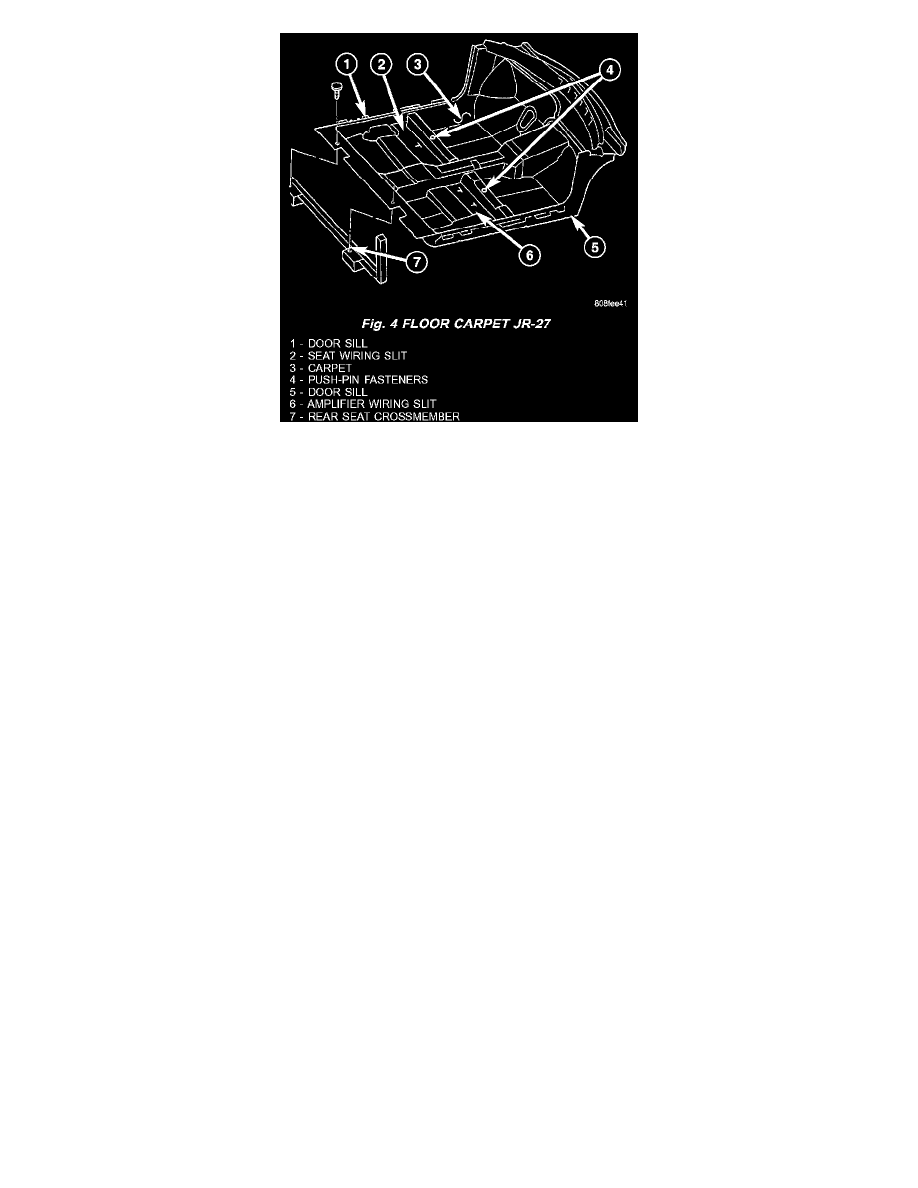
Fig. 4
12. Remove push-in fasteners from rear of carpet attaching carpet to rear seat crossmember (Fig. 4).
13. Remove plastic sill retainers from metal clips along door sill panel.
14. Remove carpet from vehicle.
INSTALLATION
1. Install carpet into vehicle through passenger door opening.
2. Unfold carpet into position.
3. Install carpet behind brake pedal, accelerator pedal, and HVAC.
4. Install the tunnel push pin fastener.
5. Install the front seat and crossmember push pin fasteners.
6. Install the two push pin fasteners into the floor pan.
7. Install forward instrument panel console.
8. Install floor console.
9. Install cowl trim panels.
10. Install lower B-pillar trim panels as necessary.
11. Install bolts attaching front seat belts to floor.
12. Install amplifier on passenger side of floor pan, if equipped.
13. Install front seats.
14. Install rear seat cushion.
15. Install the eight push pin fasteners into the door opening sills.
16. Install door opening sill plates.
INSTALLATION - JR-27 (Convertible) ONLY
1. Position carpet in vehicle (Fig. 4).
2. Install push in fasteners from rear of carpet attaching carpet to rear seat crossmember.
3. Install front seat push pin fasteners.
4. Feed wiring connectors for the seats and amplifier, if equipped, through slits in carpet.
5. Install plastic sill retainers in metal clips along door sill panel.
6. Install wiring troughs attaching carpet at outboard ends of rear seat crossmember.
7. Install amplifier on passenger side of floor pan, if so equipped.
8. Install quarter trim panels.
9. Install cowl trim panels.
10. Install door sill trim panels.
11. Install instrument panel hush panel.
12. Install accelerator pedal.
13. Install floor console and center instrument panel console.
14. Install rear seat cushion.
15. Install front seats.