
Stratus Sedan L4-2.4L VIN X (2003)
Brake Rotor/Disc: Service and Repair
Brake Rotor - Removal and Installation
Front Brake Rotor
FRONT ROTOR
REMOVAL
1. Raise the vehicle.
2. Remove the front tire and wheel assembly.
3. Slide the caliper outward in an effort to retract the caliper piston into its bore.
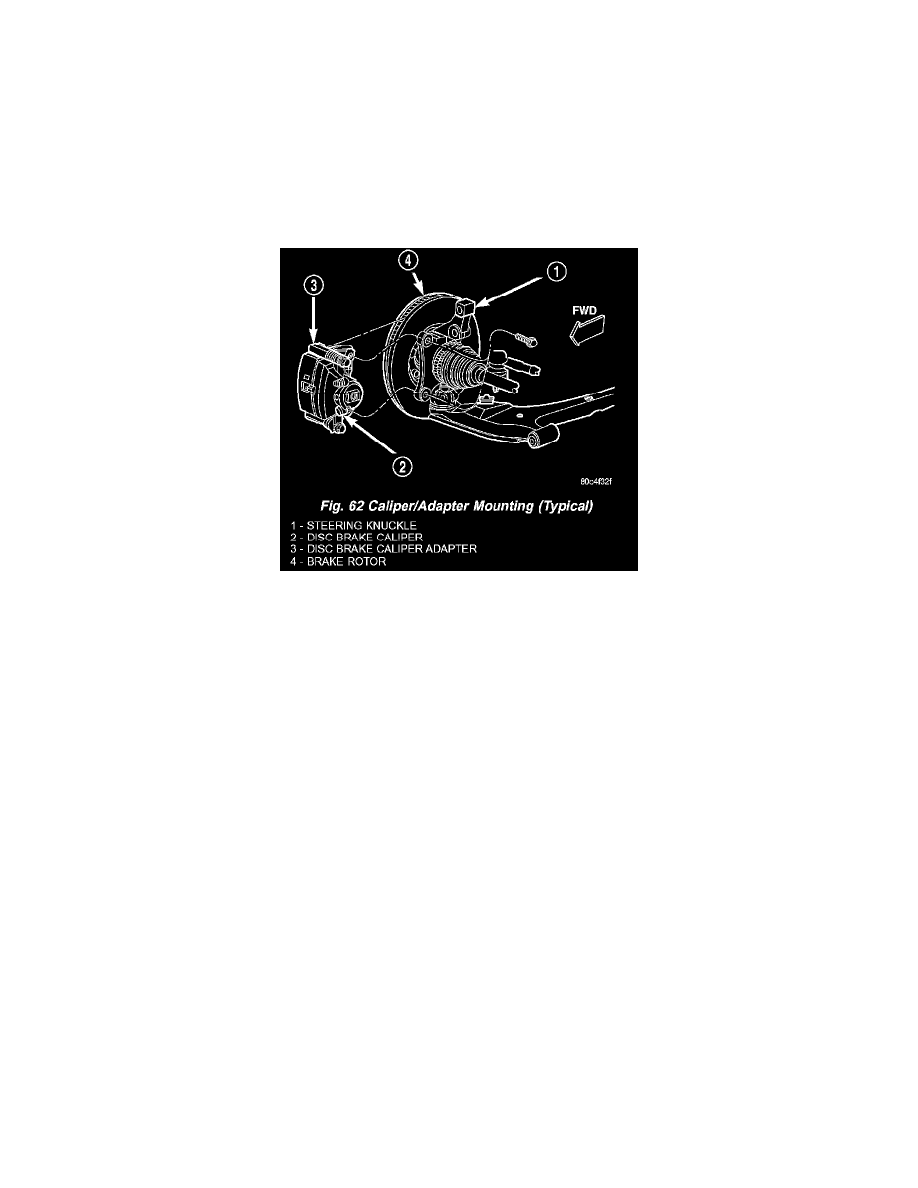
4. Remove the two bolts securing disc brake caliper adapter to the steering knuckle (Fig. 62).
5. Remove the disc brake caliper and adapter from the knuckle as an assembly. Hang the assembly out of the way using wire or a bungee cord. Use
care not to overextend the brake hose when doing this.
6. Remove the clips retaining the brake rotor to the wheel studs.
7. Remove the brake rotor.
INSTALLATION
1. Install the brake rotor over the studs on the hub.
2. Install the disc brake caliper and adapter assembly over the brake rotor.
3. Install the mounting bolts securing the caliper adapter to the steering knuckle (Fig. 62). Tighten the bolts to a torque of 80 Nm (60 ft. lbs.).
4. Install the tire and wheel assembly. Tighten the wheel mounting nuts to a torque of 135 Nm (100 ft. lbs.).
5. Lower the vehicle.
6. Pump the brake pedal several times before moving the vehicle to set the shoes to the brake rotor.
7. Road test the vehicle and make several stops to seat the brake shoes to the rotor.
Rear Brake Rotor
REAR ROTOR
REMOVAL
1. Raise vehicle.
2. Remove rear tire and wheel.
3. Remove the caliper and shoes from adapter and hang out of way.
4. Remove any clips on the wheel mounting studs.