
Stratus Sedan L4-2.4L VIN X (2003)
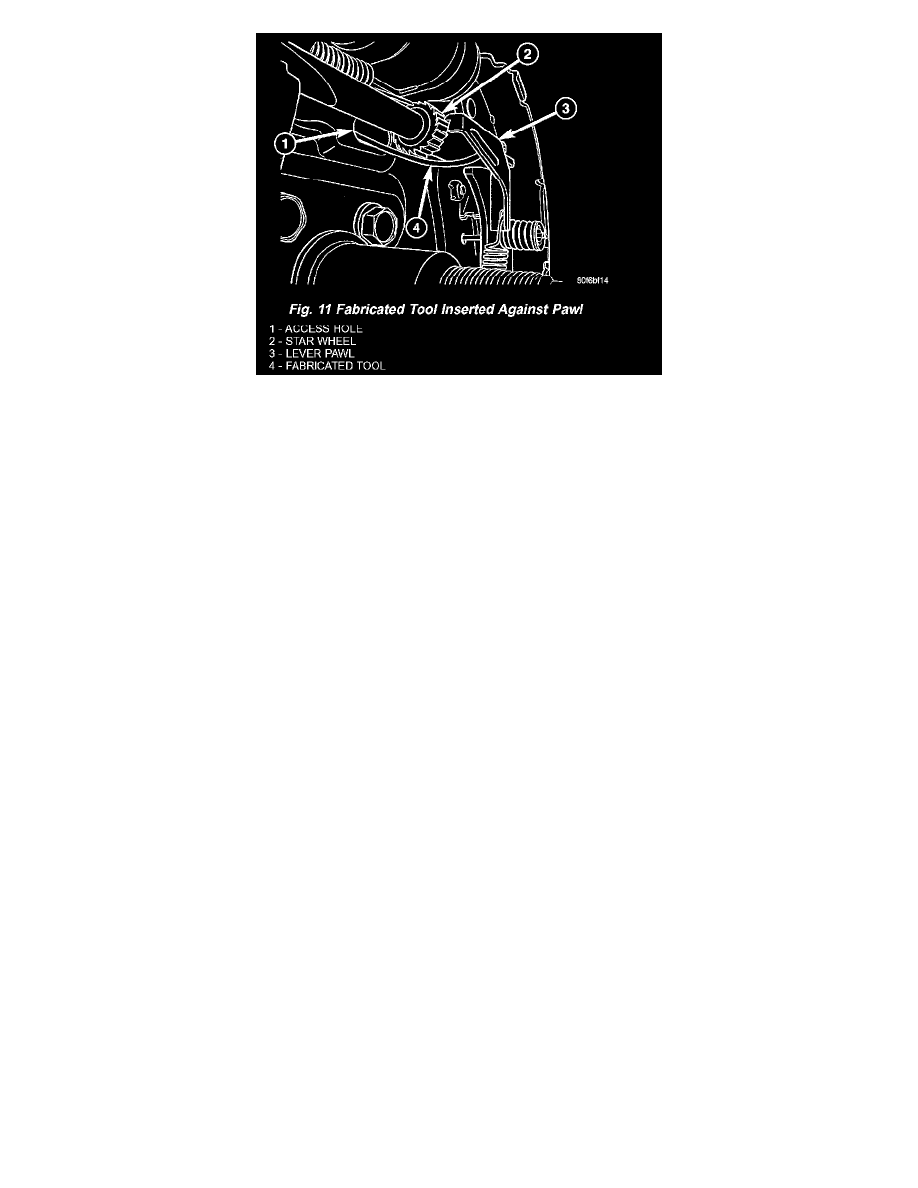
c. Insert fabricated tool through access hole in support plate, under adjuster, against lever pawl. Pawl is attached to and pivots from leading shoe.
When inserting tool through hole, directing tool somewhat forward (toward leading shoe) assures better contact with pawl.
d. While pushing on pawl with fabricated tool to disengage it from adjuster star-wheel teeth, rotate star-wheel downward to back off adjustment
using a small screwdriver or brake adjuster tool.
e. Once adjuster screw is backed off a sufficient amount, drum should slide off wheel studs.
f.
Remove tools and reinstall plug in support plate.
INSTALLATION
NOTE: Before installing drum, inspect brake shoe linings for wear, alignment, and contamination. Repair or replace as necessary.
NOTE: If rust or any foreign material is present on hub, drum or wheel mating surfaces, wet wire brush these areas to remove prior to assembly of
parts.
1. Properly remove any buildup formed along outer edge of drum's machined braking surface.
2. Adjust brake shoes to drum diameter using a brake shoe gauge.
3. Install brake drum on rear hub and bearing.
4. Install tire and wheel assembly. Tighten wheel mounting nuts to 135 Nm (100 ft. lbs.) torque.
5. Lower vehicle.
6. Road test vehicle stopping in both forward and reverse directions. Automatic-adjuster will continue to adjust brakes as necessary during road test.