
Stratus Sedan V6-2.7L (2001)
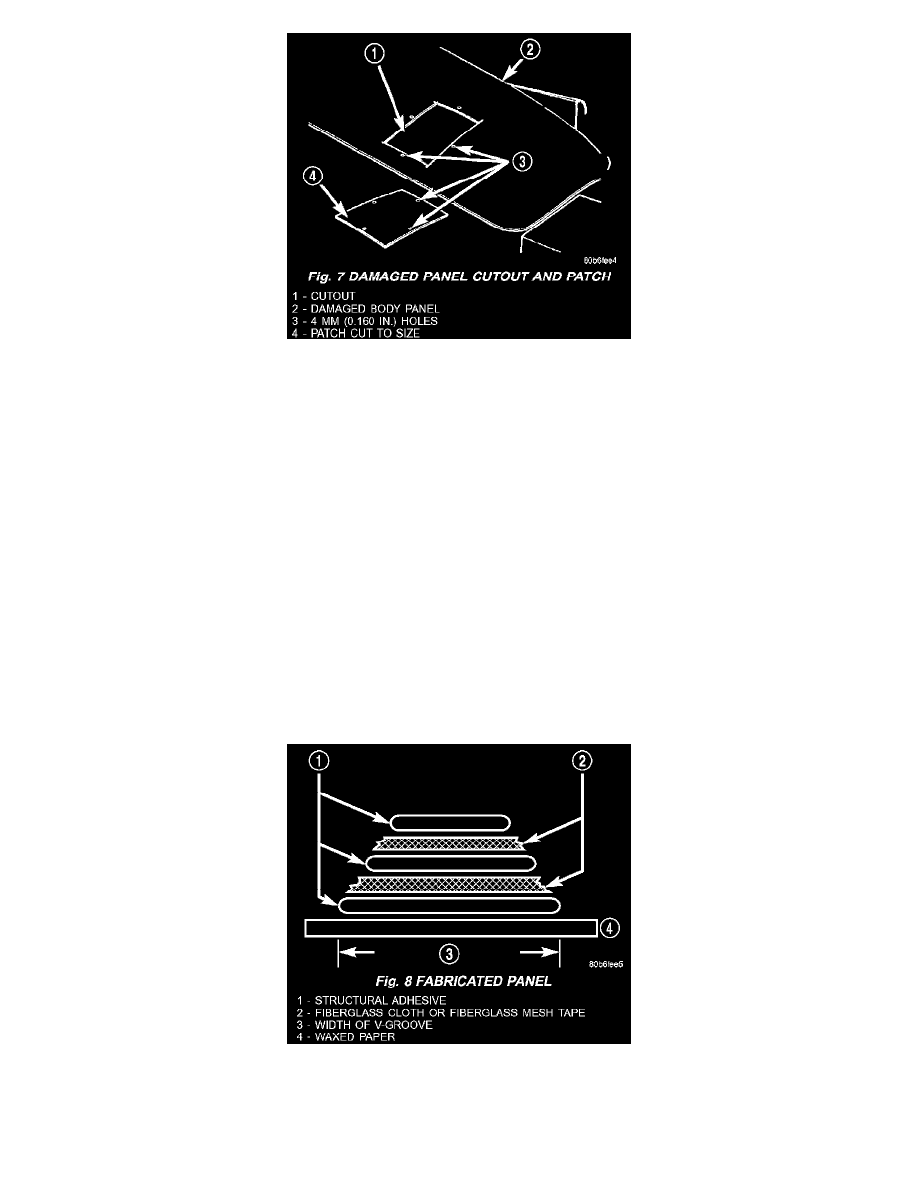
Fig. 7
Identify the type of repair: Puncture or Crack -Damage that has penetrated completely through the panel. Damage is confined to one general area; a panel
section is not required. However, a backer panel, open fiberglass tape, or matted material must be bonded from behind (Fig. 7) (Fig. 6).
PANEL SURFACE PREPARATION
If a body panel has been punctured, cracked, or crushed, the damaged area must be removed from the panel to achieve a successful repair. All spider web
cracks leading away from a damaged area must be stopped or removed. To stop a running crack in a panel, drill a 6 mm (0.250 in.) hole at the end of the
crack farthest away from the damage. If spider web cracks can not be stopped, the panel would require replacement. The surfaces around the damaged
area should be stripped of paint and freed from wax and oil. Scuff surfaces around repair area with 360 grit wet/dry sandpaper, or equivalent, to assure
adhesion of repair materials.
PATCHING PANELS
An panel that has extensive puncture type damage can be repaired by cutting out the damaged material (Fig. 7). Use a suitable reciprocating saw or cut
off wheel to remove the section of the panel that is damaged. The piece cut out can be used as a template to shape the new patch. It is not necessary to
have access to the back of the panel to install a patch. Bevel edges of cutout at 20 degrees to expose a larger bonding area on the outer side. This will
allow for an increased reinforcement areas.
PANEL PATCH FABRICATIONS
A patch can be fabricated from any rigid fiberglass panel that has comparable contour with the repair area. Lift gates and fenders can be used to supply
patch material. If existing material is not available or compatible, a patch can be constructed with adhesive and reinforcement mesh (dry wall tape).
Perform the following operation if required:
Fig. 8
1. Cover waxed paper or plastic with adhesive backed nylon mesh (dry wall tape) larger than the patch required (Fig. 8).
2. Tape waxed paper or plastic sheet with mesh to a surface that has a compatible contour to the repair area.
3. Apply a liberal coat of adhesive over the reinforcement mesh (Fig. 8). If necessary apply a second or third coat of adhesive and mesh after first