
Stratus Sedan V6-2.7L (2001)
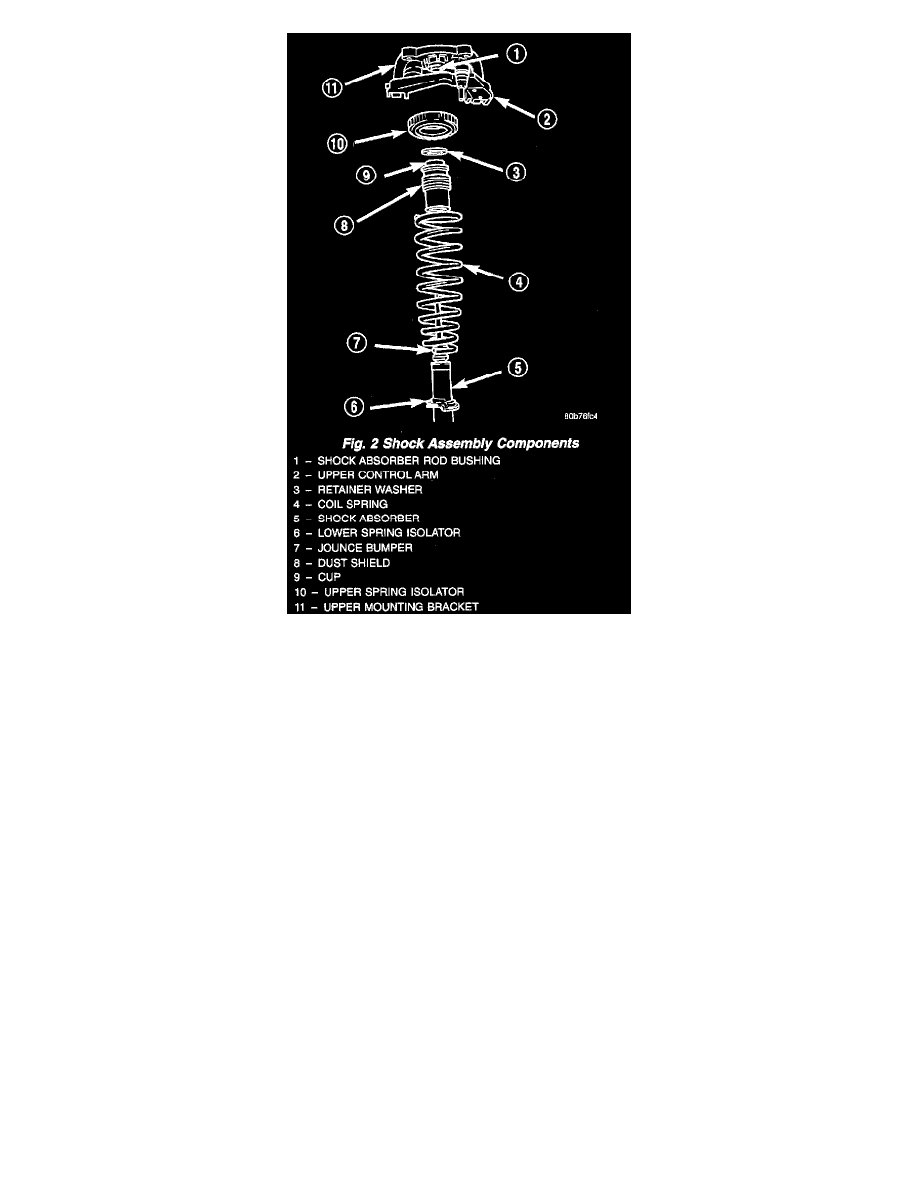
11. Remove the lower shock rod bushing retainer washer from the shock absorber rod.
12. Remove the dust shield and cup as an assembly from the shock absorber rod by pulling both straight up and off the shock rod. The jounce bumper
may come off at the same time. Remove the jounce bumper and metal collar.
13. Remove the lower spring isolator from the lower spring seat on the shock absorber.
14. Inspect the shock assembly components for the following and replace as necessary:
-
Inspect the shock for any condition of rod binding over the full stroke of the shaft.
-
Check the upper mounting bracket for cracks, distortion and any sign of damage.
-
Inspect the upper mounting bracket-upper control bushings for deterioration of the rubber.
-
Check the upper and lower shock rod isolator bushings for severe deterioration of the rubber.
-
Check the upper and lower spring isolators for severe deterioration of the rubber.
-
Inspect the dust shield for rips and deterioration.
-
Inspect the jounce bumper for cracks and signs of deterioration.
-
Inspect the coil spring for any sign of damage to the coating.
ASSEMBLY - SHOCK ASSEMBLY
For the disassembly and assembly of the shock assembly, use strut spring compressor Pentastar Service Equipment (PSE) tool W-7200, or the
equivalent, to compress the coil spring. Follow the manufacturer's instructions closely.
NOTE: If the coil spring, upper mounting bracket, rod bushings, upper coil spring isolator, and upper control arm have been removed from the spring
compressor, proceed with the next step, otherwise, proceed with step 7.
NOTE: If installation of the upper control arm on the upper mounting bracket is necessary, Refer to UPPER CONTROL ARM -REMOVAL.
1. Install the upper coil spring isolator on the upper (shock absorber/upper control arm) mounting bracket.