
Stratus Sedan V6-2.7L VIN R (2002)
Front Door Panel: Service and Repair
Trim Panel
TRIM PANEL
REMOVAL
1. Roll door glass down.
2. Disengage two clips attaching speaker grille to door trim panel. They are at the front of the grille, one near the top, and the other one at the bottom.
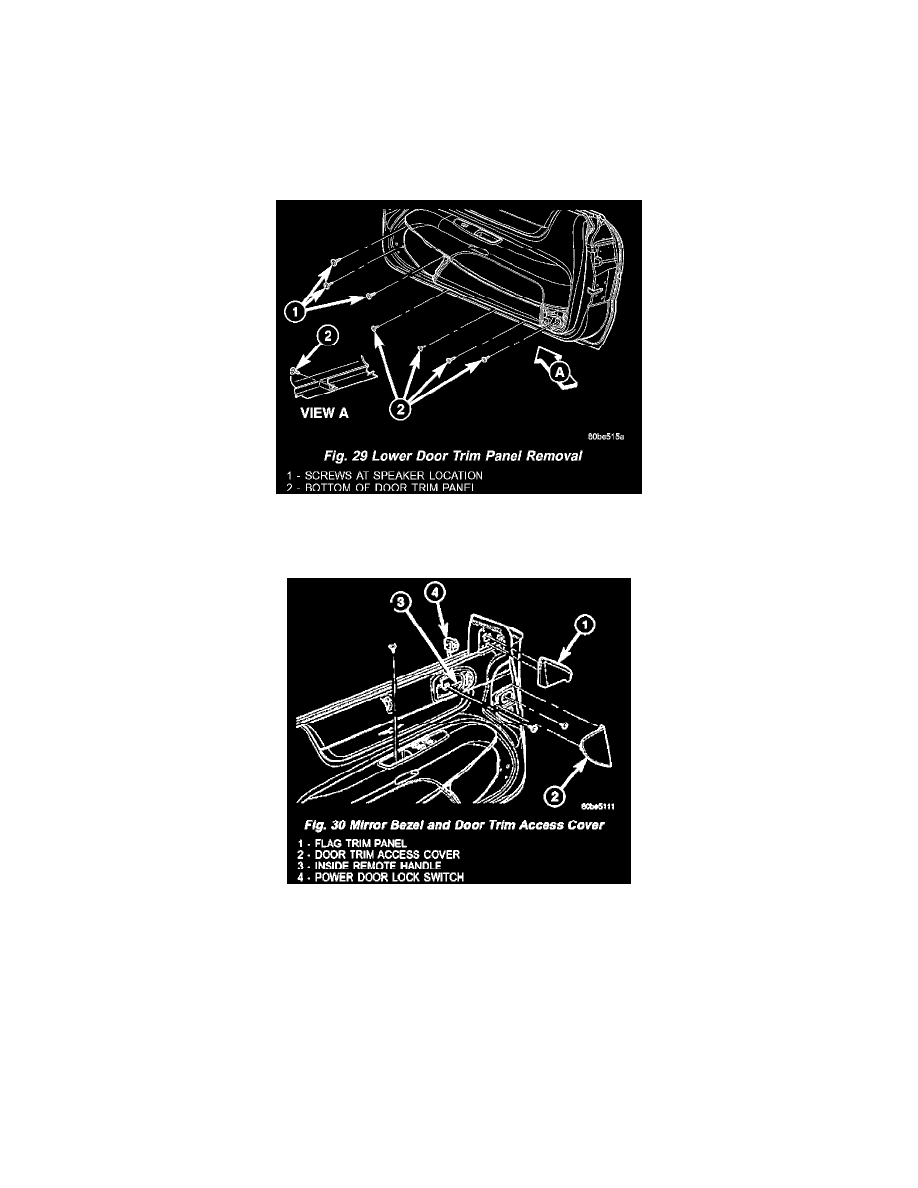
Fig. 29
3. Remove three large washer-headed screws surrounding the speaker (Fig. 29).
Fig. 30
4. Remove access cover at front of door trim panel. Remove by prying at its rear edge (Fig. 30).
5. Remove red courtesy reflector from lower tail or door. Disengage by prying at screwdriver notch at bottom of reflector.
6. Remove flag trim panel from door by prying off at two attachment clips points (Fig. 30).
7. Remove seven screws attaching door trim panel to door: (Fig. 29) and (Fig. 30).
a. One screw is located at lower rear screw pocket.
b. Three screws located along the bottom of door.
c. One screw located inside handle opening.
d. One screw located at the upper front.
e. One screw in the pull cup.
8. Disengage two hidden clips attaching at the rear of the trim panel, by prying off at two attachment clip points.
9. Lift trim panel upward and away from door, disengage trim panel from upper retainer channel.