
Stratus Sedan V6-2.7L VIN R (2002)
Console: Removal and Replacement
Forward Instrument Panel Console
FORWARD INSTRUMENT PANEL CONSOLE
REMOVAL
1. Remove floor console.
2. Remove instrument panel cluster hood.
3. Remove instrument panel center bezel.
4. Remove left knee bolster.
5. Release glove box door catches and allow to hang downward.
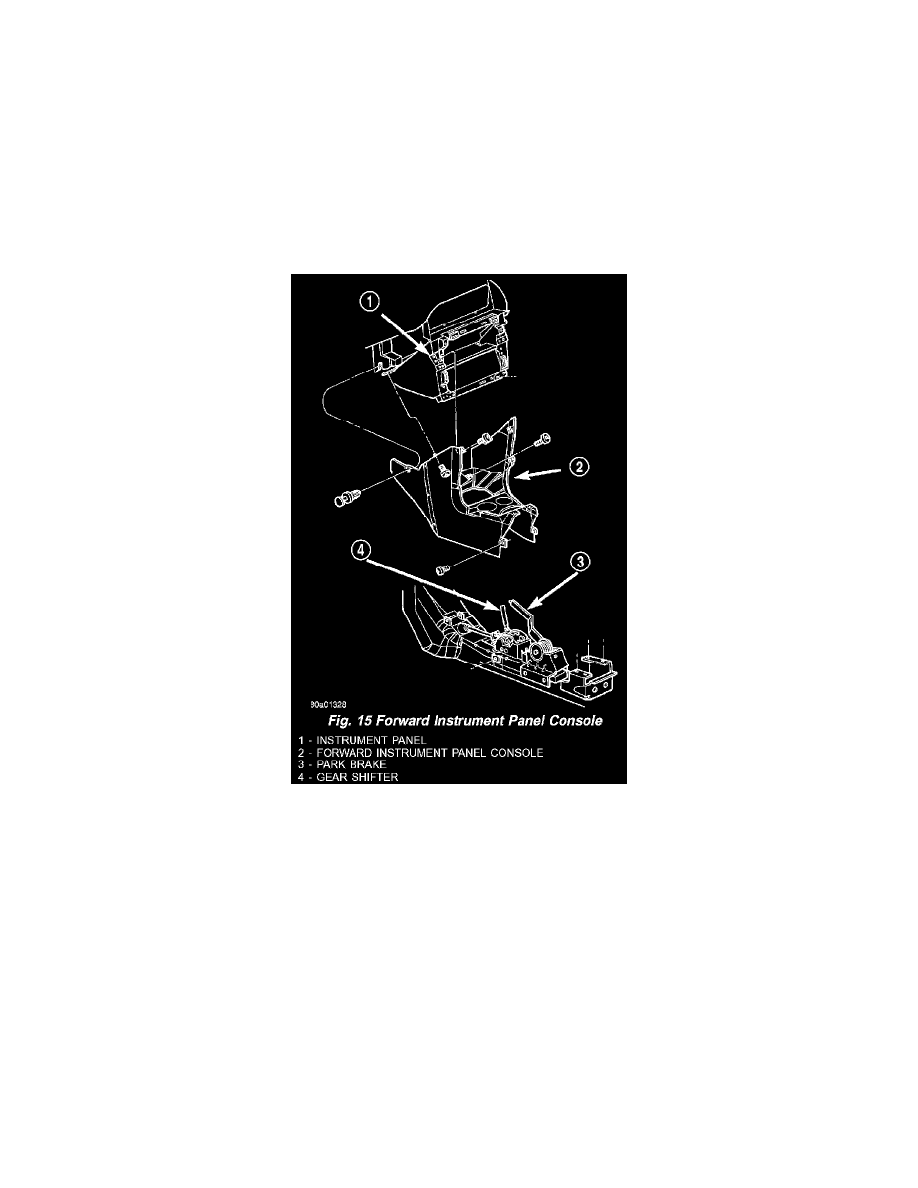
Fig. 15
6. Remove screws holding storage bin to forward instrument panel console (Fig. 15).
7. Remove storage bin from forward instrument panel console.
8. Remove screws holding forward instrument console to shifter mounting bracket.
9. Remove screws attaching forward instrument panel console to instrument panel at sides of storage bin area.
10. Remove screws attaching forward instrument panel console to instrument panel support braces.
11. Remove forward instrument panel console from vehicle.
INSTALLATION
1. Position forward instrument panel console to vehicle.
2. Install screws attaching forward instrument panel console to instrument panel support braces.
3. Install screws attaching forward instrument panel console to instrument panel at sides of storage bin area.
4. Install screws attaching forward instrument panel console to shifter mounting bracket.
5. Install storage bin from forward instrument panel console.
6. Install screws attaching storage bin to forward instrument panel console.
7. Release glove box door catches and allow to hang downward.
8. Install left knee bolster.
9. Install instrument panel center bezel.