
Stratus Sedan V6-2.7L VIN R (2002)
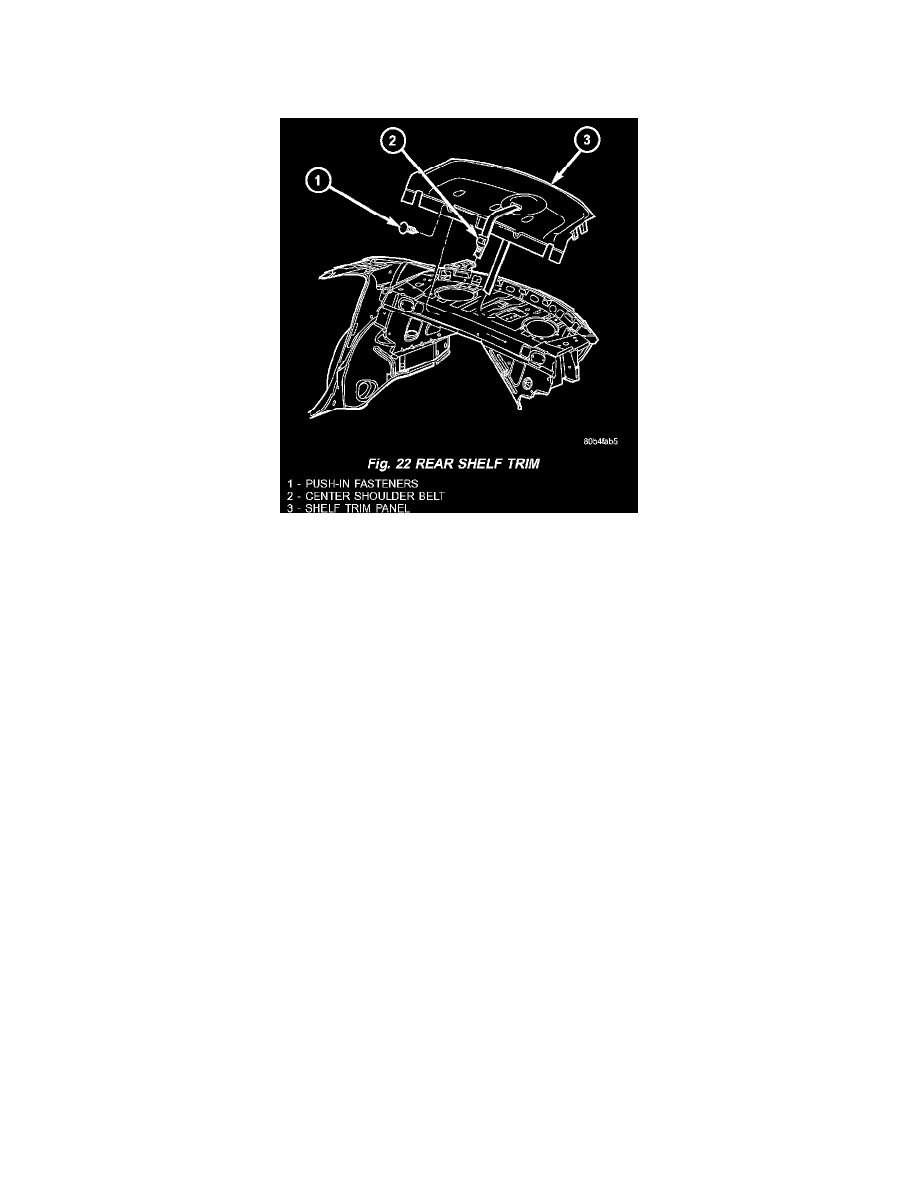
Fig. 21
3. Remove the center plug (Fig. 21).
4. Remove close out panel trim.
Fig. 22
5. Remove push-in fasteners attaching rear shelf trim to shelf panel (Fig. 22).
6. Disconnect the center shoulder belt at the base.
7. Pull trim forward to disengage clip attaching trim to shelf panel.
8. Feed seat belt through the seat belt opening in the shelf panel.
CAUTION: Do not pull on child tether covers or use as a handle for removal of panel.
9. Remove shelf trim from vehicle.
INSTALLATION
1. Feed center shoulder belt through opening in shelf panel.
2. Place rear shelf trim into position.
3. Push trim rearward to engage clip attaching rear shelf trim to shelf panel.
4. Install push-in fasteners attaching rear shelf trim to shelf panel.
CAUTION: Do not pull on child tether covers or use as a handle for installation of panel.
5. Install close out trim panel.
6. Install center plug.
7. Install upper quarter trim panels.
8. Connect the center shoulder seat belt.
9. Fold seat backs up.
Upper Deck Molding
UPPER DECK MOLDING
REMOVAL
1. Lower convertible top to midway position.
2. Remove screws attaching upper deck molding to rear deck panel above convertible top rear attachment.
3. Open decklid.
4. Remove screws attaching upper deck molding to rear deck panel inside decklid water trough.
5. Disconnect wire connector for CHMSL.
6. Remove upper deck molding from vehicle.