
Stratus Sedan V6-2.7L VIN T FFV (2003)
INSTALLATION
1. Place A-pillar trim into position.
2. Engage clips attaching A-pillar trim to A-pillar.
3. Install the door opening weatherstrip to the A-pillar.
INSTALLATION - JR-27 (Convertible) ONLY
1. Position trim panel near A-pillar.
2. Align locating pins on back side of trim panel to holes in A-pillar.
3. Press clips on A-pillar trim panel into slots in A-pillar.
4. Install header molding panel.
B-Pillar Lower Trim
B - PILLAR LOWER TRIM
REMOVAL
1. Remove upper B-pillar trim. Refer to Trim Panel.
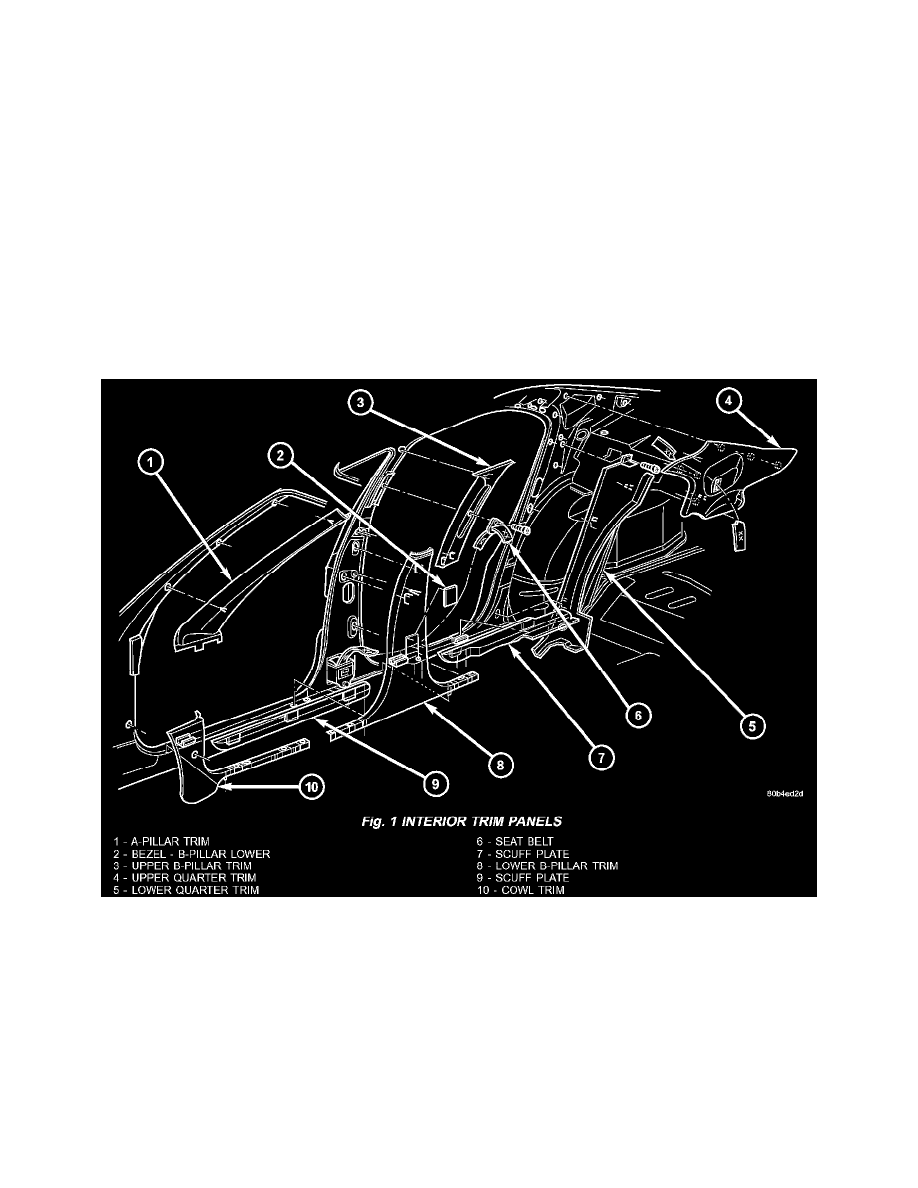
Fig. 1
2. Disengage clips attaching seat belt access panel to lower B-pillar trim (Fig. 1).
3. Remove scuff plates. Refer to Trim Panel.
4. Remove the screws attaching the trim to the door sills.
5. Disengage clips attaching lower B-pillar trim to B-pillar.
6. Route seat belt webbing through access hole in lower B-pillar trim.
7. Remove lower B-pillar trim from vehicle.
INSTALLATION
1. Place lower B-pillar trim into position.
2. Route seat belt webbing through access hole in lower B-pillar trim.
3. Engage clips attaching lower B-pillar trim to B-pillar.