
Stratus Sedan V6-2.7L VIN T FFV (2003)
Back Window Glass: Service and Repair
BACKLITE
REMOVAL
For a description of tools and adhesive systems that are recommended for use in this procedure.
WARNING: DO NOT OPERATE THE VEHICLE WITHIN 24 HOURS OF WINDSHIELD INSTALLATION. IT TAKES AT LEAST 24
HOURS FOR URETHANE ADHESIVE TO CURE. IF IT IS NOT CURED, THE WINDSHIELD MAY NOT PERFORM PROPERLY IN AN
ACCIDENT. BE SURE TO REFER TO THE URETHANE MANUFACTURER'S DIRECTIONS FOR CURING TIME SPECIFICATIONS,
AND DO NOT USE ADHESIVE AFTER ITS EXPIRATION DATE.
CAUTION: Open the left front door glass before installing the rear window to avoid pressurizing the passenger compartment if a door is
slammed before the urethane bonding is fully cured. Water leaks can result.
1. Remove rear window moldings.
2. Remove upper quarter trim panel.
3. Disengage wire connectors from rear window defogger, and rear window mounted radio antenna, if so equipped.
4. Remove C-pillar applique, if so equipped.
WARNING: WEAR EYE AND HAND PROTECTION WHEN HANDLING SAFETY GLASS. PERSONAL INJURY CAN RESULT.
CAUTION: Do not damage body or trim finish when cutting out glass or applying fence primer.
5. Cut the urethane around the perimeter of the rear window glass.
6. Remove the rear window from the vehicle.
INSTALLATION
For a description of tools and adhesive systems that are recommended for use in this procedure.
WARNING: DO NOT OPERATE THE VEHICLE WITHIN 24 HOURS OF WINDSHIELD INSTALLATION. IT TAKES AT LEAST 24
HOURS FOR URETHANE ADHESIVE TO CURE. IF IT IS NOT CURED, THE WINDSHIELD MAY NOT PERFORM PROPERLY IN AN
ACCIDENT. BE SURE TO REFER TO THE URETHANE MANUFACTURER'S DIRECTIONS FOR CURING TIME SPECIFICATIONS,
AND DO NOT USE ADHESIVE AFTER ITS EXPIRATION DATE.
CAUTION: Open the left front door glass before installing the rear window to avoid pressurizing the passenger compartment if a door is
slammed before the urethane bonding is fully cured. Water leaks can result.
1. Prepare the work area, window fence, and glass the same way as described in the Windshield section of this group.
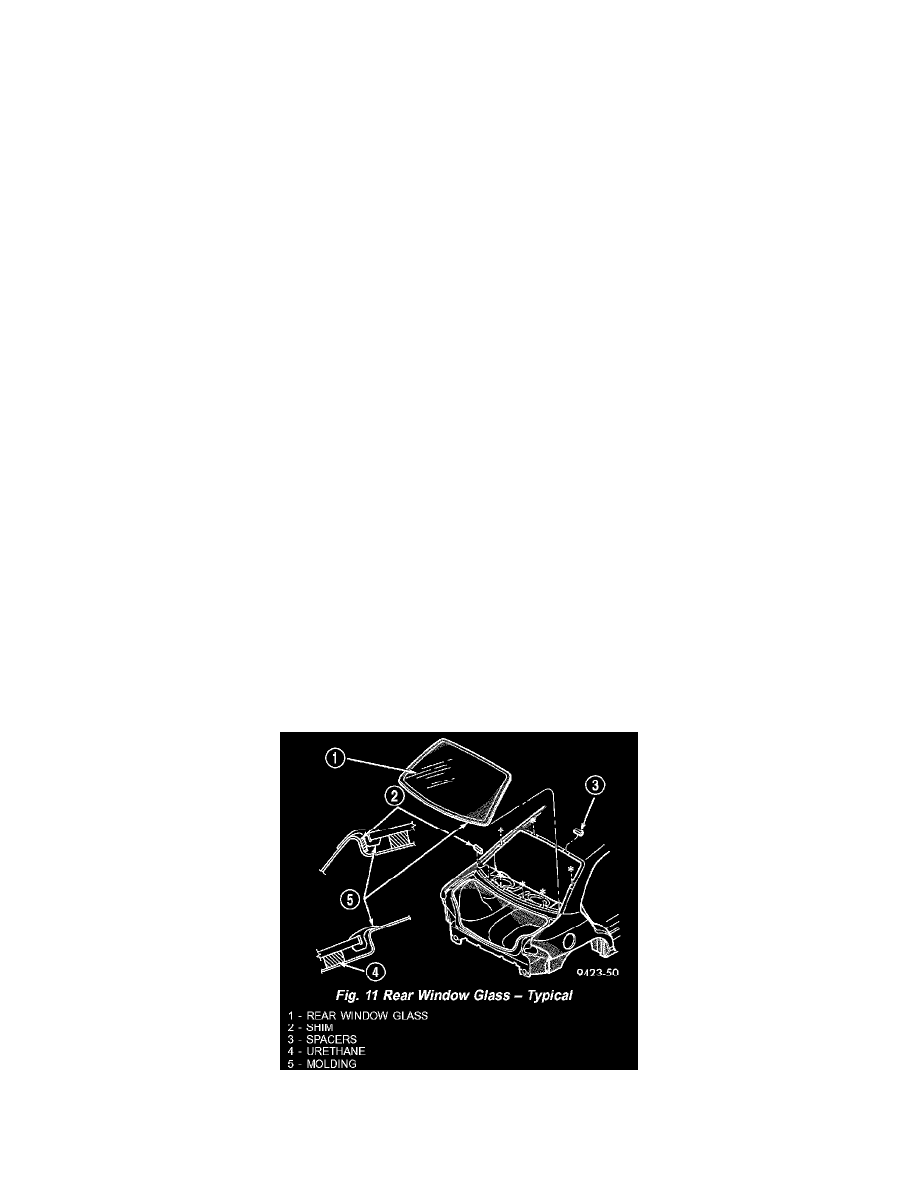
Fig. 11
2. Place fence spacers at the locations shown (Fig. 11).