
Viper V10-488 8.0L (1992)
5. Step 1 Tighten only the center main caps bolts in the sequence order shown in the illustration to 20 Nm (15 ft. lbs.). This will seat the bearing caps
onto the engine block.
6. Step 2 To ensure correct thrust bearing alignment the following procedure must be done:
7. Move crankshaft all the way to the rear of its travel.
8. Then, move crankshaft all the way to the front of its travel.
9. Wedge an appropriate tool between the rear of the cylinder block and rear crankshaft counterweight. This will hold the crankshaft in it's most
forward position.
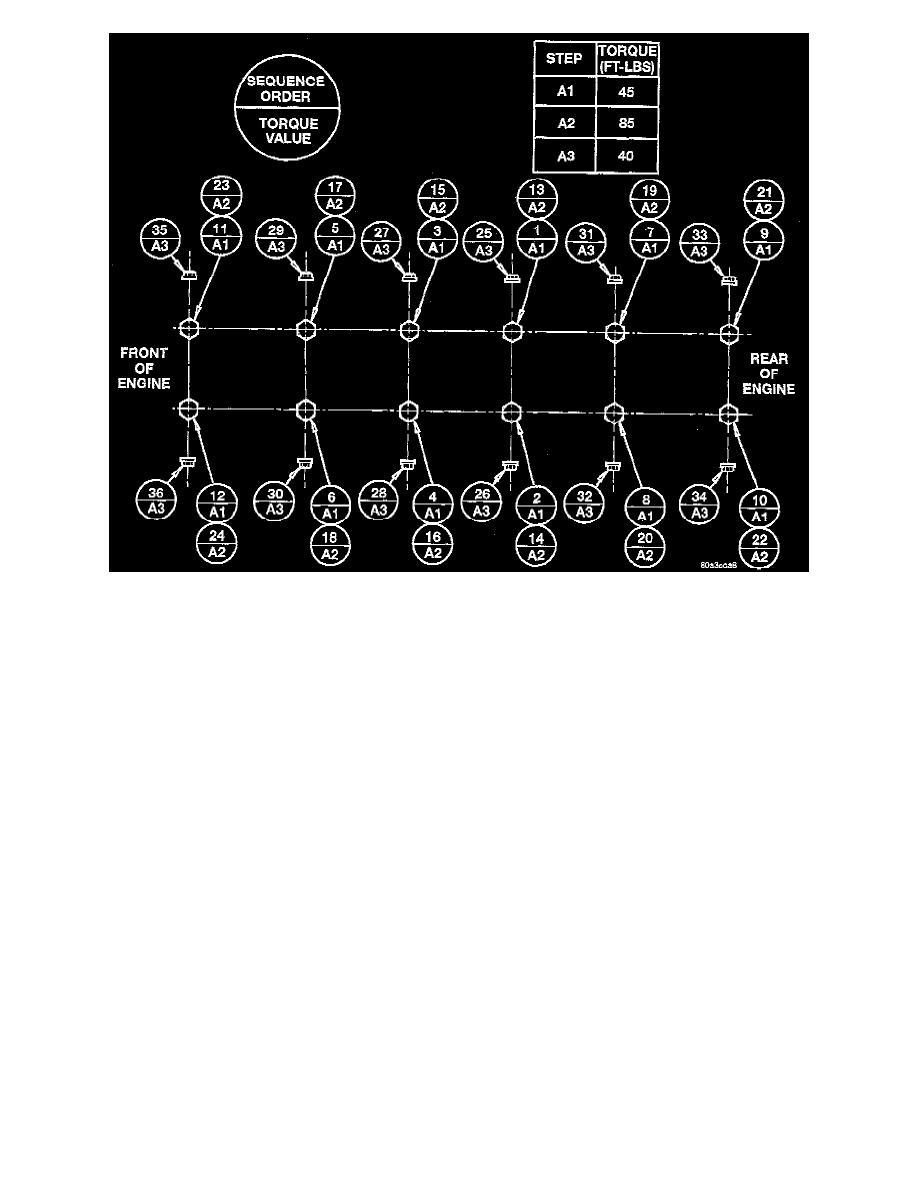
10. Step A1 Tighten the A1 bolts to 61 Nm (45 ft. lbs.) in the sequence order shown in the illustration.
11. Step A2 Tighten the A2 bolts to 115 Nm (85 ft. lbs.) in the sequence order shown in the illustration.
12. Step A3 Tighten the A3 Bolts to 54 Nm (40 ft. lbs.) in the sequence order shown in the illustration.
13. Remove the holding tool.
14. Install windage tray and torque nuts to 11 Nm (95 inch lbs.).
15. Install rear crankshaft seal and retainer.
16. Install timing chain cover.
17. Install oil pan.