
Viper GTS V10-488 8.0L (1998)
Turn Signal Switch: Service and Repair
WARNING: ON VEHICLES EQUIPPED WITH AIRBAGS, AIR BAGS AND SEAT BELTS/AIR BAGS BEFORE ATTEMPTING
STEERING WHEEL, STEERING COLUMN, OR INSTRUMENT PANEL COMPONENT DIAGNOSIS OR SERVICE. FAILURE TO TAKE
THE PROPER PRECAUTIONS COULD RESULT IN ACCIDENTAL AIR-BAG DEPLOYMENT AND POSSIBLE PERSONAL INJURY.
REMOVAL
1. Disconnect and isolate the battery negative cable.
2. Remove the tilt steering column lever.
3. Remove the knee blocker/lower steering column trim panel. Refer to Instrument Panel and Systems.
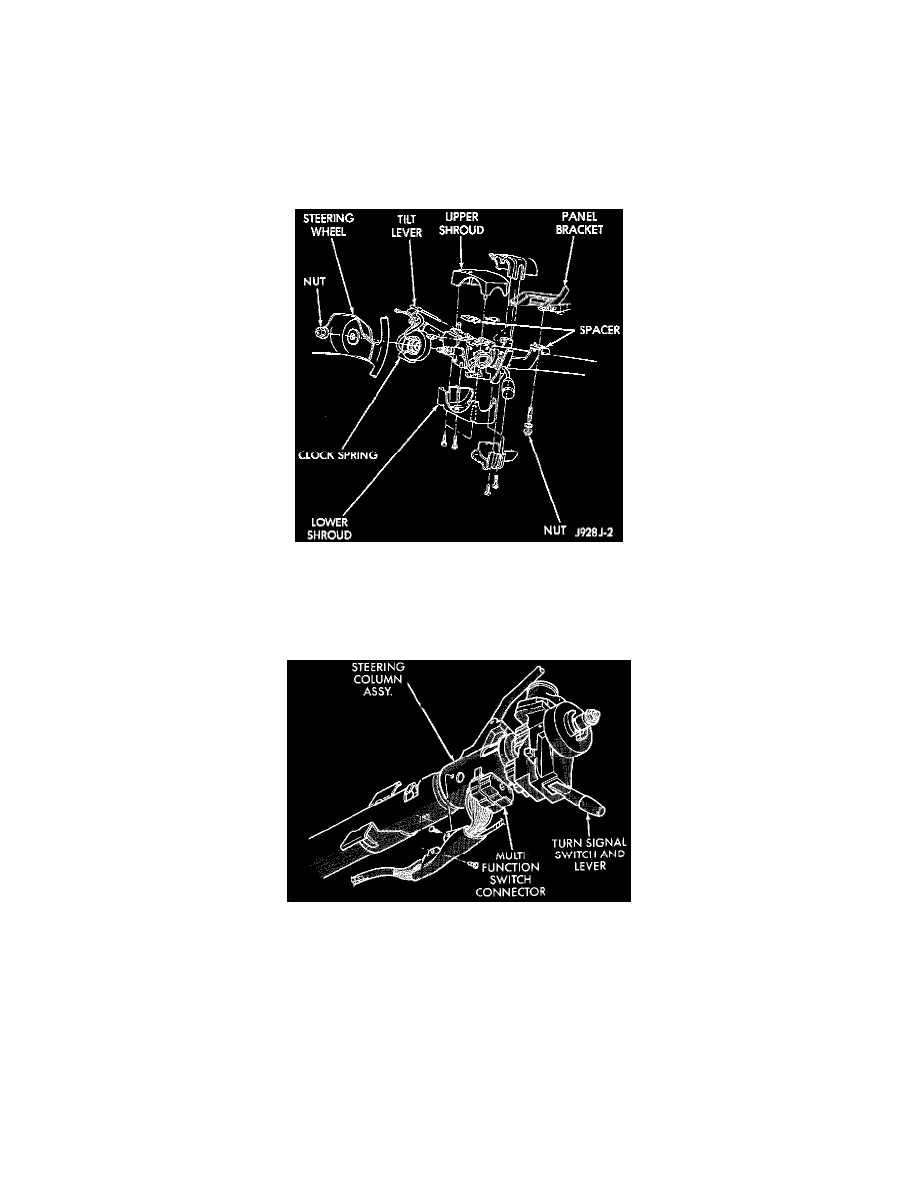
Steering Column Shrouds Remove/Install - Typical
4. Remove both the upper and lower shrouds from the steering column.
5. Remove the lower fixed column shroud.
6. Loosen the steering column upper bracket nuts. Do not remove the nuts.
Multi-Function Switch Connector - Typical
7. Move the upper fixed column shroud to gain access to the rear of the multi-function switch.
8. Remove the multi-function switch tamper proof mounting screws (tamper proof Torx Bit TTXR20B2 or equivalent is required).
9. Gently pull the switch away from the column. Loosen the connector screw. The screw will remain in the connector.
10. Disconnect the wire harness connector from the multi-function switch.
INSTALLATION
1. For installation reverse the above procedures. Tighten the fasteners to the following torque:
-
Multi-function switch connector screw - 2 N.m (17 in. lbs.)
-
Multi-function switch retaining screws - 2 N.m (17 in. lbs.)
-
Steering column upper bracket nuts - 12 N.m (110 in. lbs.)