
Viper GTS V10-8.0L VIN E (1999)
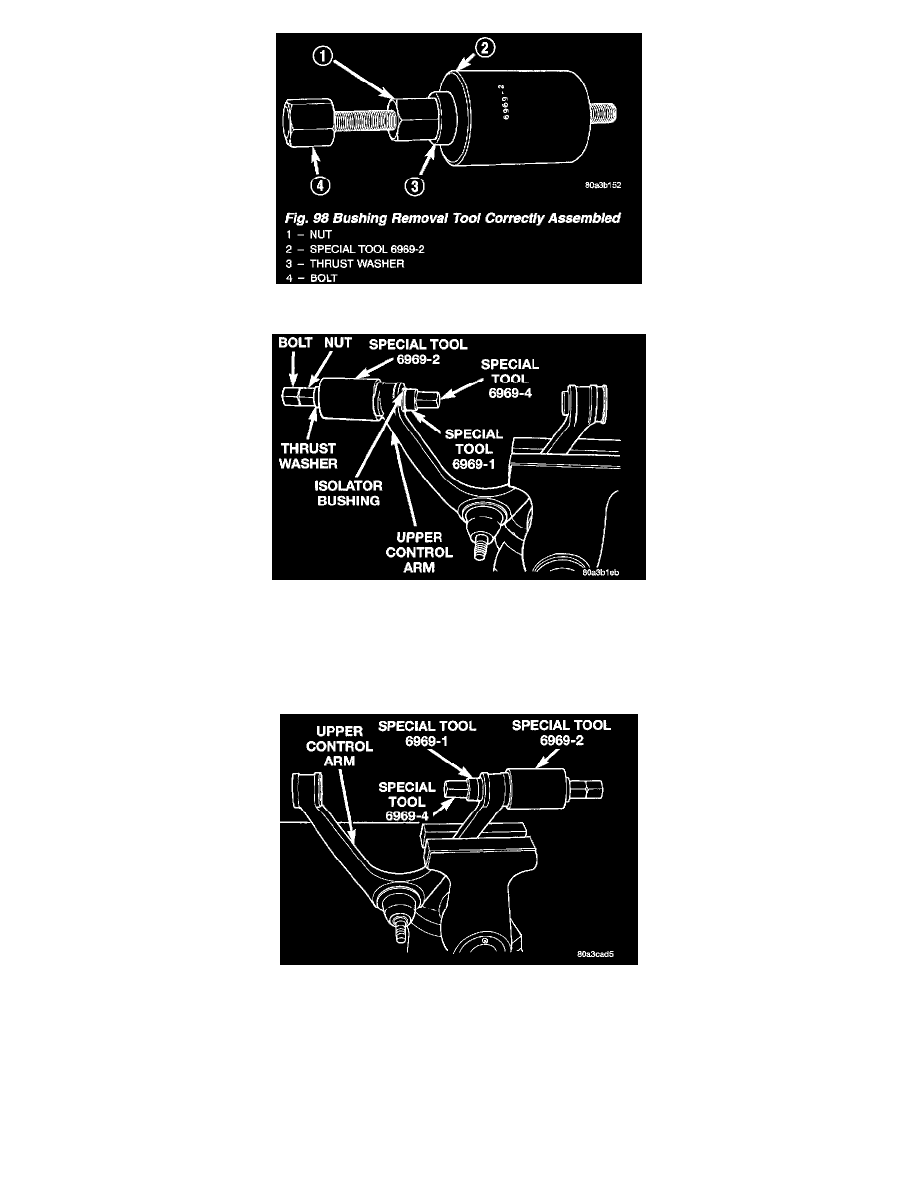
3. Assemble Remover, Special Tool 6969-2, bolt, nut, and thrust washer as shown.
Tools Installed For Bushing Removal
4. Install the assembled pieces of Remover, Special Tool 6969-2, on the lower control arm. Then install Remover, Special Tool 6969-1, and Nut,
Special Tool 6969-4, on the bolt of Remover, Special Tool 6969-2.
5. Isolator bushing is removed from control arm using the following procedure. Hold the bolt of Remover, Special Tool 6969-2, from turning while
rotating the nut. This will pull the isolator bushing out of the control arm.
Tool Installed For Second Bushing Removal
6. Transfer Remover, Special Tool 6969-2, Remover, Special Tool 6969-1, and Nut, Special Tool 6969-4, to the remaining isolator bushing in the
upper control arm.
7. Remove the second isolator bushing from the control arm using the following procedure. Hold the bolt of Remover, Special Tool 6969-2, from
turning while rotating the nut. This will pull the isolator bushing out of the upper control arm.
ASSEMBLE
1. Install the isolator bushing into the control arm by hand making sure it is installed squarely into the hole in the control arm.