
Viper RT-10 V10-8.0L VIN E (1997)
1. Install the original or replacement brake shoes in the new caliper assembly. See Brake Pad for the procedure. See: Brake Pad/Service and Repair
2. Position the replacement caliper assembly over the rotor and align with caliper mounting bosses on knuckle assembly
3. Lubricate the caliper slide pins and bushings with silicone lubricant.
4. Align the lower caliper slide pin bushing with lower caliper mounting hole in knuckle. Install the caliper to knuckle slide pin bolt, do not torque at
this time only finger tighten.
5. Align upper caliper assembly slide pin bushing with upper caliper assembly mounting hole in knuckle. Install upper caliper assembly to steering
knuckle slide pin bolt. Tighten the caliper upper slide pin bolt to a torque of 32 Nm (24 ft. lbs.), and the caliper lower slide pin bolt to a torque of
51 Nm (38 ft. lbs.).
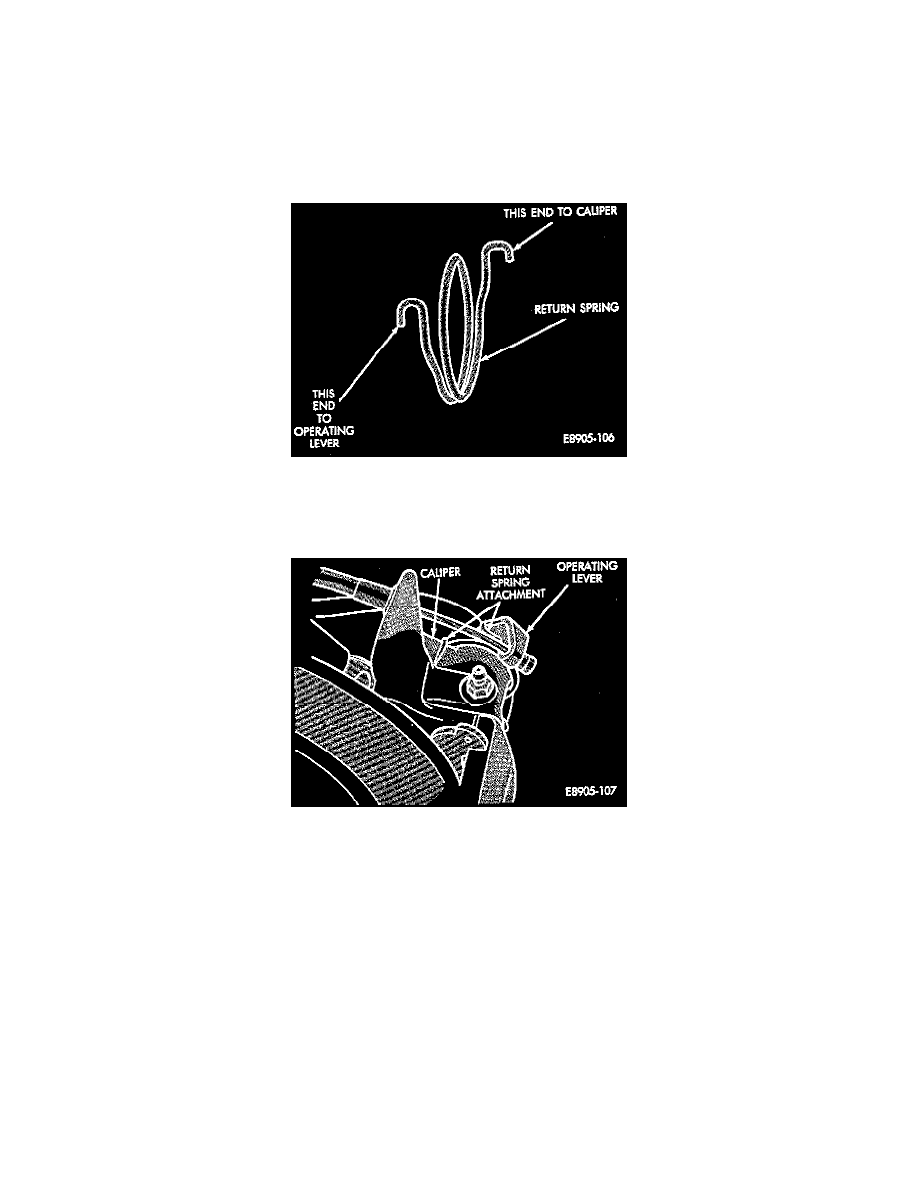
6. Position the park brake operating lever return spring on the caliper with the correct end.
7. Install park brake operating lever on the parking brake cable.
8. Pull the park brake cable rearward, Then install the park brake operating lever on the caliper drive disc spline. Install the operating lever to drive
disc spline attaching bolt and tighten.
9. Connect the park brake operating lever return spring, to the operating lever first. Then hook the spring onto the caliper with a long screw driver.
10. Position 2 new copper seal washers on the brake hose fitting and connect the fitting to the caliper. Tighten the Banjo bolt to a torque of 31 Nm (23
ft. lbs.).
11. Bleed the rear brake calipers. See Brakes for the bleeding procedure. See: Service and Repair
12. Install the wheel and tire assemblies. Tighten the wheel mounting stud nuts in proper sequence until all nuts are torqued to half specification. Then
repeat the tightening sequence to the full specified torque of 108 - 136 Nm (80 - 100 ft. lbs.).
13. Remove jackstands or lower hoist. Before moving vehicle, pump the brake pedal several times to insure the vehicle has a firm brake pedal to
adequately stop vehicle.
14. Apply the brakes several times to seat the brake shoes and equalize parking brake adjustment.
15. Road test the vehicle and make several stops to wear off any foreign material on the brakes and to seat the brake shoe linings. See Brake Pad for
the correct Burnishing procedure if NEW brake shoe assemblies were installed. See: Brake Pad/Service and Repair