
Viper RT-10 V10-8.0L VIN E (1997)
17.
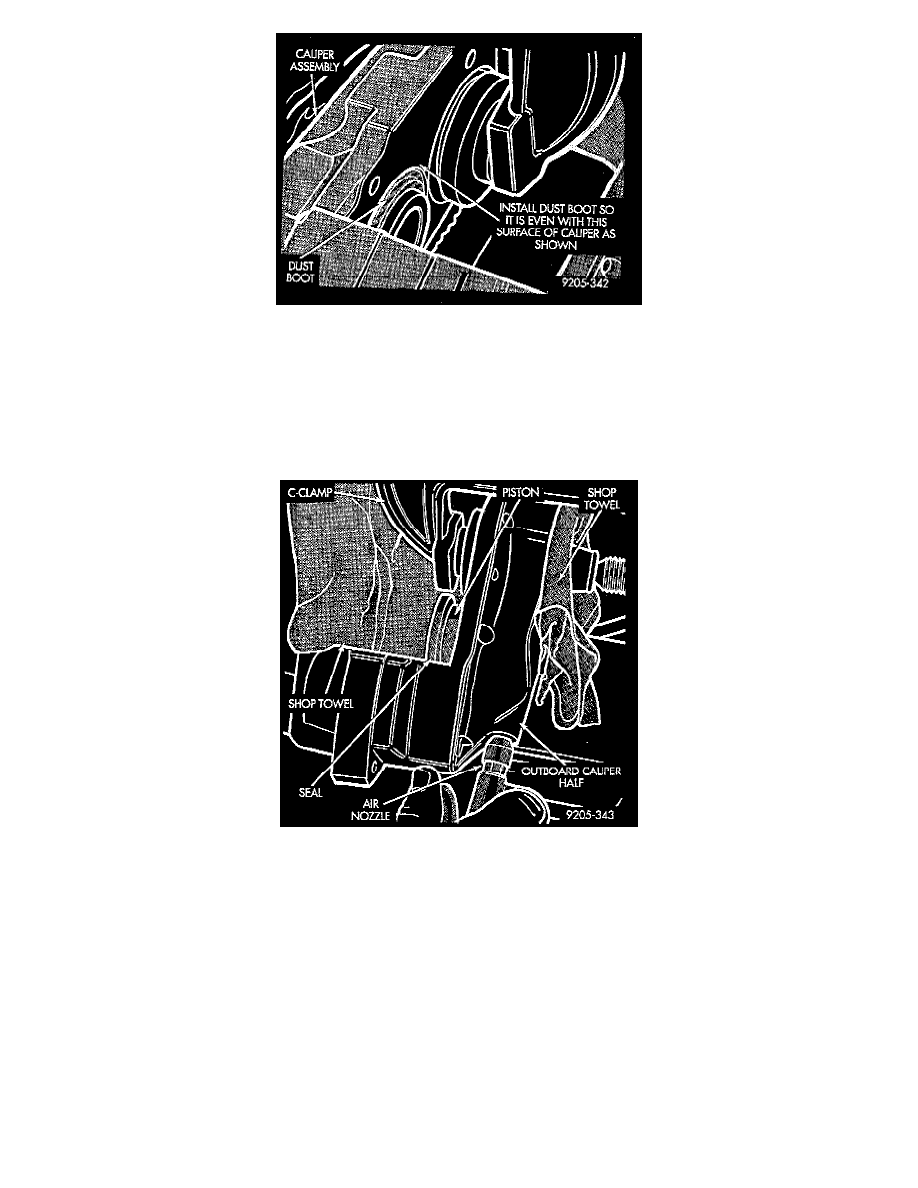
Position the dust boot in the counterbore of the caliper bore. Using your fingers install the dust boot into the counterbore until it is flush with the
face of the caliper surface.
18.
Move C-clamp and seal installer to caliper piston which has just been reconditioned. This will hold piston in place while reconditioning remaining
inboard caliper piston.
19.
Repeat steps Step 7 through Step 17 on remaining piston, in inboard half of the caliper assembly. When these steps are completed, the inboard half
of the caliper assembly reconditioning is completed.
Outboard Caliper Half
1.
Lay a shop towel over the outboard caliper half to protect the finish on the caliper. Place an appropriate size tool such as the seal installer or an
equivalent, over the caliper piston and dust boot which had been reconditioned. Using a C-clamp, hold the seal installer or equivalent tool in place
over the top of the caliper piston. Tighten the C-clamp just enough to hold the pieces in place, DO NOT USE EXCESSIVE FORCE this could
damage the caliper or piston.
2.
Place a shop towel in the center area of the caliper. This is to protect the piston and the caliper from damage, when the piston is removed from the
bore of the caliper.
WARNING: WHEN REMOVING THE PISTON FROM THE BORE OF THE CALIPER DO NOT PLACE HANDS OR FINGERS
INTO THE CENTER AREA OF THE CALIPER. HAND INJURY WILL OCCUR WHEN THE PISTON COMES OUT OF THE BORE
OF THE CALIPER.
3.
Using ONLY a rubber tipped air nozzle, insert the nozzle into the port for the interconnecting brake fluid line on the end of outboard half of the
caliper. Slowly apply just enough air pressure to slowly push the unclamped piston out of the bore of the caliper.