
Viper RT-10 V10-8.0L VIN E (1997)
Brake Master Cylinder: Service and Repair
Master Cylinder Bleeding
Bench Bleeding
NOTE: It is not necessary to bleed the entire hydraulic system after replacing the master cylinder. Providing that the master cylinder has been filled and
bled prior to installation.
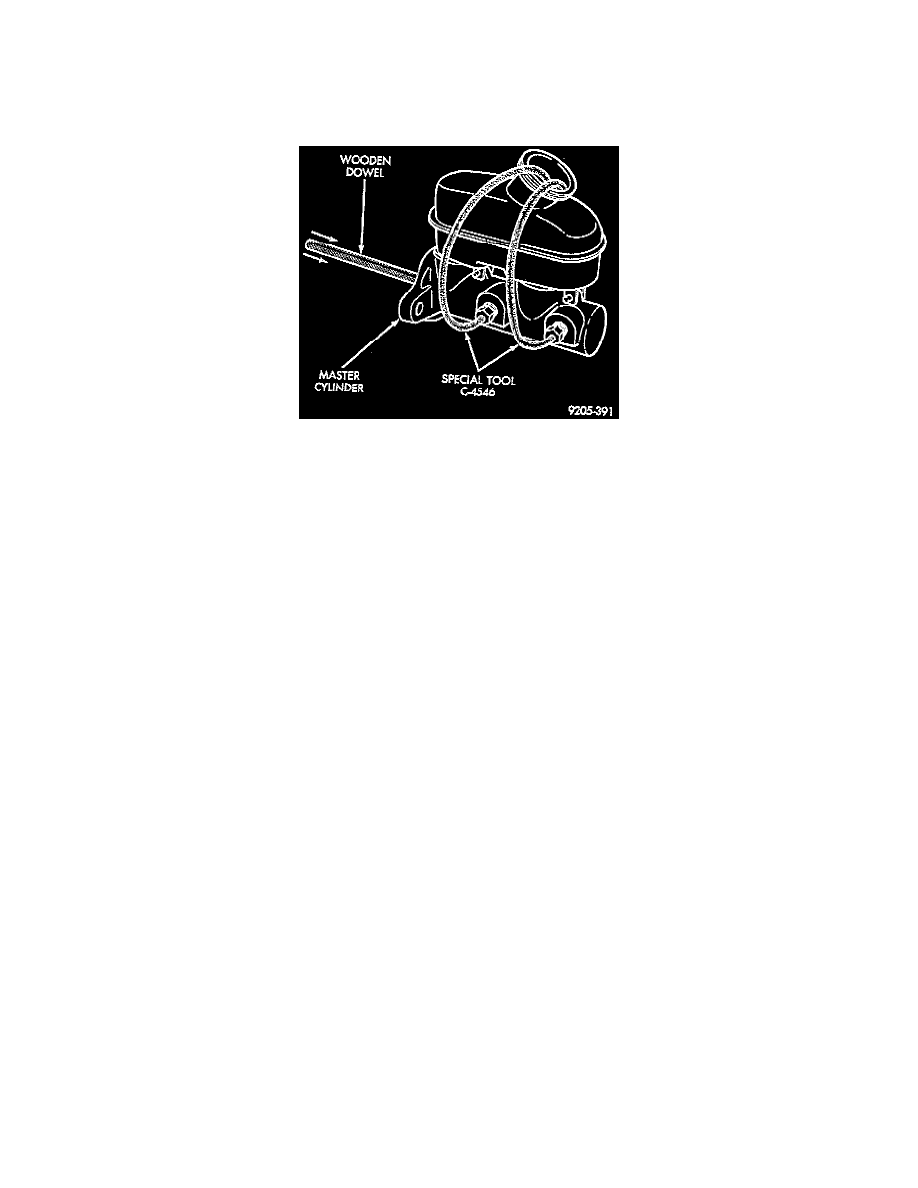
1. Clamp master cylinder in a vise. Attach Bleeding Tubes, Special Tool C-4546, or equivalent to the master cylinder. Position tubes so outlets of
Bleeding Tubes will be below the surface of the brake fluid when reservoir is filled to the proper level.
2. Fill reservoir with brake fluid conforming to DOT 3 specifications such as Mopar or Equivalent.
3. Using a wooden dowel per, Depress master cylinder slowly, and then allow pistons to return to released position. Repeat several times until all air
bubbles are expelled.
4. Remove bleeding tubes from cylinder, plug outlets and install caps.
5. Remove master cylinder from vise and install on power brake vacuum booster.
Manual Bleeding
NOTE: Manual bleeding of air from the hydraulic brake system on this vehicle is not the preferred method. Manual bleeding may not ensure all air is
adequately eliminated from the hydraulic brake fluid.
In the event a pressure bleeder is not available the hydraulic brake system can be manually bled. Use the procedures and steps listed below to ensure a
good and complete bleeding of all air from the brakes hydraulic fluid can be obtained using a manual bleeding procedure. If the brake hydraulic system
is required to be manually bled, follow the specific bleeding sequence for the front and rear calipers as described. Then follow the procedure listed below
for the manual pressurizing and bleeding of the brakes hydraulic system.
1. Pump the brake pedal three or four times and hold it down before the bleeder screw is opened.
2. Then open the bleeder screw at least 1 full turn. When the bleeder screw opens the brake pedal will drop all the way to the floor.
3. Release the brake pedal only after the bleeder screw is closed.
4. Repeat steps 1 through 3, four or five times, at each bleeder screw. This should pass a sufficient amount of fluid to expel all the trapped air from
the brake system. Be sure to monitor the fluid level in the master cylinder, so it stays at a proper level so air will not re-enter the brake system
through the master cylinder.
5. Test drive vehicle to be sure brakes are operating correctly and that pedal is solid.
FRONT BRAKES
When bleeding the front brakes it is necessary that both halves of the caliper assembly be bled individually. The procedure for bleeding the front
caliper is described below, this procedure should be followed to ensure that the caliper assembly is adequately bled.