
Viper RT-10 V10-8.0L VIN E (1997)
Brake Master Cylinder: Service and Repair
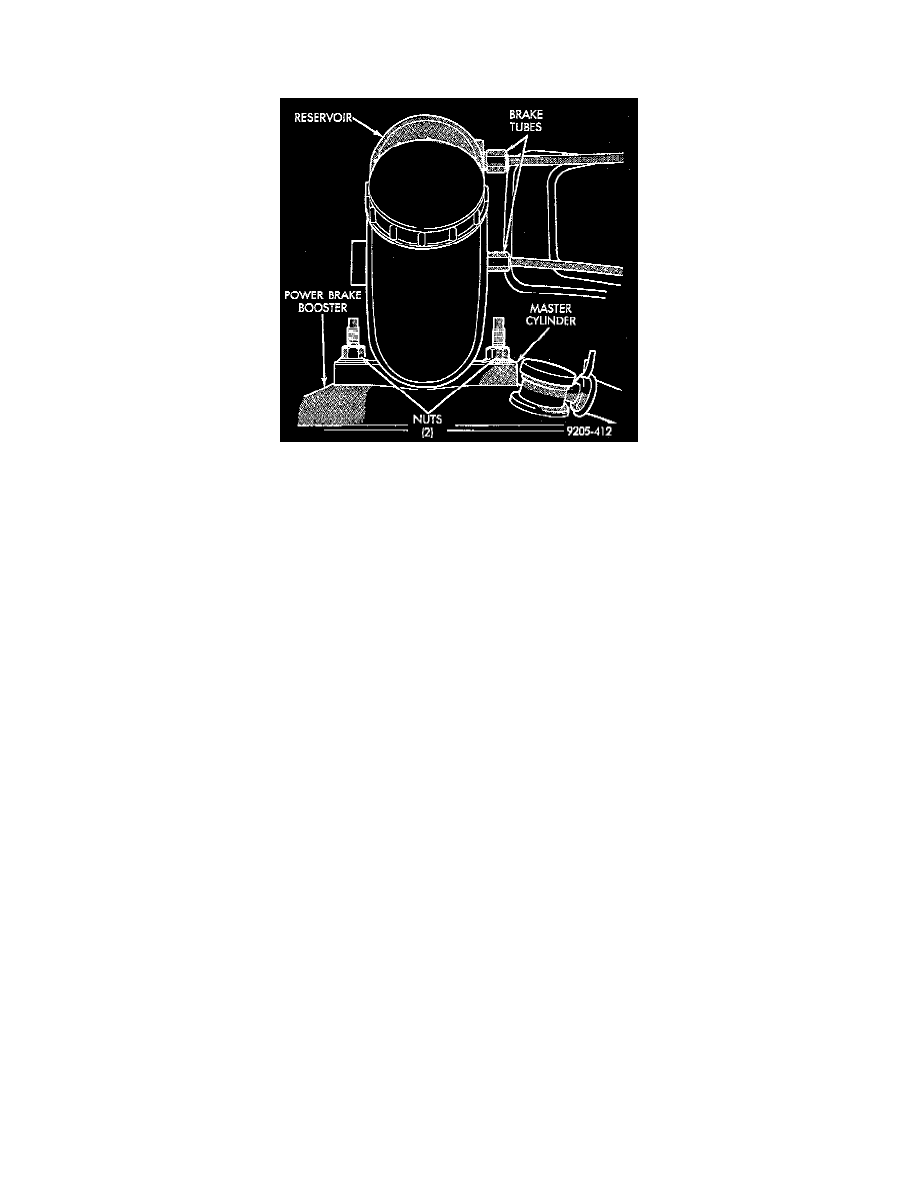
Master Cylinder Replacement
REMOVE
1. Disconnect primary and secondary brake tubes from master cylinder housing. Install plugs at brake tube outlets.
2. Remove 2 nuts attaching master cylinder housing to power brake booster unit.
3. Slide master cylinder straight out and away from vacuum booster.
NOTE: It is recommended to bleed the master cylinder before installation.
INSTALL
NOTE: It is not necessary to bleed the entire hydraulic system after replacing the master cylinder. Providing that the master cylinder has been filled
and bled prior to installation.
1. Bleed the master cylinder assembly prior to mounting it on the power brake booster. See Bleeding Master Cylinder in this section of the service
manual for the proper procedure.
2. Position the master cylinder on the studs of the vacuum booster. Be sure the push rod on the vacuum booster is correctly aligned with the piston of
the master cylinder.
3. Push the master cylinder up against the front of the vacuum booster.
4. Install the master cylinder to vacuum booster mounting nuts and tighten to a torque of 28 Nm (250 inch lbs.).
5. Connect brake tubes to master cylinder primary and secondary ports. Tighten fittings to a torque of 17 Nm (145 inch lbs.).