
Viper SRT-10 V10-8.4L (2008)
Brake Master Cylinder: Removal and Replacement
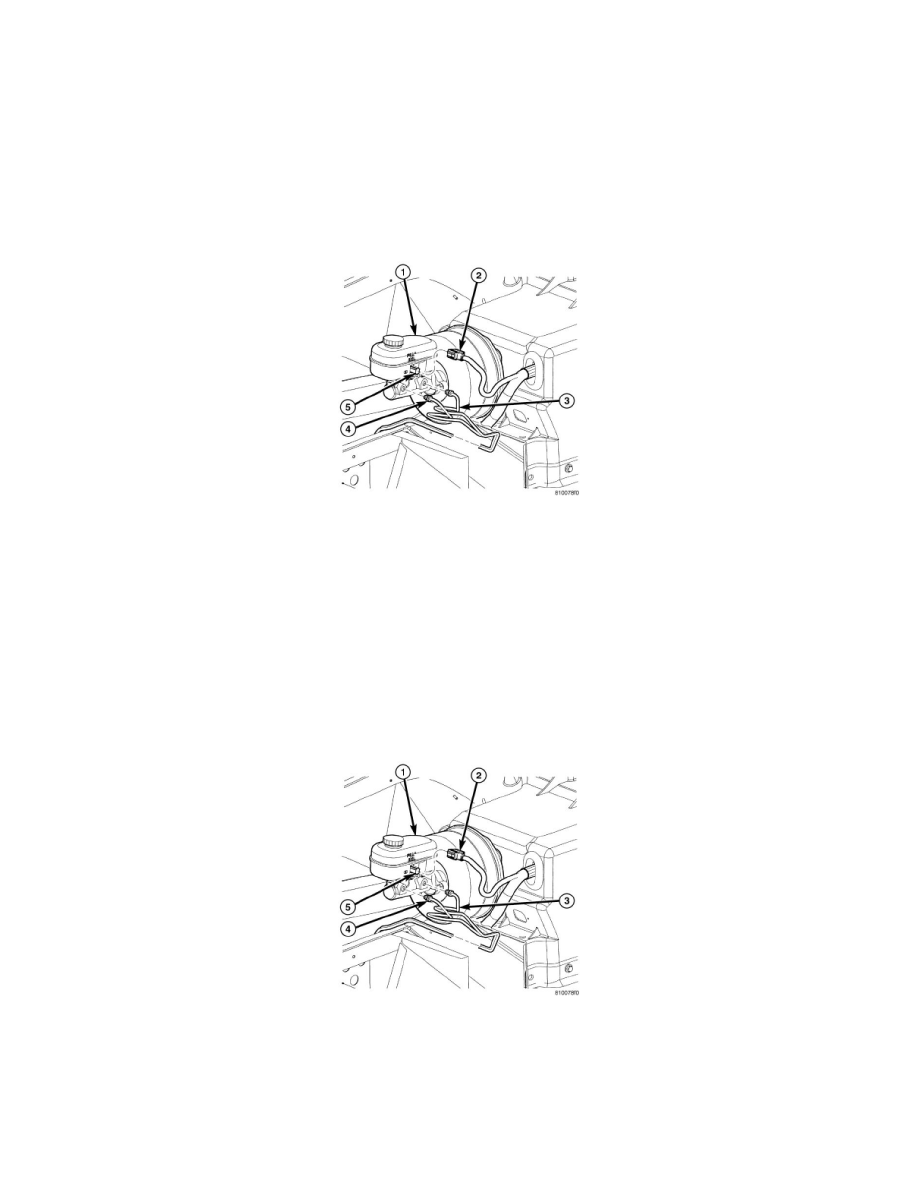
Master Cylinder - Removal
REMOVAL
NOTE: Review all Warnings and Cautions. See: Service Precautions/Brakes - Warning
1. With the engine not running, pump the brake pedal several times to remove all vacuum from power brake booster.
2. Open hood.
3. Disconnect battery negative (-) terminal.
4. Disconnect brake fluid level switch wiring connector (2).
5. Disconnect primary (3) and secondary (4) brake tubes from master cylinder (1). Install plugs at brake tube outlets.
6. Remove two nuts attaching master cylinder to power brake booster.
7. Slide master cylinder straight out and away from booster.
Master Cylinder - Installation
INSTALLATION
1. Bench bleed master cylinder. See: Procedures
2. Wipe face of booster clean where master cylinder seal comes in contact when installed. Do not get any cleaner or debris inside booster.
3. Position master cylinder on mounting studs of booster. Be sure push rod on booster is correctly aligned with piston of master cylinder.
4. Push master cylinder up against front of booster.
5. Install master cylinder mounting nuts and tighten to 28 Nm (250 in. lbs.).
6. Connect primary (3) and secondary (4) brake tubes to master cylinder (1) ports. Tighten tube nuts to 17 Nm (145 in. lbs.).
7. Connect the wiring connector (2) to the brake fluid level switch (5).
8. Connect battery negative terminal.
9. Fill reservoir to proper level with brake fluid.
WARNING: Be certain a firm brake pedal is achieved prior to attempting to operate the vehicle. If a firm brake pedal cannot be
achieved, bleed the brake hydraulic system and check for leaks. See: Brake Bleeding