
Viper SRT-10 V10-8.4L (2008)
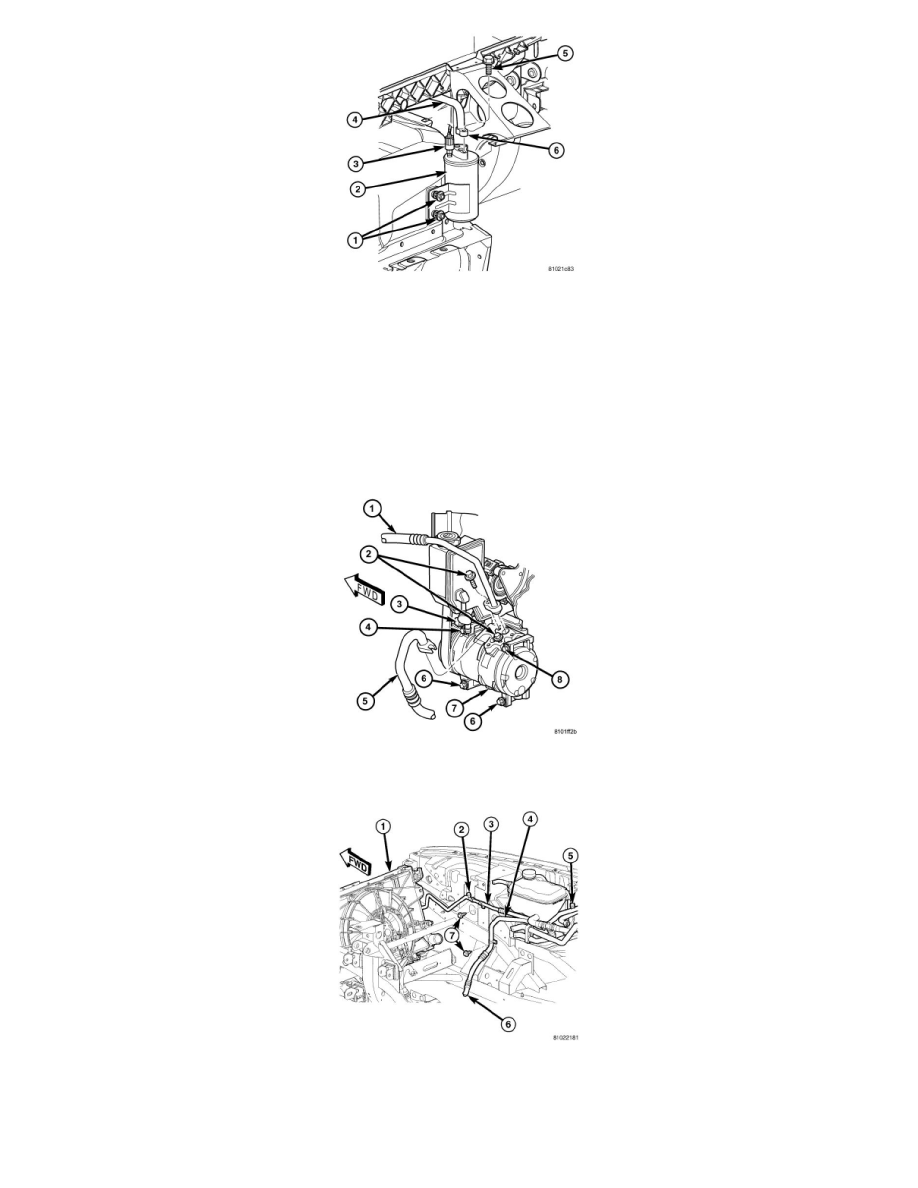
1. Position the front section of the A/C suction line (4) into the engine compartment.
2. Remove the tape or plugs from the opened suction line fittings and the compressor and accumulator ports.
3. Lubricate new rubber O-ring seals with clean refrigerant oil and install them onto the suction line fittings. Use only the specified O-ring seals as
they are made of a special material for the R-134a system. Use only refrigerant oil of the type recommended for the A/C compressor in the vehicle.
4. Connect the front section of the A/C suction line to the A/C accumulator (2).
5. Install the bolt (5) that secures the A/C suction line to the A/C accumulator. Tighten the bolt to 18 Nm (13 ft. lbs.).
6. Install the right inner fender splash shield See: Body and Frame/Fender/Front Fender/Front Fender Liner/Service and Repair/Front Wheelhouse
Splash Shield - Installation.
7. Install the right front wheel See: Maintenance/Wheels and Tires/Service and Repair/Removal and Replacement/Tires and Wheels - Installation.
8. Install the bolts that secure the two suction line brackets to the front of the engine. Tighten the bolts securely.
9. Lower the vehicle.
10. Connect the A/C suction line (5) to the A/C compressor (7).
11. Install the bolt (2) that secures the A/C suction line to the A/C compressor. Tighten the bolt 23 Nm (17 ft. lbs.).
12. Install the bolt (7) that secures the A/C suction line (6) to the right inner front fender (4). Tighten the bolt securely.
13. Reconnect the negative battery cable.
14. Evacuate the refrigerant system See: Service and Repair/Refrigerant System Evacuate.
15. Adjust the refrigerant oil level See: Service and Repair/Refrigerant Oil Level.
16. Charge the refrigerant systemSee: Service and Repair/Refrigerant System Charge.