
Viper SRT-10 V10-8.4L (2008)
8. Remove the instrument panel See: Body and Frame/Interior Moulding / Trim/Dashboard / Instrument Panel/Service and Repair/Instrument Panel -
Removal.
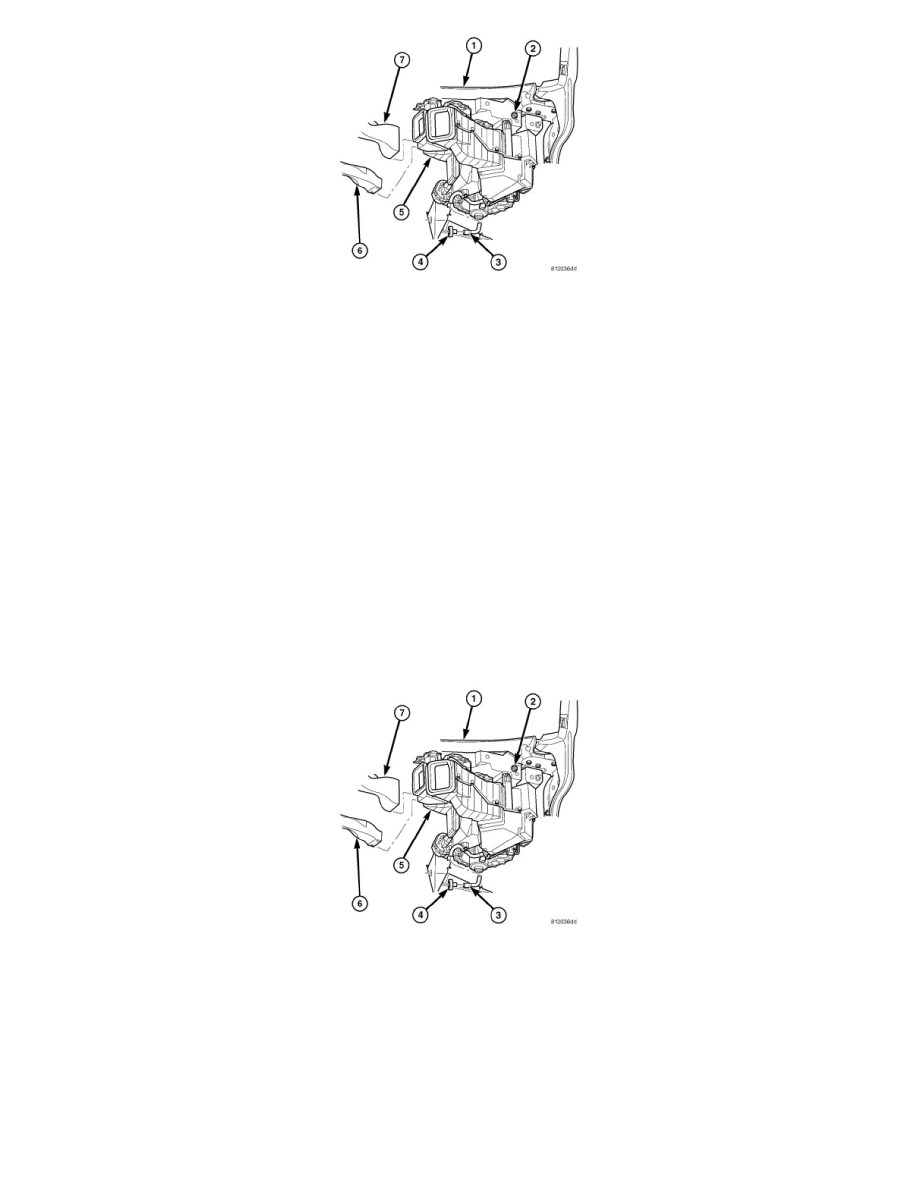
9. Disconnect the evaporator drain tube (3) from the fitting (4) on the dash panel (1) in the passenger compartment.
10. Disconnect the lower defroster duct (7) and the floor distribution duct (6) from the HVAC housing (5) See: Air Duct/Service and Repair/Defroster
Ducts - Removal and See: Air Duct/Service and Repair/Floor Ducts - Removal.
11. Remove the one nut (2) that secures the HVAC housing to the dash panel in the passenger compartment and remove the housing.
HVAC Housing - Installation
INSTALLATION
CAUTION: Be certain to adjust the refrigerant oil level when servicing the A/C refrigerant system See: Service and Repair/Refrigerant Oil
Level. Failure to properly adjust the refrigerant oil level will prevent the A/C system from operating as designed and can cause serious A/C
compressor damage.
NOTE: When replacing multiple A/C system components, refer to the Refrigerant Oil Capacities chart to determine how much oil should be
added to the refrigerant systemSee: Service and Repair/Refrigerant Oil Level.
NOTE: If the A/C evaporator is being replaced, add 60 milliliters (2 fluid ounces) of refrigerant oil to the refrigerant system. Use only
refrigerant oil of the type recommended for the A/C compressor in the vehicle.
NOTE: Replacement of the refrigerant line O-ring seals is required anytime a refrigerant line is disconnected. Failure to replace the rubber
O-ring seals could result in a refrigerant system leak.
1. Position the HVAC housing (5) into the vehicle.
2. Install the one nut (2) that secures the HVAC housing to the dash panel (1) in the passenger compartment. Tighten the nut to 7 Nm (60 in. lbs.).
3. Connect the lower defroster duct (7) and the floor distribution duct (6) to the HVAC housing (5) See: Air Duct/Service and Repair/Defroster Ducts
- Installation and See: Air Duct/Service and Repair/Floor Ducts - Installation.
4. Connect the evaporator drain tube (3) to the fitting (4) located on the dash panel.
5. Install the instrument panel See: Body and Frame/Interior Moulding / Trim/Dashboard / Instrument Panel/Service and Repair/Instrument Panel -
Installation.