
Viper SRT-10 V10-8.4L (2008)
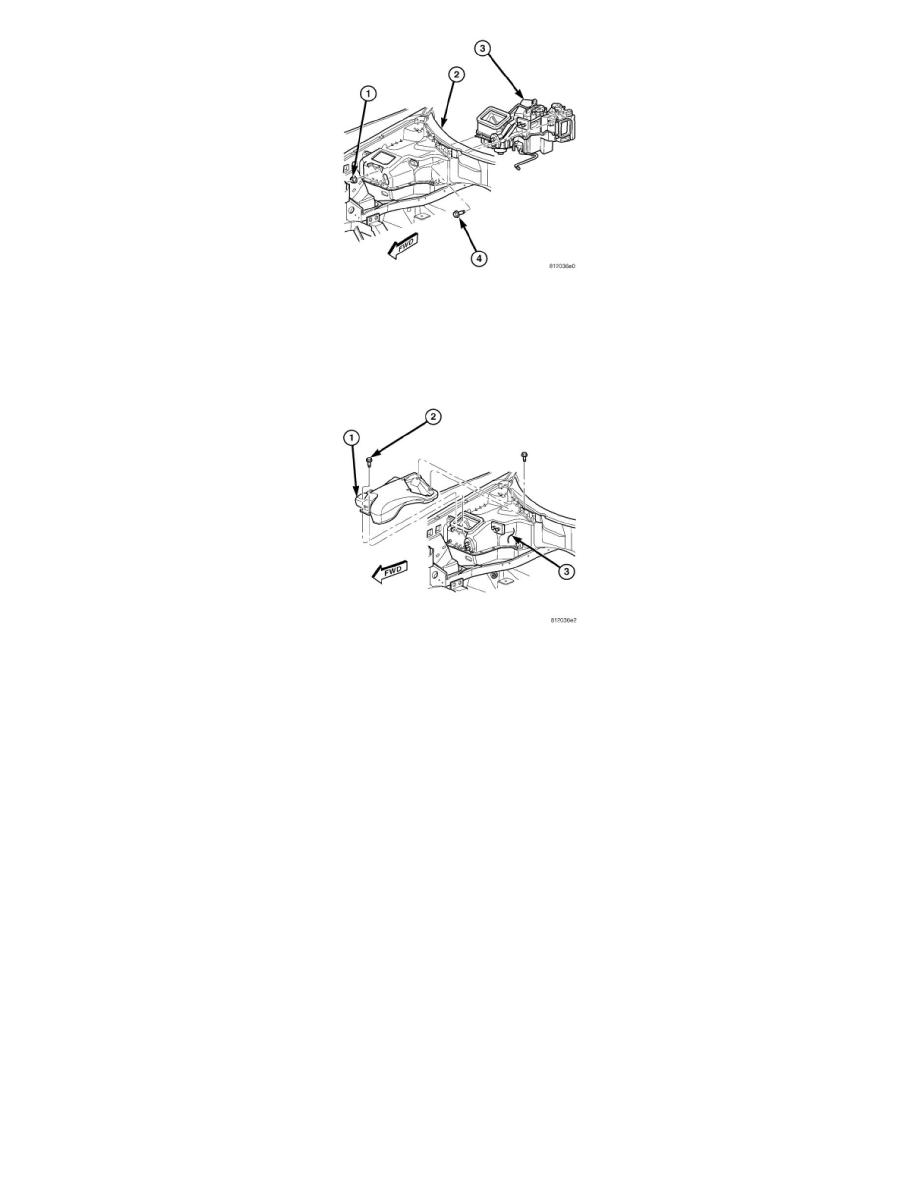
6. Install the two nuts (1) and one bolt (4) that secure the HVAC housing (3) to the dash panel (2) in the passenger compartment. Tighten the nuts
and bolt 7 Nm (60 in. lbs.).
7. Connect the heater hoses to the heater core See: Hose/Line HVAC/Service and Repair/Hose-Heater/Installation.
8. Connect the A/C suction and liquid lines to the A/C evaporator See: Hose/Line HVAC/Service and Repair/A/C Line - Installation and See:
Hose/Line HVAC/Service and Repair/A/C Line - Installation.
9. Position the air inlet plenum (1) into the engine compartment.
10. Install the four screws (2) that secure the air inlet plenum to the dash panel (3). Tighten the screws to 2 Nm (17 in. lbs.).
11. Reconnect the negative battery cable.
12. If the heater core is being replaced, flush the cooling system See: Engine, Cooling and Exhaust/Cooling System/Service and Repair.
13. Refill the engine cooling system See: Engine, Cooling and Exhaust/Cooling System/Service and Repair.
14. Evacuate the refrigerant system See: Service and Repair/Refrigerant System Evacuate.
15. If the A/C evaporator is being replaced, add 60 milliliters (2 fluid ounces) of refrigerant oil to the refrigerant system. When replacing multiple A/C
system components, refer to the Refrigerant Oil Capacities chart to determine how much oil should be added to the refrigerant system See: Service
and Repair/Refrigerant Oil Level. Use only refrigerant oil of the type recommended for the A/C compressor in the vehicle.
16. Charge the refrigerant system See: Service and Repair/Refrigerant System Charge.