
Viper SRT-10 V10-8.4L (2008)
9. Install rear Suspension Height Gage (1) on vehicle. Ensure that gage is correctly attached to inner rim flange at very base of each wheel.
CAUTION: Only apply weight to seat cushions as described in STEP 10. Do not over-ballast the vehicle. If vehicle is over-ballasted, the design
height will be incorrect.
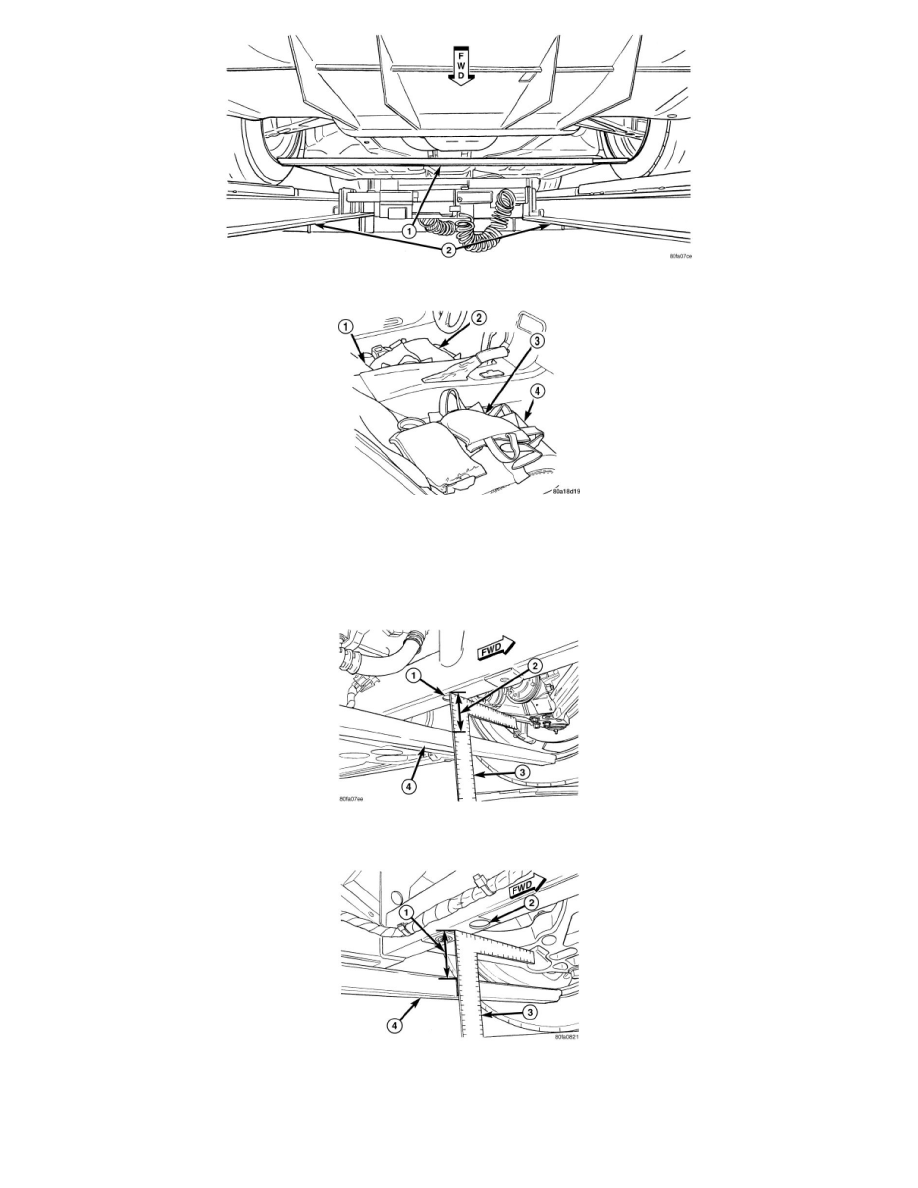
10. Add 150 pounds ballast weight (2, 3) to each seat cushion (1, 4) of vehicle (300 pounds total) to lower vehicle to specified design height.
11. Jounce vehicle several times, each time paying special attention to release vehicle at very bottom of jounce cycle. This is very important in
allowing suspension to settle to correct height.
12. Measure and record vehicle's front design height. Measure distance (2) between top of Suspension Height Gage (4) and each frame rail at forward
edge of Gage. This is the nearest point to the Principle Locating Point (PLP) hole (1).
13. Measure and record vehicle's rear design height. Measure distance (1) between top of Suspension Height Gage (4) and each frame rail at forward
edge of Gage. This is the nearest point to the PLP hole (2).
14. Compare recorded measurements to specifications. See: Specifications
15. If recorded height is higher than specifications, jounce vehicle and remeasure. Before remeasuring design height, be sure to jounce the vehicle
as described in STEP 11. If still above specifications, one or more of following rubber bushing mounted suspension components may not be