
Viper SRT-10 V10-8.4L (2008)
Rear Knuckle Alignment Link: Service and Repair
Installation
INSTALLATION
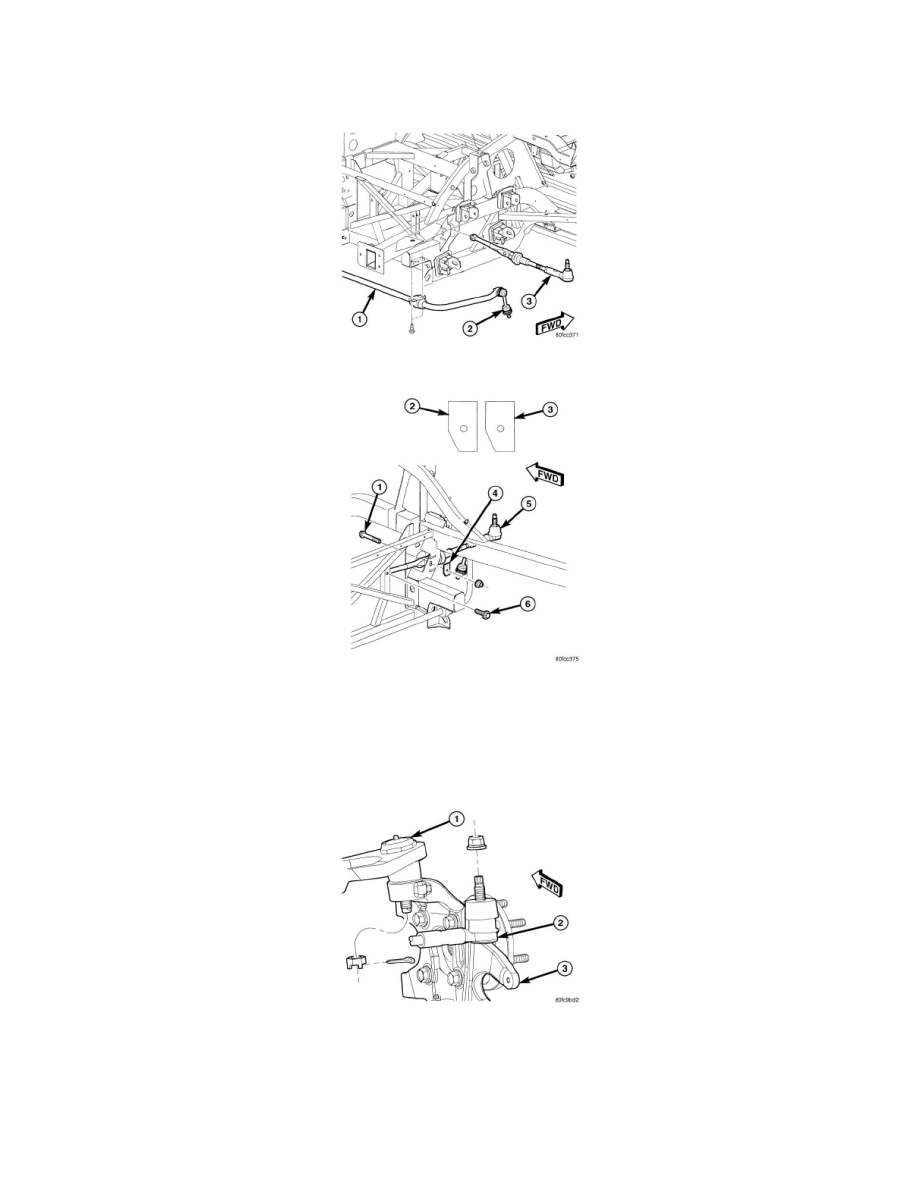
1. Install toe link (3) into its mounting bracket and "U" channel on frame of vehicle.
2. Install toe link inboard mounting bolt (6). Do not tighten bolt at this time.
3. Install original adjustment shim (4) as shown, then install toe link outboard mounting bolt (1) and nut. Make sure shim is correctly orientated (2
or 3) or dynamic toe will be incorrect.
4. Push downward on toe link at outer mounting bracket and while holding toe link in this position, tighten outboard mounting bolt (1) nut to 75 Nm
(55 ft. lbs.).
5. Tighten toe link inboard mounting bolt (1) to 75 Nm (55 ft. lbs.).
6. Install toe link (2) into mounting hole on knuckle (3). Install NEW nut on toe link stud and tighten to 75 Nm (55 ft. lbs.).
7. Install plastic appearance cap on toe link stud.
8. Install the wheel and tire assembly See: Wheels and Tires/Service and Repair/Removal and Replacement/Tires and Wheels - Installation.
Progressively tighten wheel mounting nuts in proper sequence to 1352 Nm (100 ft. lbs.).
9. Lower vehicle.
10. Position vehicle on alignment rack/drive-on hoist.
11. Set vehicle to design height. See: Alignment/Service and Repair