
Viper SRT-10 V10-8.4L (2008)
Stabilizer Link: Service and Repair
Rear Stabilizer Link - Removal
REMOVAL
NOTE: Review all Warnings and Cautions.See: Service Precautions
1. Raise and support vehicle. See: Maintenance.
2. Remove wheel and tire assembly. See: Wheels and Tires/Service and Repair/Removal and Replacement/Tires and Wheels - Removal
3. Remove nut attaching stabilizer link to end of stabilizer bar.
CAUTION: Use only Remover, Special Tool MB991113, to remove link from stabilizer bar. Use of a pickle fork or other alternate tool
will damage seal and ball joint on link.
4. Separate stabilizer bar from link using Remover, Special Tool MB991113.
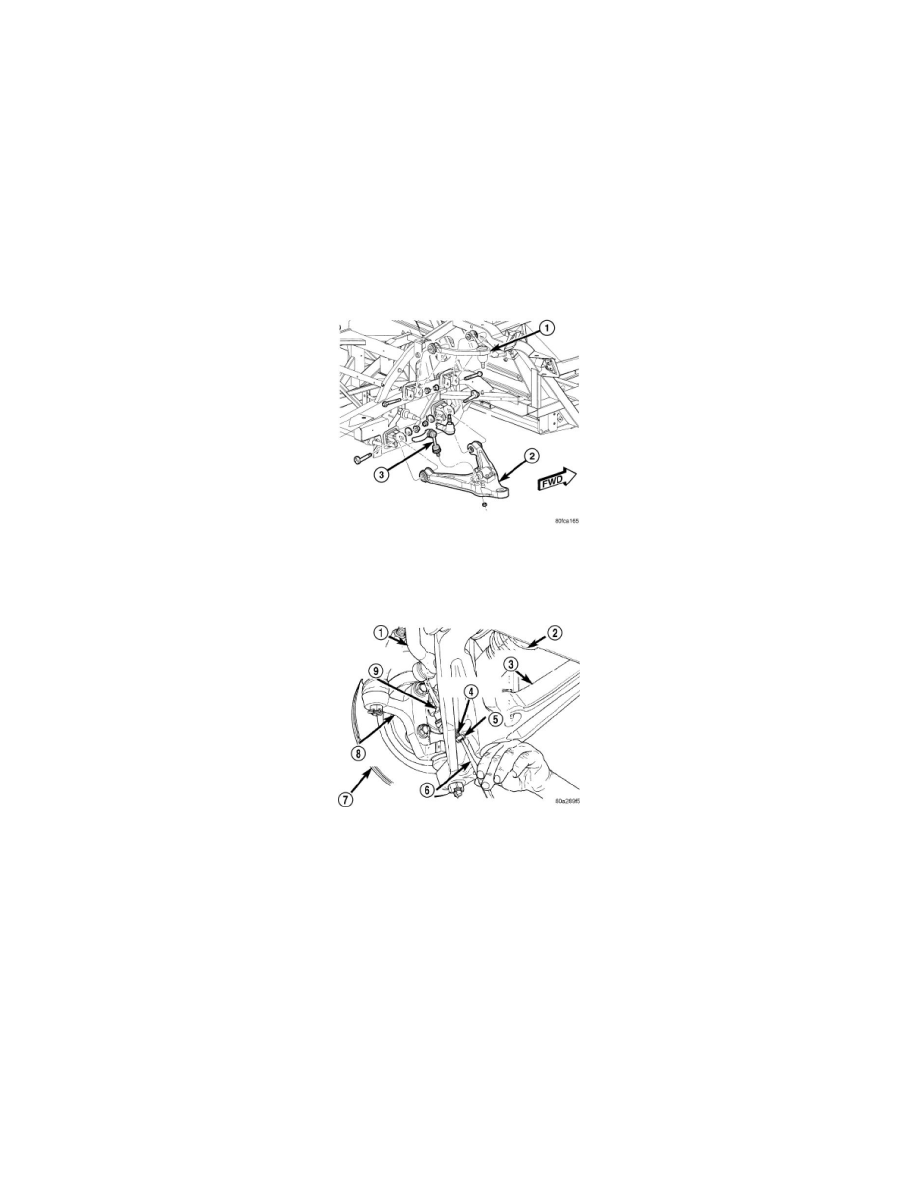
5. Loosen, but do not remove, nut attaching stabilizer link (3) to lower control arm (2). Thread nut to end of stabilizer bar link stud.
CAUTION: The nut must be positioned at the end of the stabilizer link stud when removing the link from the lower control arm. This will
prevent the end of the stud from being damaged when removing it from the lower control arm as described in the following steps.
6. Position center punch (6) in dimple on end of link stud (4).
7. Strike center punch with hammer to remove link stud (4) from lower control arm (3).
8. Remove stabilizer link from vehicle.