
W150 1/2 Ton Pickup 4WD V8-318 5.2L VIN Y FI (1988)
Axle Housing Special Service Tools
1. Using tools D-354-4, D-354-2 and C-367 or equivalents, install inner axle shaft bearing.
2. Using a suitable tool, install inner axle shaft. Install C-lock into axle shaft groove recess.
3. Install shift collar on splined end of inner axle shaft.
4. Install axle shaft bearing and seal.
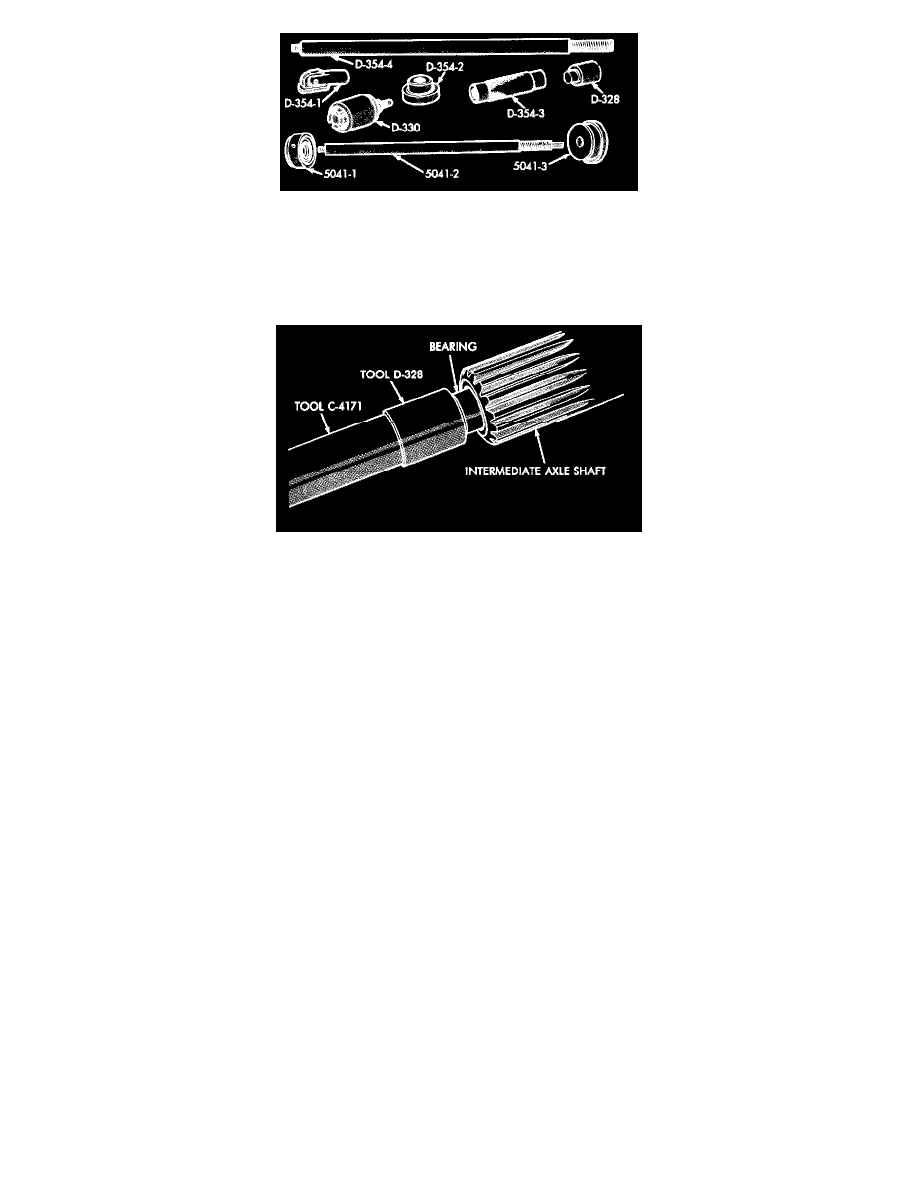
Installing Bearing Into Intermediate Axle Shaft
5. Install needle bearing into intermediate axle shaft using tool D-328 and handle C-4171.
6. Lubricate splined end of intermediate axle shaft liberally and install through inner axle seal. Care must be taken not to damage seal during this
procedure.
7. Install disconnect housing assembly and gasket. Be sure to guide the shift fork into the groove of the shift collar.
8. Install disconnect housing assembly shield and bolts. Tighten bolts to 14 Nm (10 ft. lbs.).
9. Connect vacuum lines and electrical connectors to switch on disconnect housing cover assembly. Wrap clip securely around four-wheel-drive
indicator switch connector.
10. Install splash shield and spindle. Tighten nuts to 34-41 Nm (25-30 ft. lbs.).
11. Install brake disc, outer bearing, nut, washer and locknut on spindle assembly.
12. Install spring retainer, spring, drive gear and drive gear snap ring.
13. Apply RTV sealant to seating edge of grease cap, then install the cap.
14. Position inboard brake shoe on adapter with shoe flanges in adapter keyways. Slowly slide caliper assembly into position in adapter and over brake
disc. Align caliper on keyways of adapter. Be careful not to pull the dust boot from its grooves as the piston and boot slide over the inboard
shoe.
15. Install anti-rattle springs and retaining clips. Tighten to 20 Nm (180 in. lbs.). The inboard shoe anti-rattle spring must always be installed on top
of the retainer spring plate.
16. Remove any gasket material from differential cover and carrier face, thoroughly clean surface with mineral spirits or equivalent and dry
completely. Apply a 1/16 to 3/32 inch bead of suitable sealant along bolt circle of cover.
17. Allow sealant to cure while cleaning carrier gasket flange with mineral spirits or equivalent. Dry surface completely. Install cover on axle and
tighten attaching bolts to 41-54 Nm (30-40 ft. lbs.). If for any reason the cover is not installed within 20 minutes after applying sealant, sealant
should be removed and a new bead applied.
18. Remove fill plug and fill axle with suitable lubricant.
19. Install tire and wheel assembly.
Right Axle Shaft