
W350 1 Ton Pickup 4WD V8-360 5.9L VIN 1 4-bbl (1988)
Brake Master Cylinder: Service and Repair
Master Cylinder Bleeding
Bench Bleeding
For additional information see Bench Bleeding Notes. See: Fundamentals and Basics
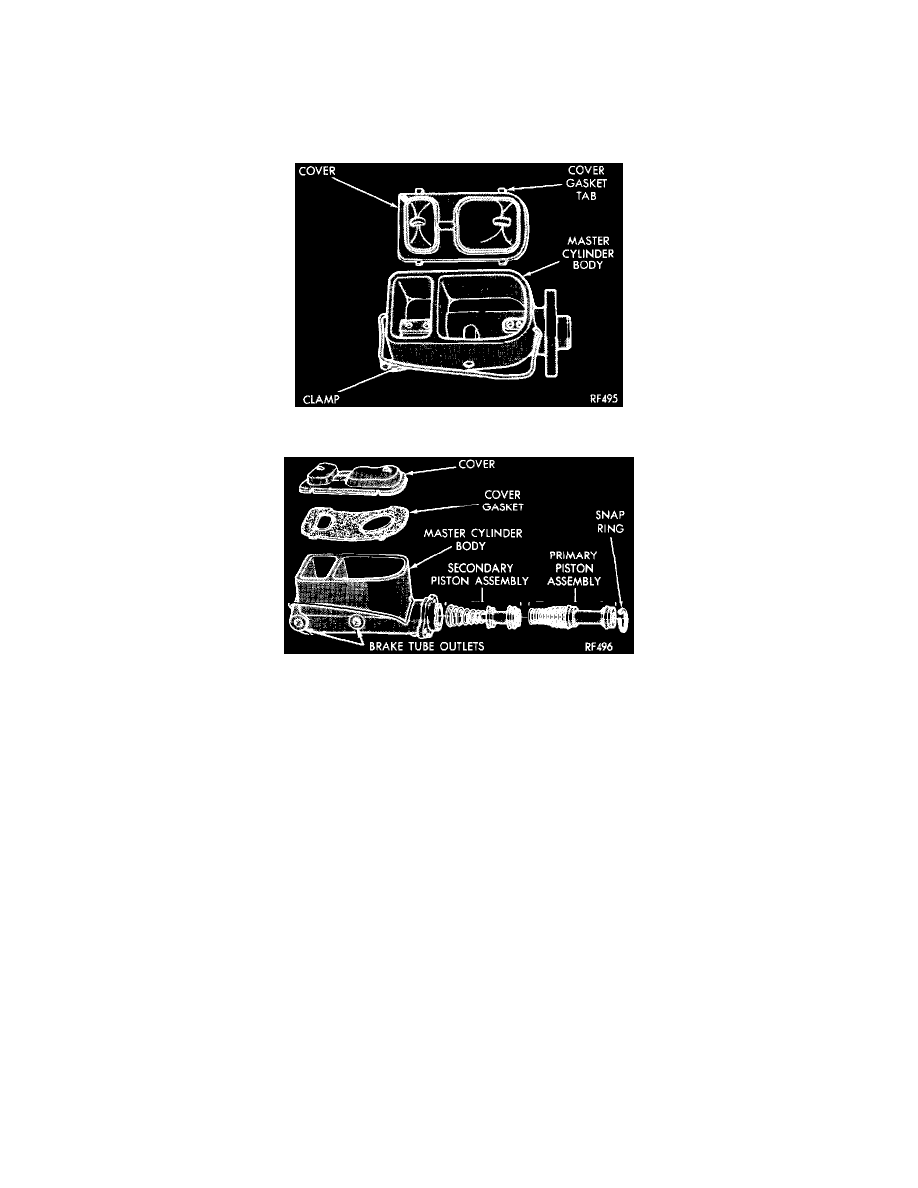
Fig 2 Cast Iron Master Cylinder (Top View)
Fig 3 Cast Iron Master Cylinder (Exploded View)
NOTE: Before installing the master cylinder on the vehicle it must be bled on the bench using the following procedure:
1. Clamp master cylinder in vise and attach bleeding tubes.
2. Fill both reservoirs with approved brake fluid.
3. Using a brass rod or wooden dowel, depress push rod slowly and then allow pistons to return under pressure of springs.
4. Repeat several times until all air bubbles are expelled.
5. Remove bleeding tubes from cylinder, plug outlets and install gasket and cover.
6. Install cover clamp.
7. Remove from vise and install master cylinder on vehicle.
Pressure Bleeding
WITHOUT ABS
1. Clean all dirt and foreign material from the cover of the master cylinder to prevent dirt from falling into the master cylinder reservoir when the
cover is removed.
NOTE: Using the one-man Bleeder Tank C-3496B (with adaptor C-4578) provides a convenient means for pressurizing the hydraulic system for
bleeding. Follow the manufacturers instructions in the use of the bleeder tools.
NOTE: Complete bleeding of dual master cylinder is important before performing this procedure!
2. Starting with the right rear wheel, clean all dirt from the bleeder valve.
3. Place bleeder hose on the bleeder valve and insert the other end of the bleeder hose into a clear jar half filled with clean brake fluid. This will
permit the observation of air bubbles as they are being expelled from the hydraulic system and also prevent air from being drawn back into the
system.