
W350 1 Ton Pickup 4WD V8-360 5.9L VIN 1 4-bbl (1988)
Drive Belt Tensioner: Service and Repair
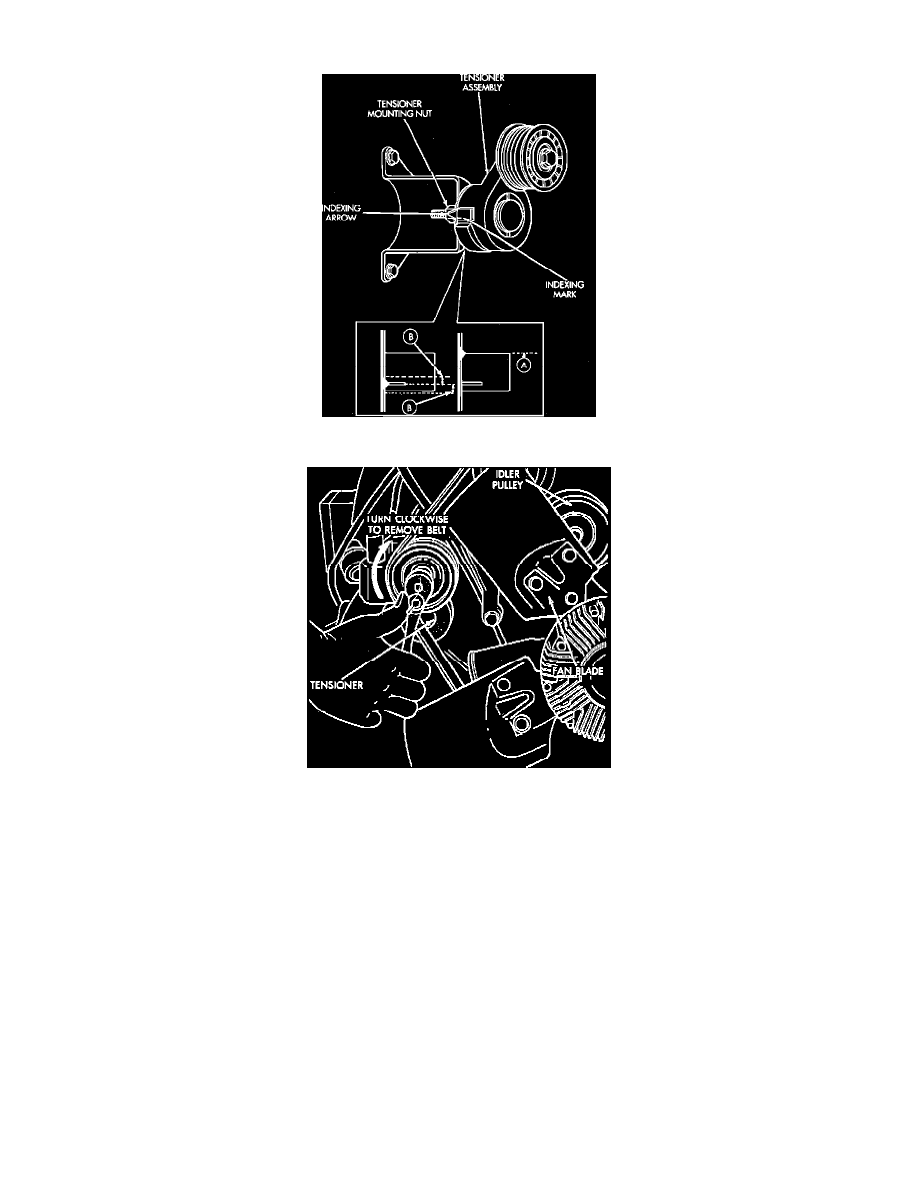
Fig. 40 Automatic Belt Tensioner Assembly
Fig. 41 Automatic Belt Tensioner Replacement
The automatic tensioner is equipped with an indexing arrow on the back of the tensioner housing. If a new belt is being installed, the arrow must be
within approximately 1/8 inch of the point B indexing mark. If an old belt is being used, it must not pass the point marked A, Fig. 40.
1.
Attach a suitable wrench to the mounting bolt of the automatic tensioner pulley bolt, Fig. 41.
2.
Remove drive belt refer to BELT.
3.
Disconnect wiring and secondary cable from ignition coil.
4.
Remove ignition coil from mounting bracket.
5.
Remove tensioner assembly from mounting bracket.
6.
Remove pulley bolt and remove pulley from tensioner.
7.
Reverse procedure to install, aligning indexing tab located on back of tensioner to slot in mounting bracket, Fig. 40.