
W 250 Pickup L6-359 5.9L DSL (1989)
Evaporator Core: Service and Repair
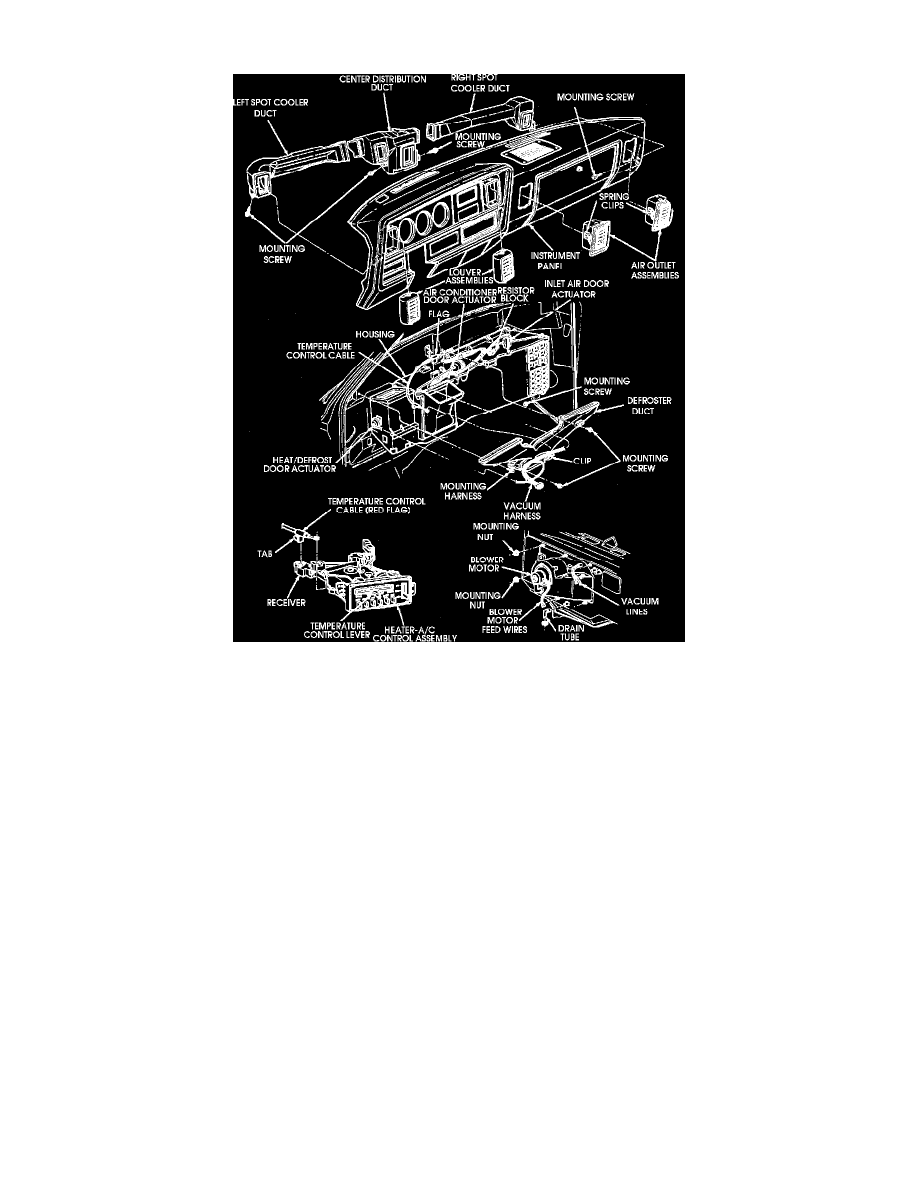
Fig. 20 Heater Assembly. With A/C
1. Disconnect battery ground cable.
2. Discharge A/C system and disconnect refrigerant and heater lines from unit.
3. Move shift levers away from dash.
4. Remove right side cowl trim panel, if equipped.
5. Remove 4 screws at base and remove glove box.
6. Remove brace through glove box opening and remove ashtray.
7. Remove right half of lower reinforcement (7 screws to instrument panel and 1 to cowl side of trim panel).
8. Disconnect radio ground strap.
9. Remove right upper air duct by removing mounting screw and pulling duct out through glove box opening.
10. Remove instrument panel center brace and right instrument panel cluster pivot bolt.
11. Remove instrument panel cluster, disconnect shift indicator cable and lower steering column.
12. Remove steering column studs and radio.
13. Remove scoop connecting heater to center distribution duct (2 screws).
14. Remove center distribution duct by pulling bottom of dash out to gain clearance.
15. Remove floor air distribution duct.
16. Disconnect temperature control cable through glove box.
17. Remove 7 retaining nuts from firewall and screw that retains assembly to cowl side sheet metal.
18. Flex dash out and remove heater assembly.
19. Remove nuts from door arms and remove door arms.
20. Remove 7 screws to remove cover from housing.
21. Remove evaporator core.
22. Reverse procedure to install.