
Concord L6-258 4.2L VIN C 2-bbl (1982)
Crankshaft Main Bearing Seal: Service and Repair
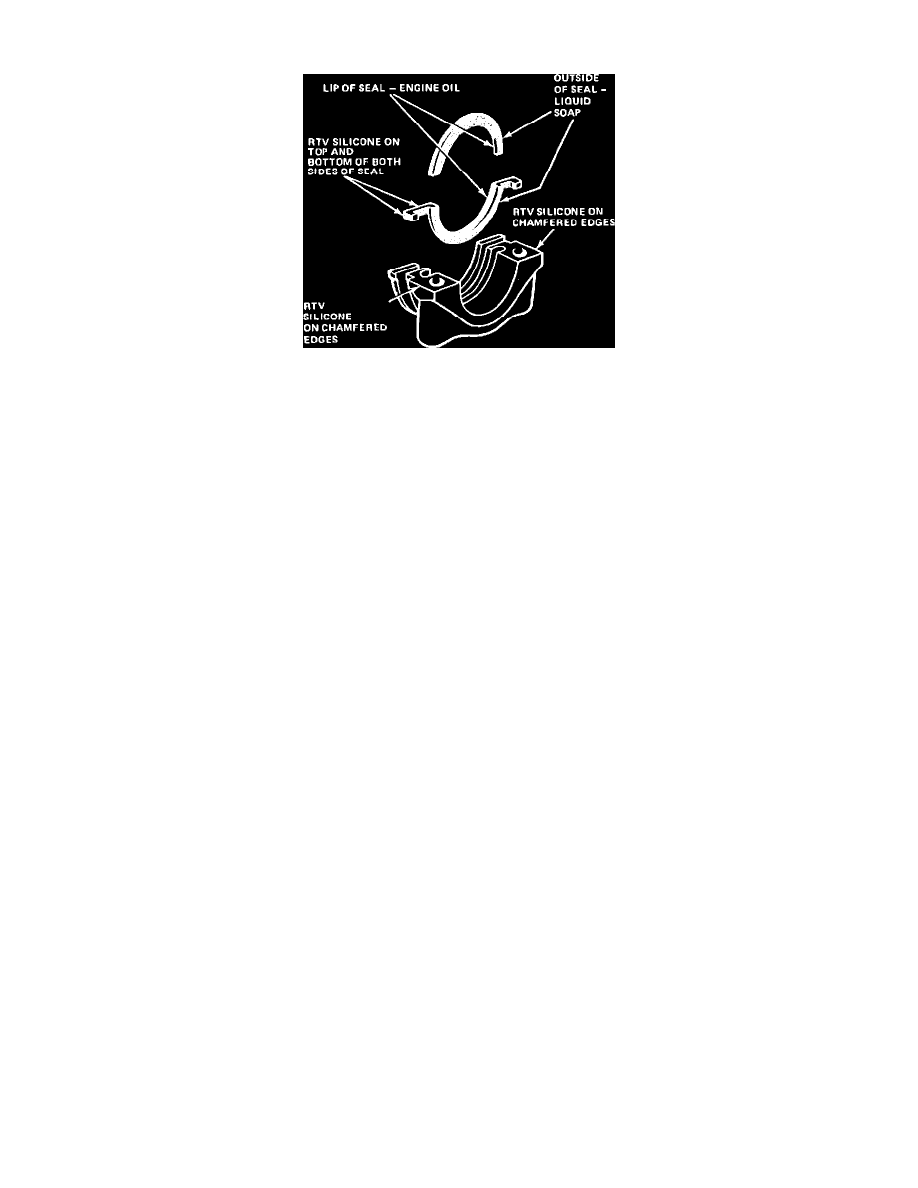
Fig. 10 Rear main bearing sealing
1.
To replace the seal, Fig. 10, remove oil pan and scrape oil pan surfaces clean.
2.
Remove rear main bearing cap.
3.
Remove and discard old seals.
4.
Clean cap thoroughly.
5.
Loosen all remaining main bearing capscrews.
6.
With a brass drift and hammer, tap upper seal until sufficient seal is protruding to permit pulling seal out completely with pliers.
7.
Wipe seal surface of crankshaft clean, then oil lightly.
8.
Coat back surface of upper seal with soap, and lip of seal with engine oil.
9.
Install upper seal into cylinder block. Lip of seal must face to front of engine.
10.
Coat cap and cylinder block mating surface portion of seal with RTV Silicone or equivalent, being careful not to apply sealer on lip of seal.
11.
Coat back surface of lower seal with soap, and lip of seal with No. 40 engine oil. Place into cap, seating seal firmly into seal recess in cap.
12.
Place RTV Silicone or equivalent on both chamfered edges of rear main bearing cap.
13.
Install main bearings and install cap. Tighten all caps to correct torque as listed in the Engine Tightening Specifications table.
14.
Cement oil pan gasket to cylinder block with tongue of gasket at each end coated with RTV Silicone or equivalent before installing into rear main
bearing cap at joint of tongue and oil pan front neoprene seal.
15.
Coat oil pan rear seal with soap. Place into recess of rear main bearing cap, making certain seal is firmly and evenly seated.
16.
Install oil pan and tighten drain plug securely.