
Concord L6-258 4.2L VIN C 2-bbl (1982)
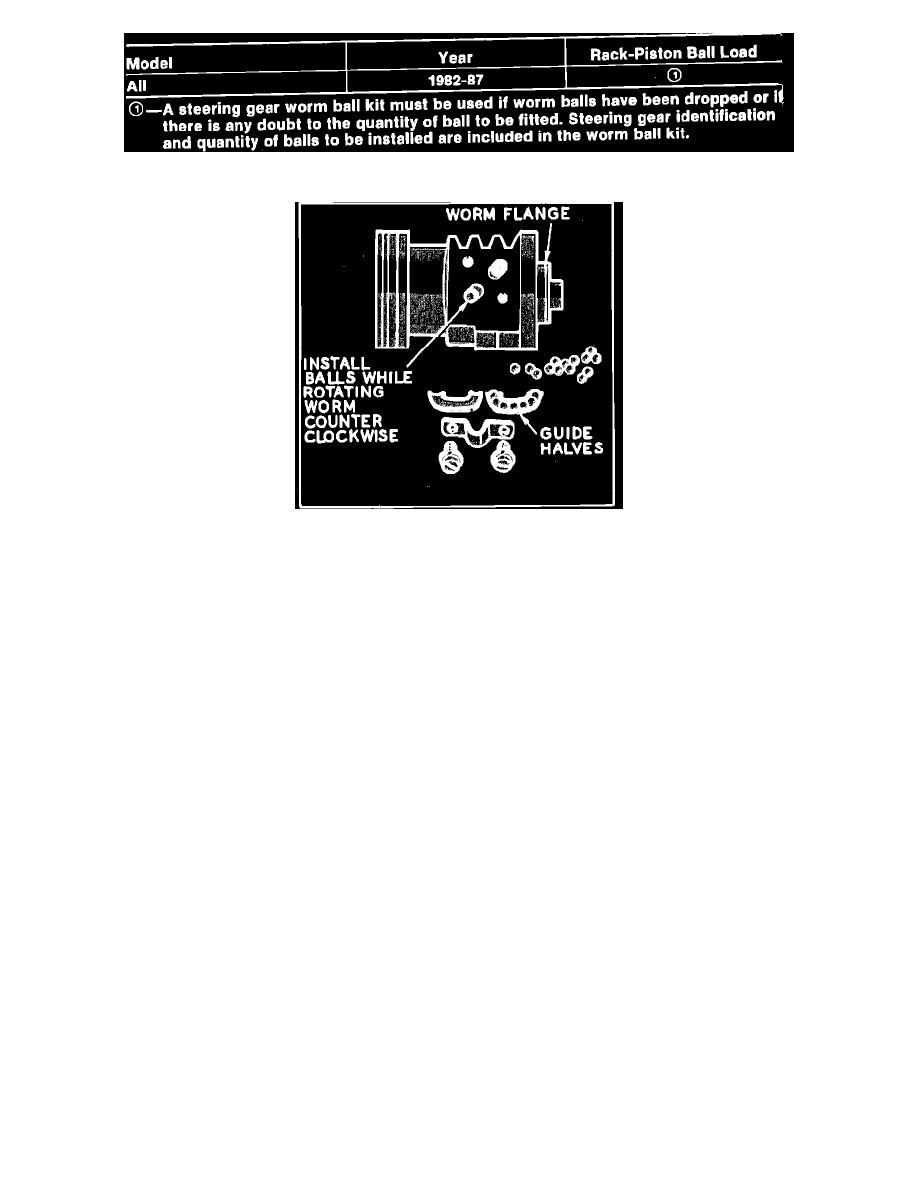
Fig. 20 Rack-Piston ball specification chart
Fig. 21 Loading rack-piston nut
1. Lubricate and install new ring back-up seal and Teflon piston ring on rack-piston nut, being careful ring and seal do not twist during installation.
2. Insert worm into rack-piston nut to bearing shoulder.
3. Align ball return guide holes with worm groove. Load specified number of balls into guide hole nearest the Teflon piston ring while slowly
rotating worm to left, feeding balls through circuit. If balls are installed properly, the worm should turn out of the rack-piston nut.
4. Fill one-half of ball return guide with remaining balls. Place other guide over balls and plug each end with heavy grease to prevent balls from
falling out when installing guides into rack-piston nut.
5. Insert guides into guide holes of rack-piston nut. Make sure black ball in guide is installed next to white ball in rack piston. Guides should fit
loosely.
Install Stub Shaft Flange
Rotate stub shaft slightly over two complete turns from either extreme right or left turn. This will place gear in center position, which will place torsion
bar pin through stub shaft in a straight up and down position. Rotate flange so the bolt with the large head is in top position. Visually align the block
tooth in the serrations of the flange with the torsion bar pin and install flange on stub shaft. Tighten flange clamping bolt.
Installing Stub Shaft