
Eagle L4-150 2.5L (1983)
Turn Signal Switch: Service and Repair
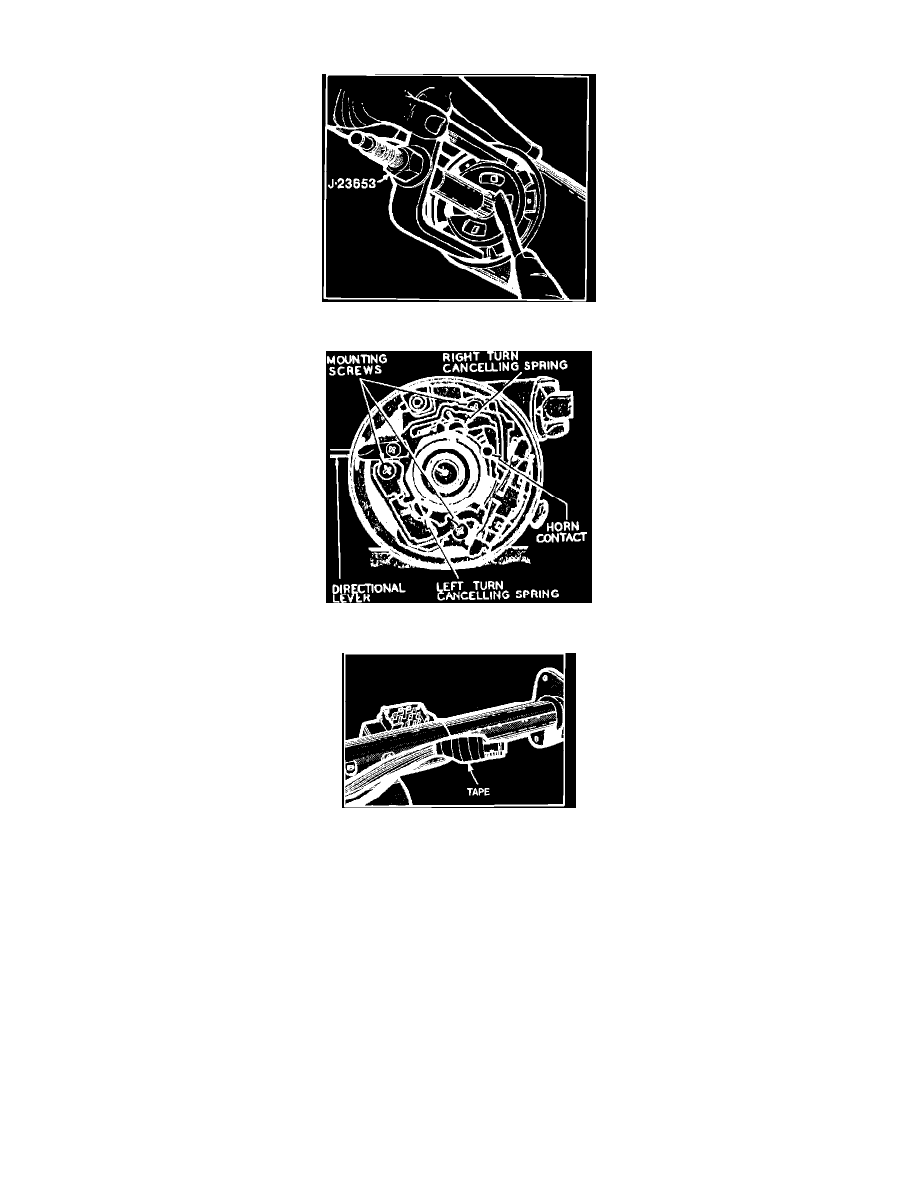
Compressing lock plate & removing retaining ring
Turn signal switch
Taping turn signal connector & wires
1. Disconnect battery ground cable, then remove steering wheel.
2. Using lock plate compressor tool No. J-23653, depress lock plate and remove and pry round wire snap ring from steering shaft groove. On some
models, the steering shaft has metric threads and is identified by a blue colored steering wheel nut and/or a groove cut into the steering shaft
splines. If shaft has metric threads, replace compressor forcing screw with metric forcing screw J-23653-4 to depress lock plate.
3. Remove lock plate compressor tool, snap ring, lock plate and directional signal canceling cam from steering shaft.
4. Place directional signal lever in the right turn position, then remove lever and directional signal switch mounting screws.
5. Depress hazard warning switch and remove button by turning in counterclockwise direction.
6. Remove directional signal switch wiring harness connector from mounting bracket on right side of lower column.
7. Remove steering tube cover.
8. Remove steering column lower bracket bolts, then loosen steering column bracket nuts.
9. Fold connector over harness and wrap with tape to avoid snagging. Raise column and pull harness out of column. On models with tilt column,
raise column and remove plastic wiring harness protector.
10.
On Concord models, with column shift, automatic transmission, use stiff wire, such as a paper clip, to depress lock tab which retains shift quadrant
light wire to wiring harness connector. The shift quadrant light wire is the gray wire connected to terminal D on wiring harness connector.
11.
Reverse procedure to install.