
Medallion L4-2165cc 2.2L (1988)
8805 - Trim Corrections
^
Loose Windshield Moldings -- All Models
Check for potential looseness by pulling at the molding across the top of the windshield. If the molding lifts out of its channel, correct as follows:
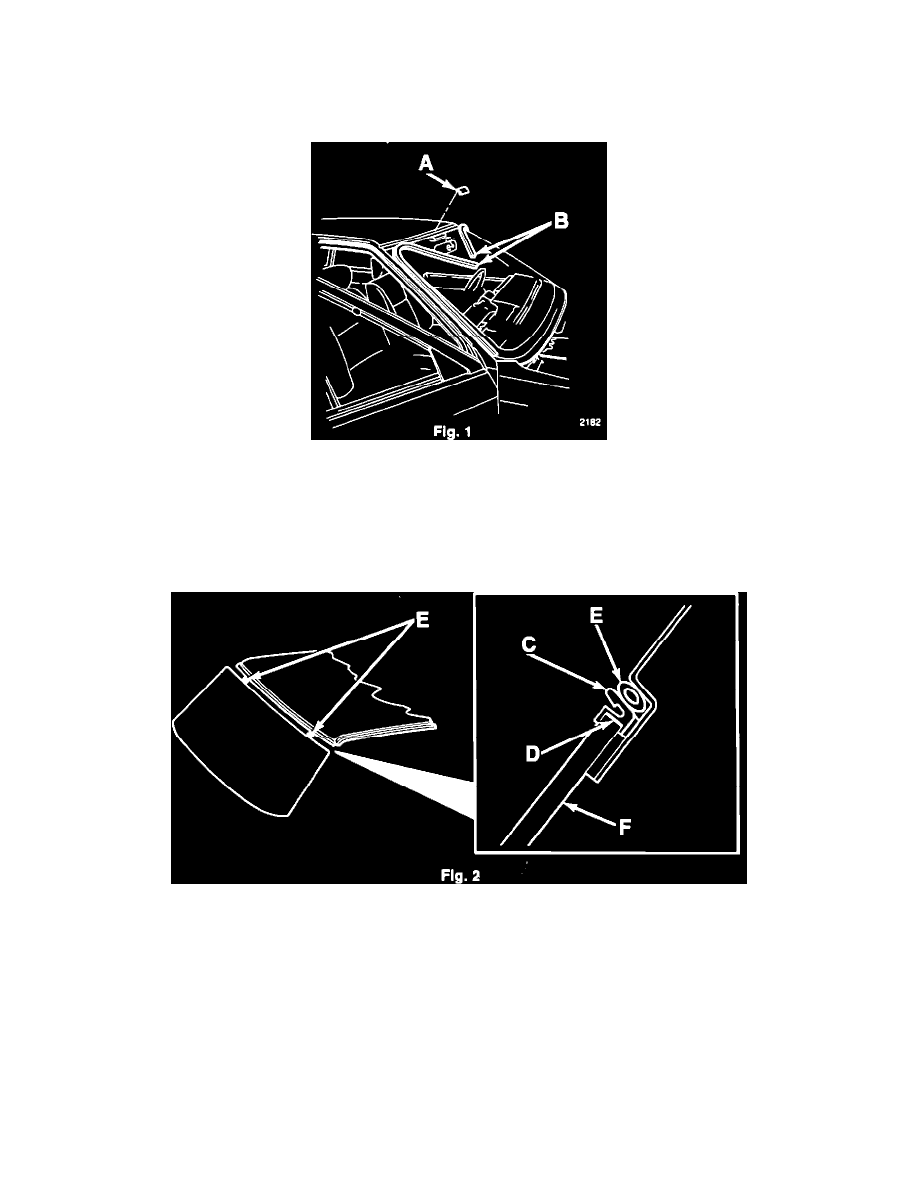
FIGURE 1
1.
Remove the clip (A of Figure 1) from the center of the upper windshield trim molding.
2.
Disconnect the left and right upper windshield moldings (B, Figure 1).
3.
Move the upper windshield moldings down. Move them away from the upper windshield flange as shown, (Figure 1).
FIGURE 2
4.
Remove the secondary molding (C of Figure 2) which holds the upper windshield molding in place.
5.
Carefully clean the upper edge of the windshield (F, Figure 2). Use 3M Cleaner, P/N 08984, or equivalent.
8805 - Trim Corrections
^
Loose Windshield Moldings -- All Models (Continued)
6.
With masking tape, mask off the upper edge of the roof panel at the windshield flange.
7.
Apply 3M Super Fast Urethane, P/N 08609, to the upper edge of the windshield (D, Figure 2).
8.
Install the secondary molding on the windshield.