
Medallion L4-2165cc 2.2L (1988)
Brake Drum: Service and Repair
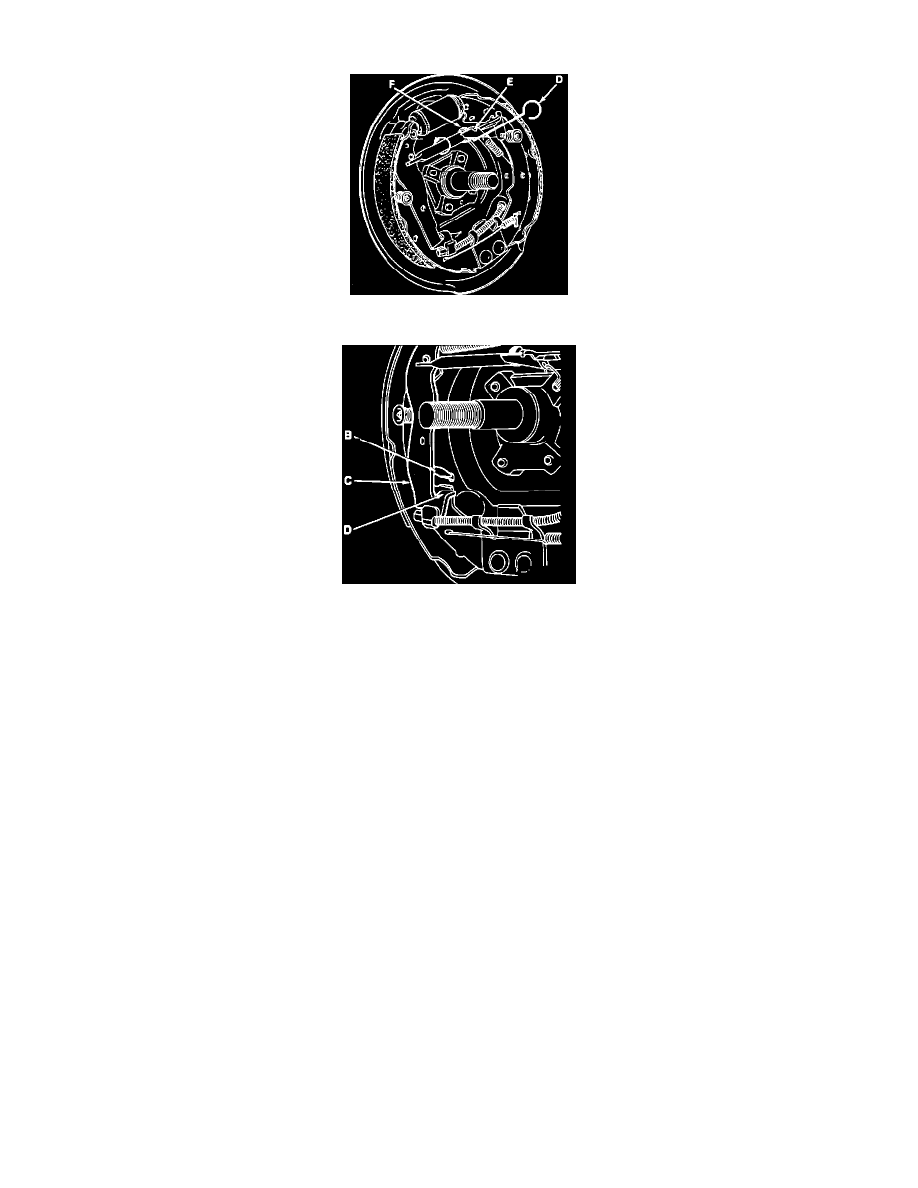
Fig. 1 Removing Brake Drum
Fig. 2 Removing Brake Drum With Screwdriver
Both rear brake drum assemblies must have the same inside diameter. If one brake drum is resurfaced, the other brake drum must also be
resurfaced. Maximum inside diameter after machining (resurfacing) should be 9.035 inch. Also, do not allow brake dust to fly. Do not use
compressed air or dry brush to clean components. Use approved breathing equipment and a water dampened cloth to clean or remove dirt and
dust from brake components.
1.
Raise and support vehicle.
2.
Remove tire and wheel assemblies.
3.
Remove plastic dust cover.
4.
Remove the two machine screws and rear brake drum. If brake drum cannot be removed, back off the brake self adjuster. Fabricate a small
hook from a piece of coat hanger or heavy wire. Insert the hook tool through one of the bolt hole openings and pull slightly on self
adjuster lever while rotating star wheel adjuster using a suitable screwdriver in direction of arrow shown. If brake drum still cannot be
removed, loosen the parking brake cables and remove plastic access plug on the rear of the brake backing plate. Insert a suitable
screwdriver (B) through access hole and push outward and inward on the parking brake lever (C) so tang (D) will clear the rear brake
shoe. This will separate the self adjuster star wheel mechanism from the parking brake lever (C).
5.
Reverse procedure to install.