
Medallion L4-2165cc 2.2L (1988)
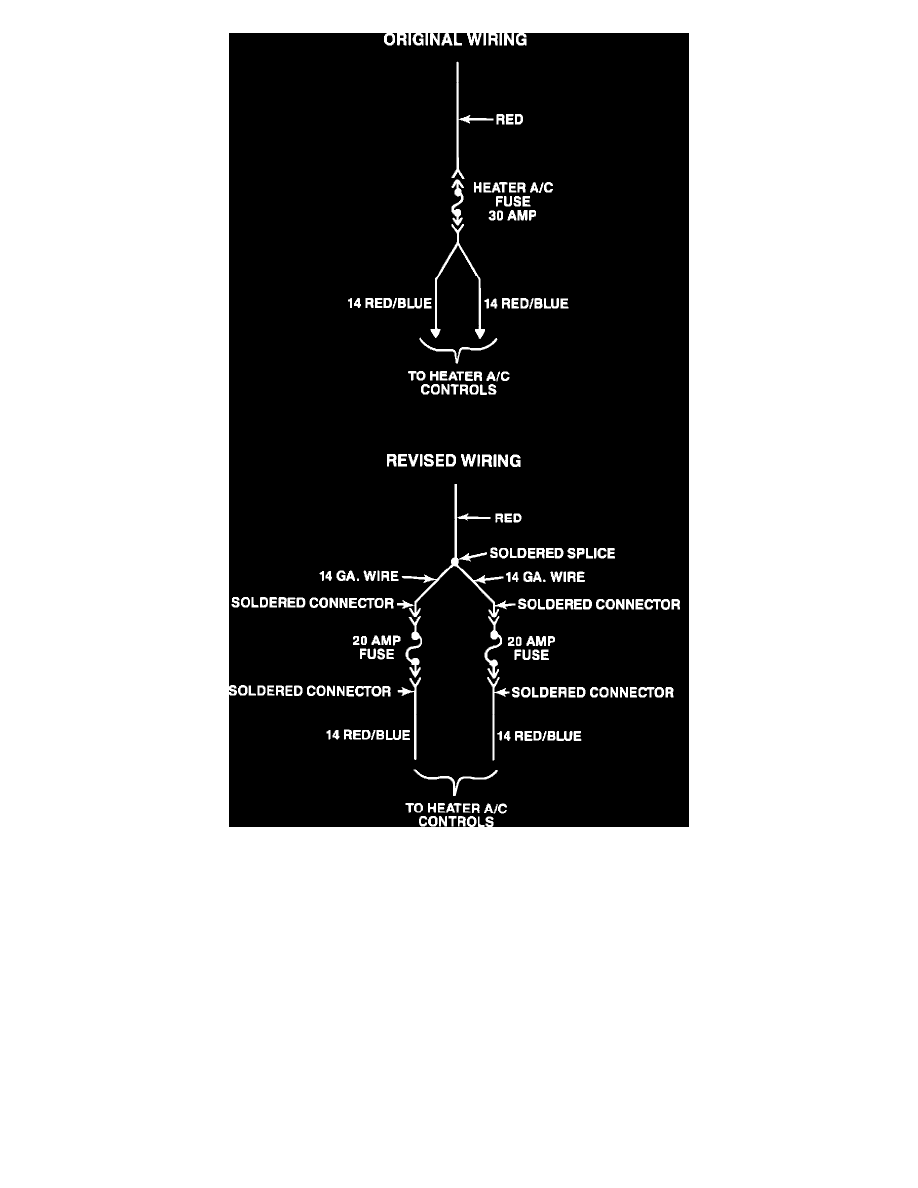
FIGURE 2
5.
Strip the insulation and solder splice the two, three-inch sections of 14 gauge red wire to the red B+ wire previously cut from the fuse holder.
Slide the piece of heat shrink tubing over the splice and by using a heat gun, shrink the tubing over the splice. Solder two PN T1997040 fuse
holders on the other end of these three inch pieces of red wire (Figure 2).
Strip the insulation and solder PN T1997040 fuse holders to the end of the two red-with-blue-tracer wires previously removed from the protected side of
the fuse holder (Figure 2).
6.
Install the wires with the soldered-on fuse holders into the applicable fuse block or the fuse block extension. Make sure that the fuse holders are
fully seated and locked in place to prevent them from pushing out when the fuses are installed.
7.
Install the fuse block back into the car and install the two 20 amp fuses.
8.
Connect the negative battery cable.
9.
Check for proper operation of the heater-a/c blower motor.
POLICY:
Reimbursable within the provisions of the warranty.