
Medallion L4-2165cc 2.2L (1988)
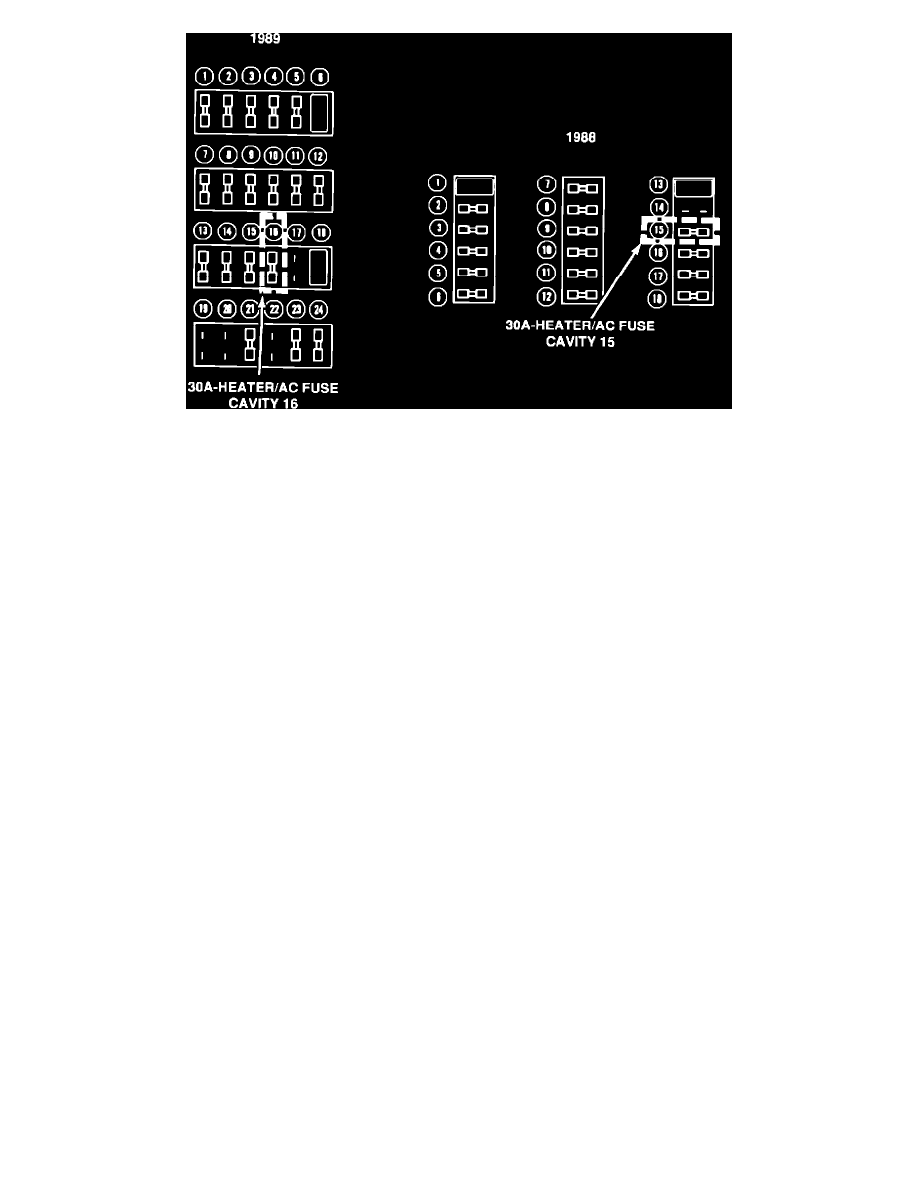
Figure 1
REPAIR PROCEDURE
The repair procedures consists of removing the original single 30 amp fuse (Figure 1), installing a fuse block extension and soldering in new wires which
then divides the blower motor current load through the two new 20 amp fuses.
1.
Disconnect the negative battery cable.
2.
Remove the fuse block from its mount to gain access to the wiring on the back side of the fuse block.
3.
From the back of the fuse block, cut the red battery positive (B+) wire as close to the fuse holder as possible. Next, cut the two 14 gauge
red-withblue-tracer wires from the protected side of the fuse holder.
4.
Inspect the fuse block for the presence of two extra empty fuse cavities. On 1988 models there may not be any empty cavities. If there are not
two extra empty cavities, install the fuse block extension PN T1996073 by snapping it onto the top row of the existing fuse block. This will
provide an additional row of extra fuse location.
NOTE:
ALL CONNECTIONS MUST BE SOLDERED USING ROSIN CORE SOLDER. DO NOT USE ACID CORE SOLDER OR ANY
CRIMP TYPE OR OTHER QUICK CONNECTORS. FAILURE TO SOLDER THESE CONNECTIONS MAY CAUSE HIGH
RESISTANCE AND RESULT IN REDUCED BLOWER MOTOR PERFORMANCE.