
Summit L4-1597cc 1.6L DOHC (1990)
10.
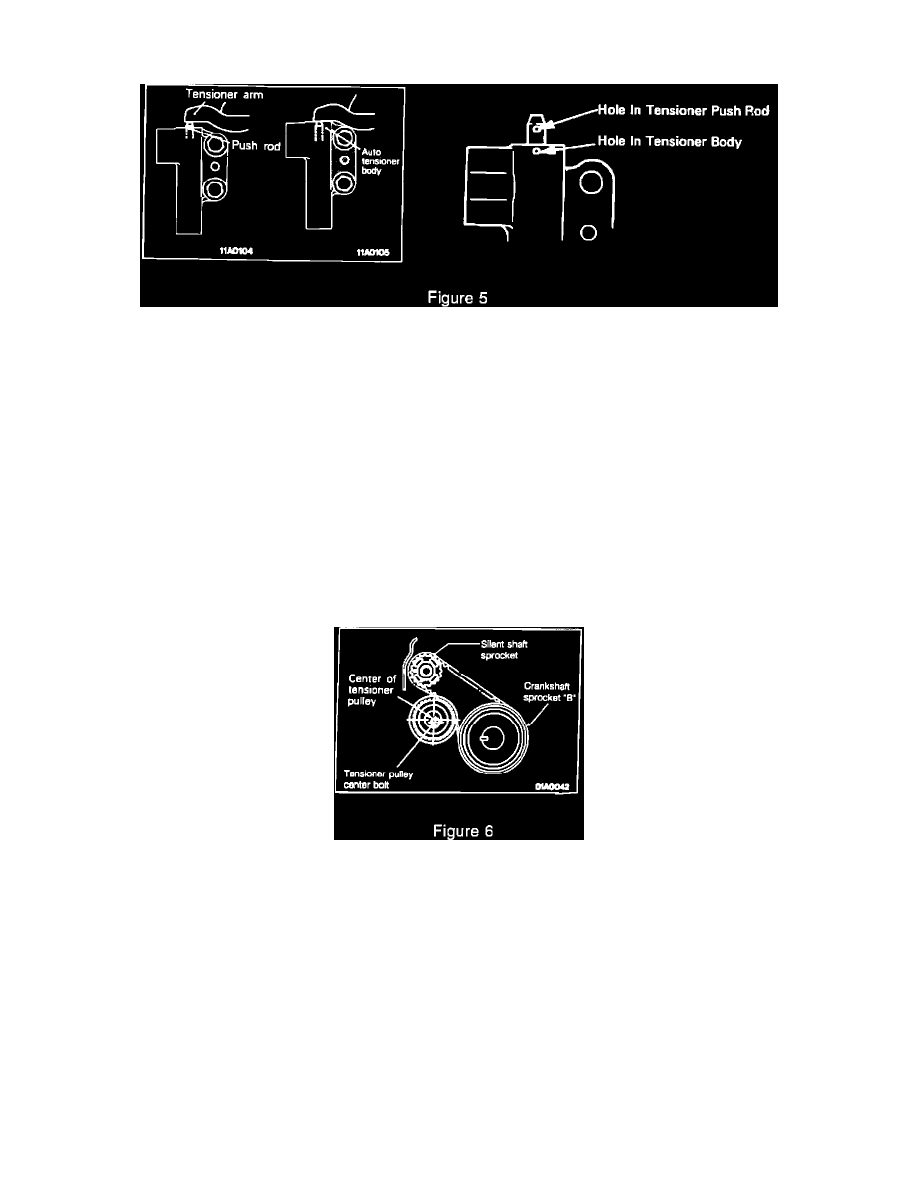
Loosen the tensioner pulley center bolt (Figure 4).
11.
Compress the Auto Tensioner push rod by SLOWLY rotating special tool no. MD998738 until hole in Auto Tensioner push rod aligns with the
hole in the Auto Tensioner body (Figure 5).
NOTE:
PUSH ROD MAY NEED TO BE ROTATED IF HOLE IN ROD IS NOT VERTICALLY IN LINE WITH HOLE IN HOUSING.
12.
Insert a 1/16 inch allen wrench or similar pin (1.4 mm (.055 in.) in diameter) into the aligned holes to hold the push rod in the reset (pinned)
position. Back off special tool MD998738 once auto tensioner is in the reset position (Figure 5).
NOTE:
INSPECT THE TENSIONER AND REPLACE IT IF IT SHOWS SIGNS OF OIL LEAKAGE.
**REQUIREMENT TO REPLACE TENSIONER BECAUSE OF BODY LENGTH ON 1990 MODEL YEAR VEHICLES DELETED.**
13.
Remove and discard the camshaft timing belt.
Removal of Timing Belt "B" (Applies to 1990 - 1993 LASER/TALON W/2.0L Engine).
14.
Loosen timing belt "B" tensioner pulley center bolt (Figure 6).
15.
Remove and discard timing belt "B".
Timing Belt Installation:
Timing Belt "B":