
Summit L4-1597cc 1.6L DOHC (1990)
Timing Belt: Service and Repair
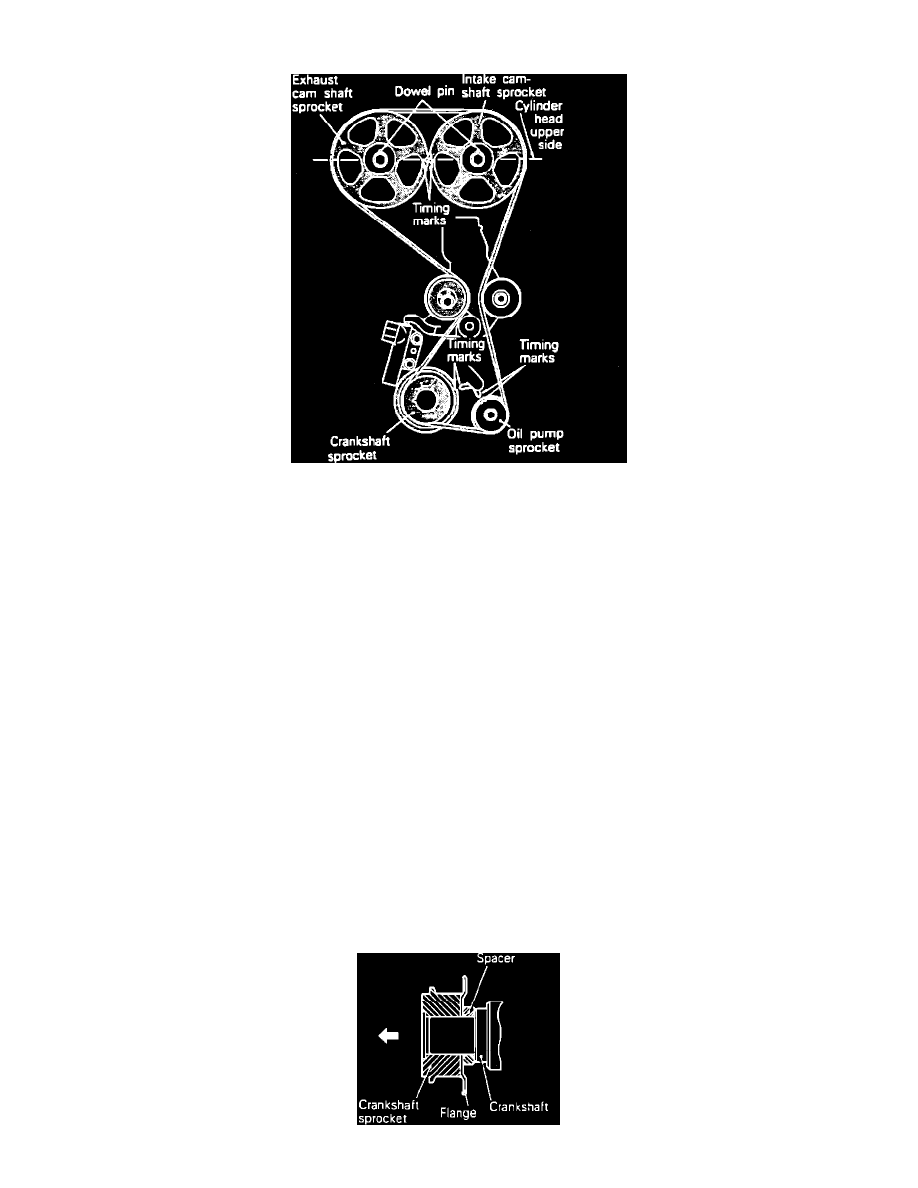
Fig. 5 Aligning Timing Marks
REMOVAL
1.
Disconnect battery ground cable.
2.
Disconnect accelerator cable from throttle body.
3.
Remove undercover.
4.
Using a wood block and a jack, place wood block on engine oil pan and raise engine only enough to relieve tension on top engine mount, then
remove mount and bracket.
5.
Remove engine drive belts. Prior to removing water pump drive belt, loosen water pump pulley bolts.
6.
Remove crankshaft pulley.
7.
Remove upper and lower timing covers.
8.
Remove tensioner pulley and bracket.
9.
Disconnect PCV and breather hoses, then remove center cover, spark plug wires and rocker cover.
10.
Rotate crankshaft clockwise to bring No. 1 cylinder to top dead center compression stroke. Rotate crankshaft only in clockwise direction. The No.
1 cylinder is at top dead center compression stroke when the timing marks on camshaft sprockets are aligned with upper surface of cylinder head
and dowel pins on camshaft sprockets are facing up as shown, Fig. 5.
11.
Remove auto tensioner and pulley.
12.
Remove timing belt. If timing belt is to be reused, mark timing belt indicating direction of rotation.
13.
Remove crankshaft sprocket spacer and flange, camshaft sprockets, oil pump sprocket and timing belt tensioner as needed.
14.
Inspect belt and replace if any of the following conditions are noted:
a. Hardened back surface rubber with back surface glossy, non-elastic and so hard that no mark is produced when fingernail is forced into
surface.
b. Cracked back surface rubber.
c. Cracked or separated canvas.
d. Cracks at tooth bottom or side of belt.