
Summit L4-1597cc 1.6L DOHC (1990)
Timing Cover: Service and Repair
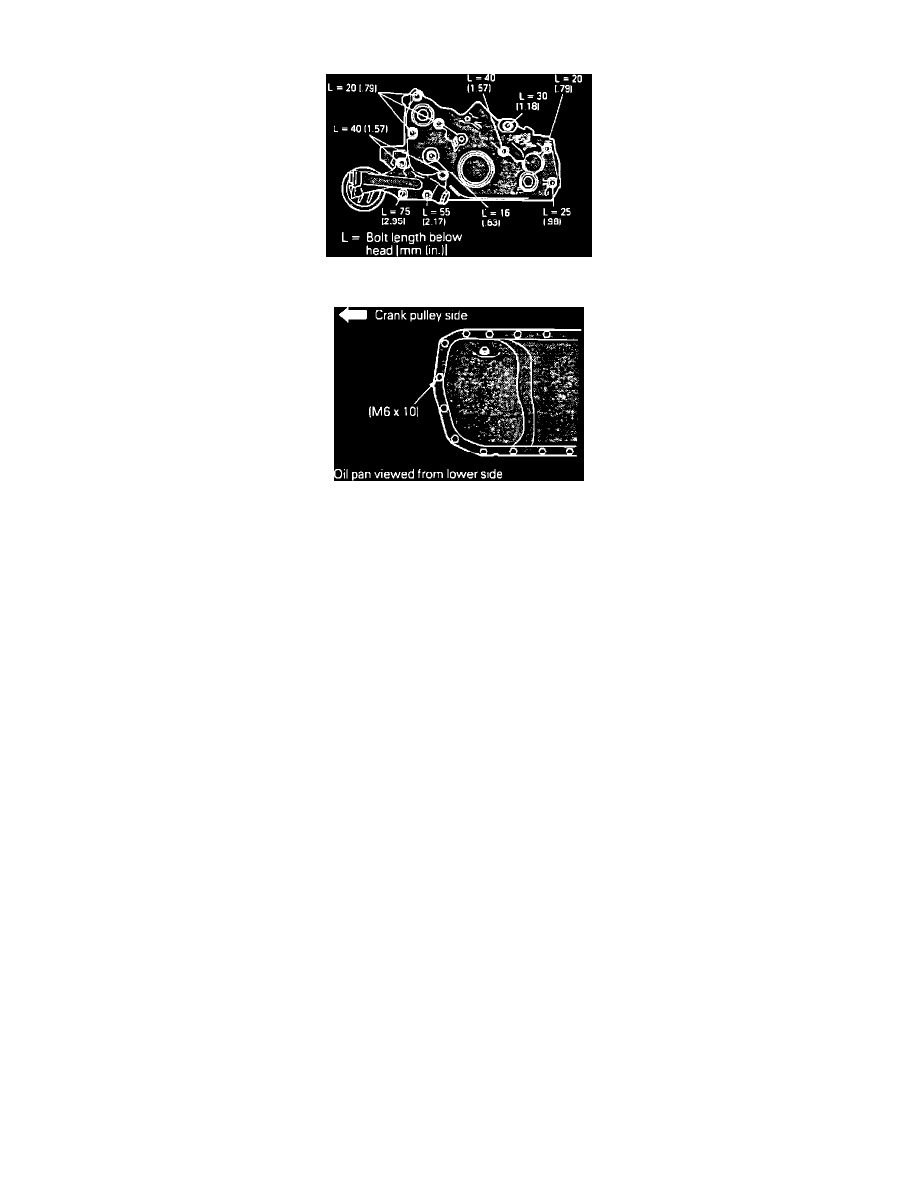
Fig. 11 Timing Case Cover Bolt Lengths & Locations
Fig. 12 Oil Pan Bolt Location
1.
Remove timing belt, refer to TIMING BELT.
2.
Drain crankcase, then remove oil filter and disconnect oil pressure switch connector.
3.
Remove oil pan attaching bolts, then drive in oil pan gasket cutter tool No. MD998727 or equivalent, between cylinder block and oil pan. Break
gasket seal using the tool, then remove oil pan.
4.
Remove oil pickup screen and gasket.
5.
Remove oil filter adapter attaching bolts, then the oil filter adapter.
6.
Remove front case attaching bolts, noting length and position for installation, then remove front case and oil pump as an assembly.
7.
Reverse procedure to install noting the following:
a. If front crankshaft seal is to be replaced, install using seal installer tool No. MD998375 or equivalent.
b. Install guide tool No. MD998285 or equivalent, on front end of crankshaft and apply a light coat of oil to outer circumference of the tool.
Install front case assembly and gasket and temporarily tighten bolts. When installing bolts, refer to Fig. 11, for bolt length and position.
c. Install oil filter adapter and gasket, torquing bolts to specifications.
d. Tighten front case attaching bolts, then remove guide tool.
e. When installing oil pan, apply a .16 inch (4 mm) wide bead of sealant to entire circumference of oil pan flange. Note difference in bolt length
shown in Fig. 12.