
Summit L4-1795cc 1.8L SOHC (1995)
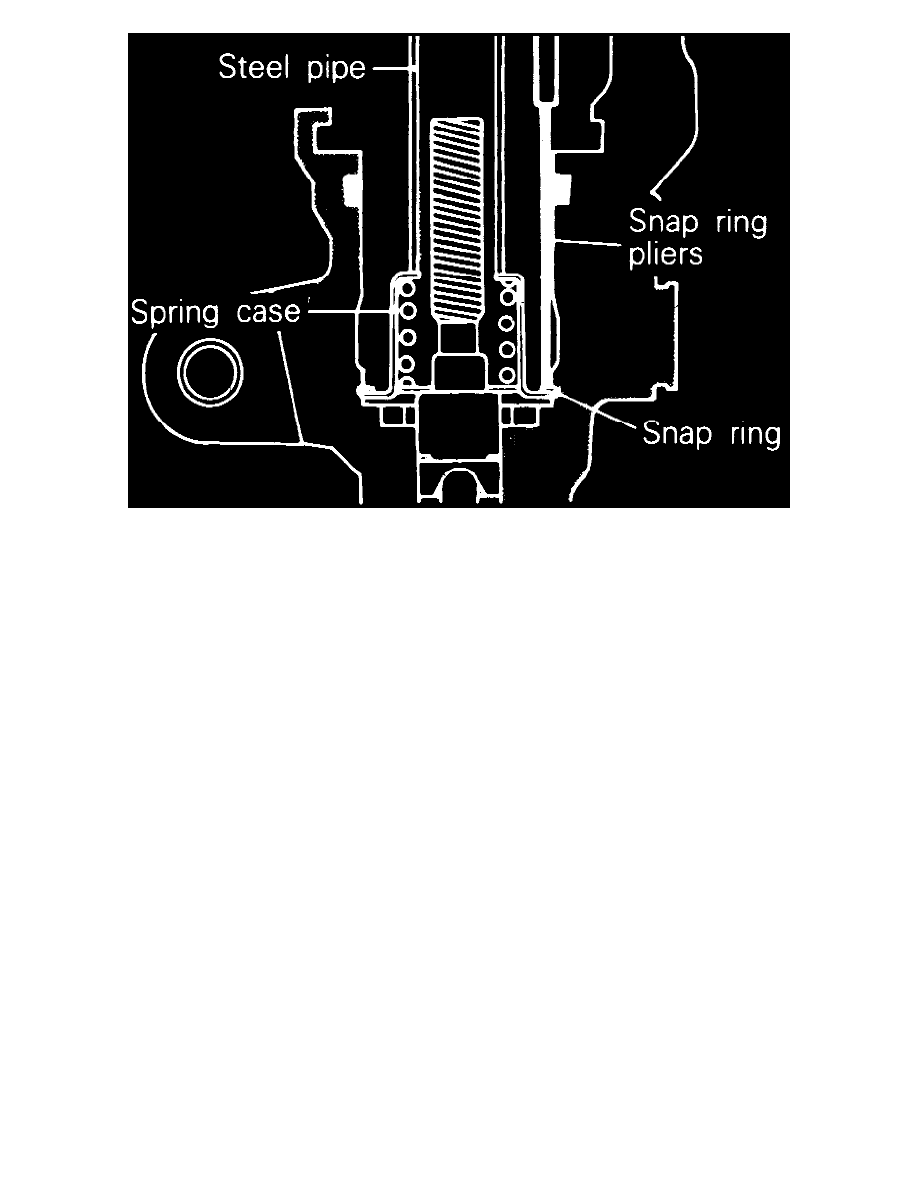
Fig 3 Compressing Spring Case
5. Compress spring case into caliper body using a 3/4 inch steel pipe as shown,then remove snap ring using suitable snap ring pliers.
6. Remove spring case, return spring, stopper plate and stopper.
7. Remove auto-adjuster spindle, connecting link, O-ring, spindle lever and lever boot.
8. Remove parking brake lever, return spring and bleeder screw.
9. Inspect the following:
a. Connecting link and spindle for wear or damage.
b. Caliper body for rust or cracks.
c. Spindle lever shaft and piston for rust.
d. Bearing for wear, piston seal and boot for wear, cracks or deterioration.
10. Reverse procedure to assemble, noting the following:
a. Apply grease supplied in brake seal kit to lever boot, spindle lever, O-ring, connecting link and auto-adjuster spindle.
b. Compress spring case into caliper body using a 3/4 inch steel pipe as shown, then install snap ring using suitable snap ring pliers.
NOTE: Install snap ring to caliper body with opening facing bleeder.
c. Apply grease supplied in brake seal kit to cylinder walls, piston seal and piston, then install piston seal into cylinder.